This recipe is very different from my usual staple recipes because I do not normally choose recipes that have coconut. Although I am not fond of coconut, my family loves it, so I decided to give it a try. 

I always find making rice a little tricky. If the rice to water ratio isn’t exactly correct, it turns out messy. I finally learned how to cook rice perfectly from a Brazilian friend. Even though she knew the recipe from memory, she carefully measured out all the ingredients for me as I used my timer to master the process.

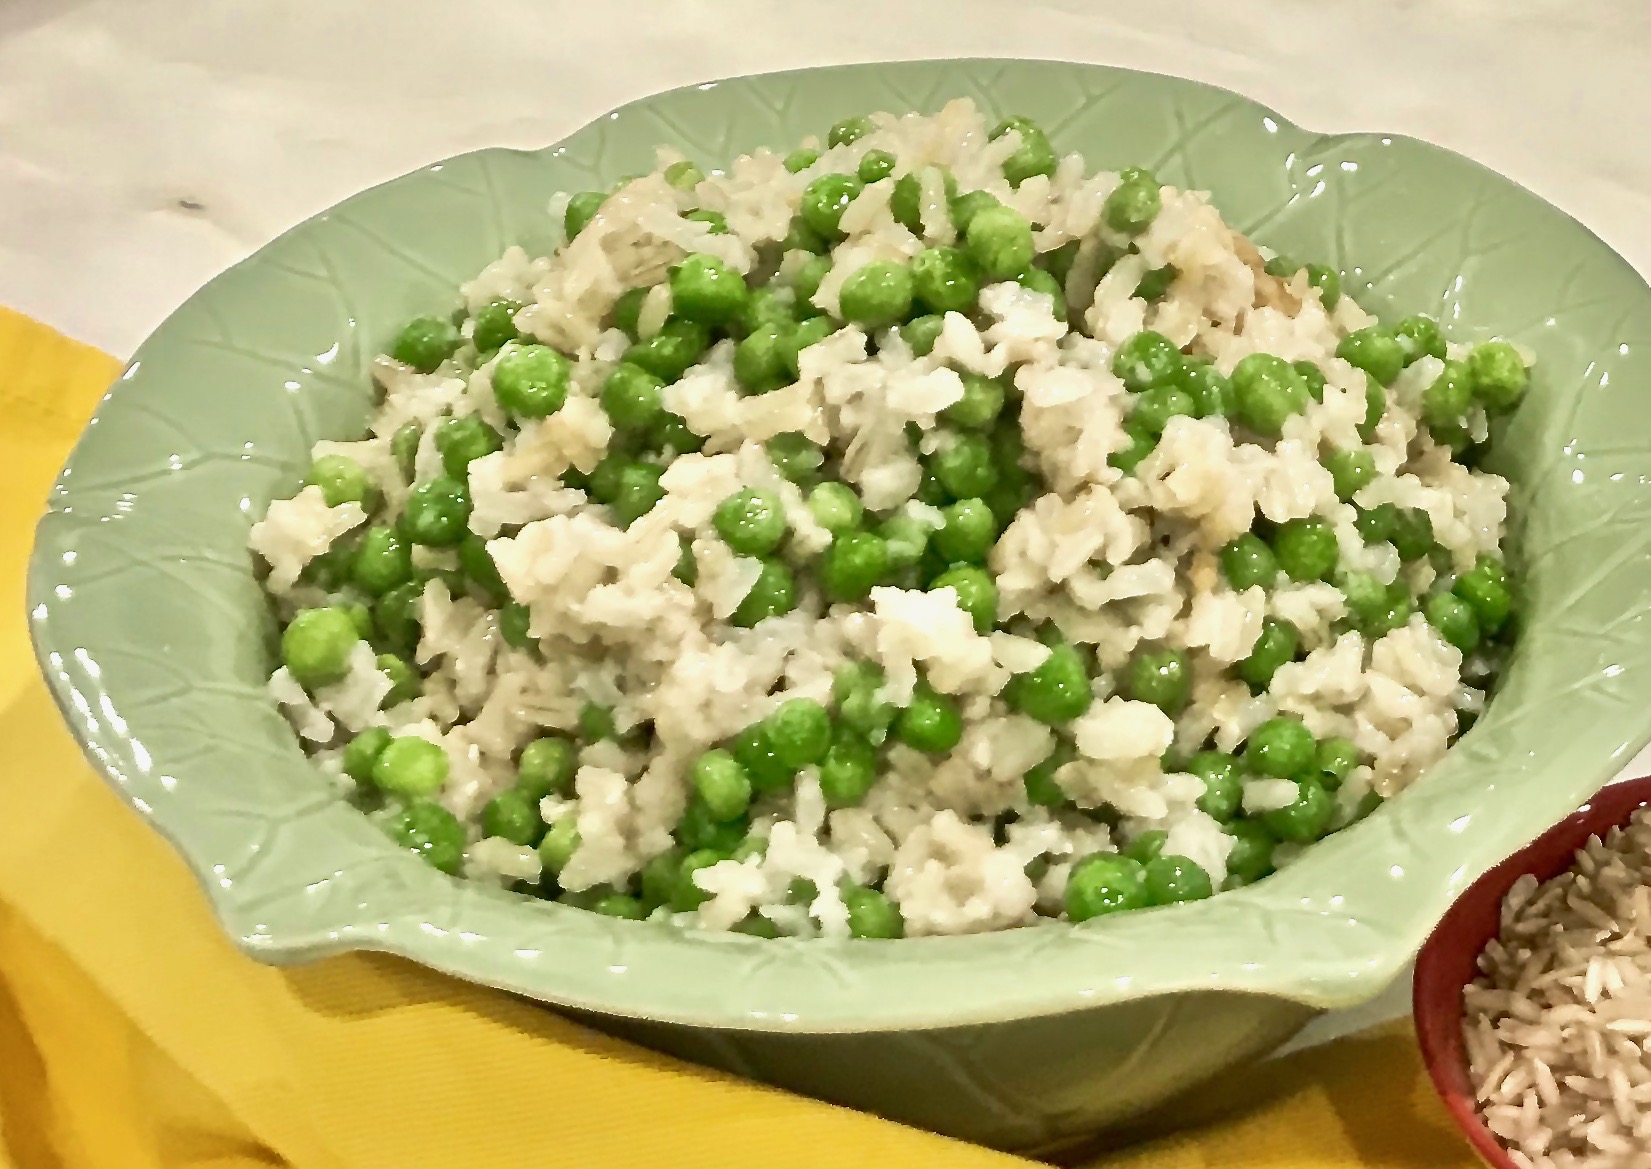
This tasty recipe calls for the rice to simmer in coconut milk, which gives it a rich flavor. Surprisingly, the coconut milk does not make the rice sweet, rather it makes it creamy. If you would like to sweeten it up a bit you could try adding some honey, maple syrup or agave nectar. You can also substitute nuts or raisins for the peas. Any way you alter it, it is going to be delicious. And for someone who does not ordinarily like coconut, I really enjoyed it! I think you will too.

This recipe is courtesy of Cook This Now and will serve 4-6 people who will be craving a second helping!

Ingredients for Coconut Rice and Peas

1 (13.5 – ounce) can coconut milk
1 cup brown rice, rinsed
Large pinch kosher salt
3/4 cup frozen peas (optional)

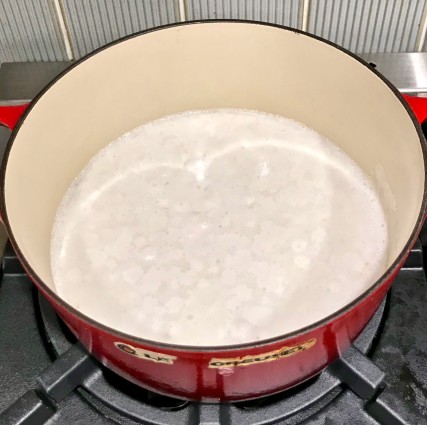
Pour the coconut milk into a liquid measuring cup. 

Add enough water until the liquid measures 2 cups and pour into a large saucepan with the rice.

Bring the liquid to a boil and add the salt.

Reduce the heat, cover, and allow the rice to simmer until the liquid has been absorbed and the rice is tender, about 45 minutes to an hour. (set your timer for 45 minutes, take a look and adjust time as needed)

rice and peas rice cooking

Stir in the peas during the last 2 minutes of cooking.

If the rice is tender but there is still liquid in the pan, remover the cover and simmer on high heat until the liquid evaporates. Keep checking it or it may burn. 

Fluff well before serving.

It’s that simple!

signature

[recaptcha]


As late afternoon approaches, I am always looking for a snack. I used to reach for a granola bar, until I became more informed about its ingredients. 

Many of the bars claim to have nutritional value, but in actuality, the “natural flavors” listed are chemically engineered sugars manufactured to resemble the designated foods. 

If you are interested in obtaining more information about this, check out “The Food Babe” website. She is passionate about the foods we are eating and their ingredients.

This is why I decided to try and make the granola bars. I know that I am using healthy and nutritious ingredients. These bars are easy to make and so delicious.  Feel free to modify this recipe with any healthy ingredient you enjoy.  I did change a few things, as I noted in the recipe.

This recipe is courtesy of The Perfect Cookie by America’s Test Kitchen. It will make 36 bars ( depending on how you cut them).

Ingredients for Crunchy Granola Bars

7 cups old-fashioned rolled oats
1/2 cup vegetable oil (I used coconut oil)
1/2 tsp. salt
3/4 cup “natural” honey
3/4 cup packed light brown organic cane sugar
1 tbsp. vanilla extract
2 tsp. ground cinnamon
1 1/2 cups almonds, peanuts, or walnuts, coarsely chopped 

Preheat oven to 375.

Adjust oven rack to middle position.

Toss oats, oil, and salt together in a medium bowl.

Spread mixture over baking sheet and toast, stirring often, until pale golden, about 20 – 25 minutes.

Gtanola Bars oats on pan

Meanwhile, line an 18 by 13-inch rimmed baking sheet with aluminum foil and grease foil. ( I used parchment paper, which I extended beyond the baking sheet rims).

Cook honey and sugar in a small saucepan over medium heat, stirring frequently, until sugar is fully dissolved, about 5 minutes. 

granola bars honey and sugar in pan

Take off the heat and stir in the vanilla and cinnamon, if using.

Transfer toasted oat mixture to a large bowl. 

Reduce oven temperature to 100. Add honey mixture and almonds (or any nut you are using) to oat mixture and toss until well combined.

Transfer mixture to prepared sheet and press firmly into even layer with a greased metal spatula.

Granola bar transferred to baking sheet

Bake bars until golden, 35 to 30 minutes, rotating sheet halfway through baking. (set your timer).

Let bars cool completely, in sheet on wire rack for 15 minutes, then cut them into 36 pieces. 

Let cool completely, then remove individual bars from sheet with spatula. 

Bars can be stored at room temperature for up to 2 weeks.

It’s that simple!

signature

[recaptcha]


This simple dish of cauliflower and broccoli florets is an excellent go-to side dish that pairs well with anything. The best thing about these vegetables is that they are always available. Most of you probably have them on your weekly grocery list and in your refrigerators.

Cauliflower is not a veggie that many people love. If you are doing a thumbs-down, maybe I can change your mind. This is not the same cauliflower your mother encouraged you to eat. This cauliflower is seasoned and roasted to perfection.

When roasted separately, these veggies are amazing, but when they collaborate, they are delectable. The lemon zest and juice give it a nice “bite” while the garlic and red pepper flakes give a “kick” of spice. It is perfect for a quick weeknight meal, yet sophisticated enough for company.  The ingredients in this recipe can be used on any roasted vegetable. They are always my choice when I am in need of a quick side dish.

This recipe will serve 6-8 people who will learn to love cauliflower and broccoli in a whole new wonderful way!

Ingredients for Roasted Cauliflower and Broccoli

1 small head of cauliflower, cut into florets
2 large stalks of broccoli, cut into florets
2 cloves of garlic, chopped
Zest of 1 lemon
Juice of 1/2 lemon
1/2-1 tsp. red pepper flakes
2 tbsp. olive oil
1 tsp. kosher salt
1/2 tsp. freshly ground black pepper

Preheat oven to 450.

Place cauliflower and broccoli into a large mixing bowl.

Toss in the olive oil, lemon zest and juice, red pepper flakes, salt and pepper. Mix thoroughly.

cauliflower and garlic in bowl

Place into a 9 by 13 inch baking dish (or aluminum pan) .

Bake, uncovered, for 25-30 minutes or until you see the tops of the florets turning brown.

Serve hot.

It’s that simple!

dogs sleeping
signature

[recaptcha]


A cipollini, or little onion, is a smaller, flatter and thinner-skinned version of a regular onion. It contains more sugar than the regular variety of white or yellow onions, making it much sweeter in taste. 

In season until December, cipollinis caramelize beautifully when you roast them in the oven or brown them on the stove. As an alternative to a regular white or yellow onion, they make a wonderful addition to any recipe, enhancing the depth and flavor.

The only downside to cipollini onions is that they are very difficult to peel. Usually, you can find them at your supermarket already peeled. If you cannot, try boiling them for a few seconds to loosen the skin, which should make them easier to peel.

This recipe is addicting. The onions are first sautéed in butter, then finished off with a red wine-balsamic vinegar reduction. They have a delectable, deep flavor that will heighten your taste sensation to a whole new limit! Even if you have to peel them, it is well worth the effort.

This recipe is courtesy of Food Network and will serve 6-8 people who will be in love with these tasty little onions!

Ingredients for Cipollini Onions Braised in Red Wine

2 tbsp. butter
2 pounds cipollini onions, peeled
Salt and freshly ground black pepper
1/2 cup red wine
1/4 cup balsamic vinegar

cipollini onions on plate

In a large straight-sided sauté pan over medium-high heat, melt butter and add onions.

cipollini onions in pot

Season with salt and pepper to taste.

Sauté until nicely browned.

cipollini onions browning

Add the wine and vinegar.

cipollini onions wine and vinegar

Bring to a boil, cover and reduce heat and simmer until onions are completely cooked through and tender, about 15 minutes.

Remove lid, turn heat up and let the liquid reduce and thicken until it forms a glaze and coats the onions well.

It’s that simple!

pictures of dogs
signature

[recaptcha]


You would never know it is autumn, as we have been enjoying 80 degree, stunningly beautiful sunny days. I just love these Indian summers!

But there are hints that the season is changing. The leaves are starting to fall and the acorns are plentiful. It’s time to start thinking about spooky monsters, ghoulish jack-o-lanterns, scary witches and candy. Then  there will be bountiful cornucopia, cranberry sauce, pilgrims and stuffing. And let’s not forget the traditional, classic Thanksgiving dessert: pecan pie!

But why wait? Let’s make it now and pretend that we are testing it for Thanksgiving!

Pecan pie is the easiest pie you will ever make. Although it originated in the south, it is popular at holiday meals throughout the country. This pecan pie recipe is filled with brown sugar, honey, maple syrup, and jazzed up with bourbon. The pecans on the top get crispy, and the filling has a delightful, chewy texture. This delectable treat is nutty, crunchy, sweet, sticky, melt-in-your-mouth goodness.

Take a look at the directions. Easy-peasy…. promise!

This recipe is courtesy of Ina Garten (first clue that it will be amazing). It will serve 8 people who will be ecstatic over its deliciousness!

Ingredients for Maple Pecan Pie

Frozen pie crust (Ina used her own pie crust, but who has time?)
1/2 cup light corn syrup
1/4 cup good honey
1/4 cup pure maple syrup
4 tbsp. (1/2 stick) unsalted butter, melted
3 extra-large eggs, lightly beaten
1 tbsp. bourbon, such as Maker’s Mark
1/2 tsp. pure vanilla extract
1/2 tsp. grated orange zest
1/2 tsp, kosher salt
2 1/2 cups whole pecans halves (9 ounces)

Preheat oven to 350.

In a large bowl, whisk together the corn syrup, honey, maple syrup, butter, egg, bourbon, vanilla, orange zest and salt.

pecan pie all ingredients without nuts

Stir in the pecans and pour it into the pie crust.

Place on baking sheet.

pecan pie ingredients in crust

Bake for 50-55 minutes, until the center is just set.

Set aside to cool, and serve.

It’s that simple!

signature

[recaptcha]