Thanksgiving 2017 was a wonderful celebration. We have about 50 guests at our home every year, and I try very hard to make it special.

I wanted to share some of the pictures from our holiday festivities. It takes a lot of planning and hard labor, but it is worth every minute. We had a magical evening.

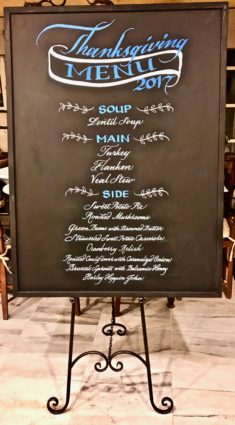
I had fun creating an actual “menu” to let everyone know what was being served, so they could choose what they wanted when it was presented to them. This year, I bought a chalkboard and had a calligrapher write the menu on it. How fun did this come out?

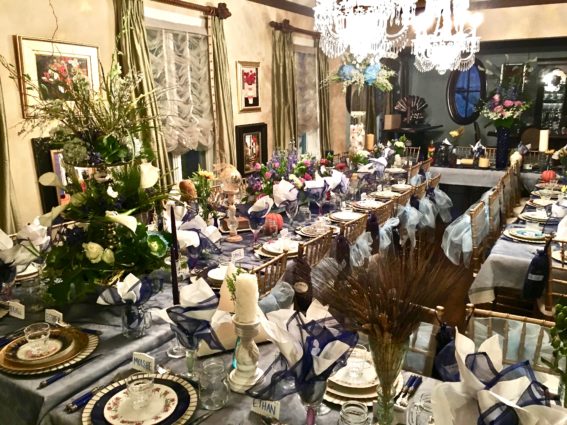
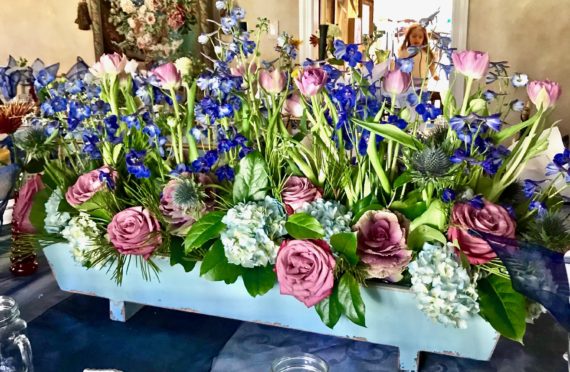
This year I choose the color blue as the theme, and designed everything on the table with the color blue in mind.

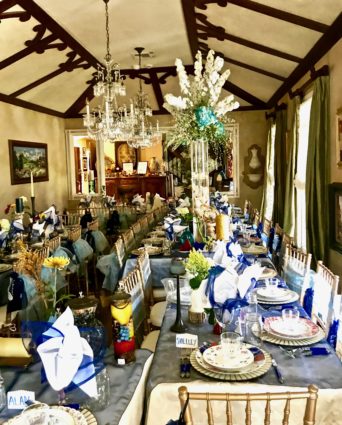
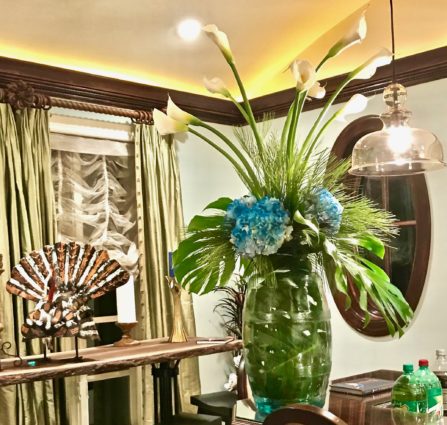
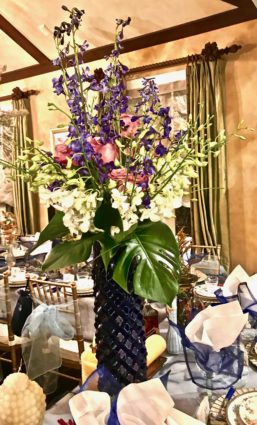
The flowers were especially beautiful this year, and again I had them designed around the color blue. For the first picture, I used a giant 3-tier dessert rack as the “vase”, which I purchased at Home Goods, as well as the last one, which is a long wooden blue box.
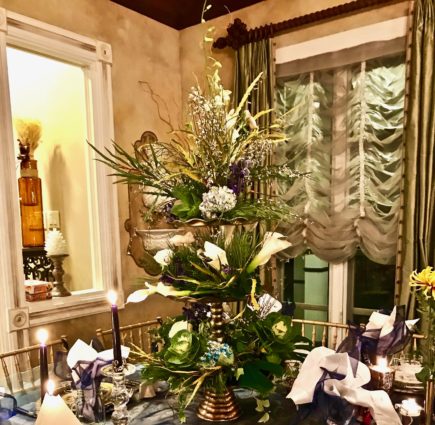
I have been collecting single vintage china salad and dinner plates for many years. I wanted each salad and dinner plate to be different. I did not want them to match. I think this makes my table settings very distinctive from most table settings as well as elegant. (I know the first setting on the left is missing a salad plate, but my little nephew was sitting there, so I did not put one down as a “safety” precaution!)
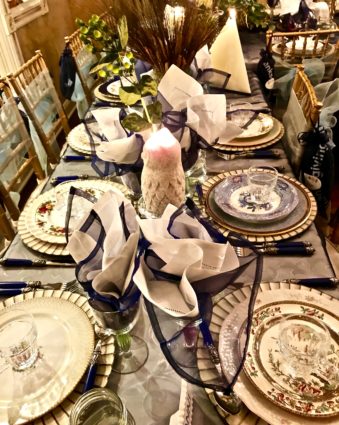
And of course there is always my cooking team. They come every year the night before to help, and we have the best time, even under all that pressure. 
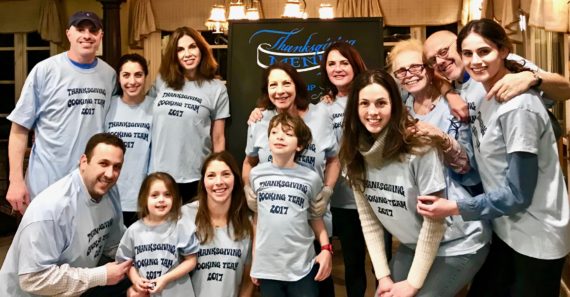
Even my great-niece, Jenna and my great-nephew, Aaron, help. Here they are juicing the lemons. They also juice all the grapefruits, limes and oranges! 
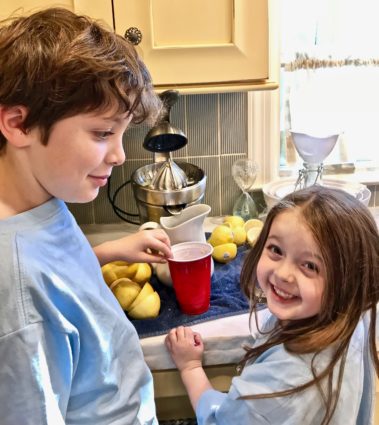
This is me, my sister-in-law, Shelley, my two nieces, Leslie and Lara, on Thanksgiving morning, up early, no make-up, ready to make Thanksgiving 2017 happen. And we do—with so much love in our hearts! 
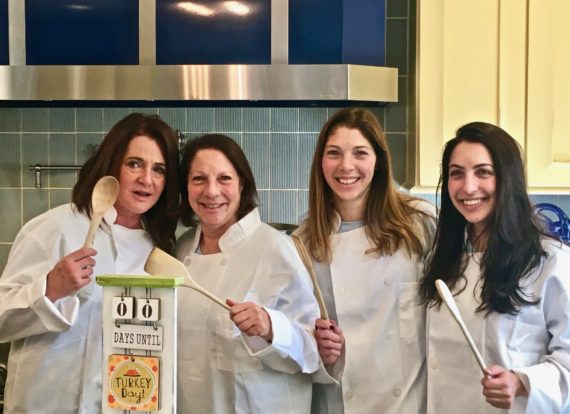
I hope you all had a wonderful Thanksgiving!

It’s that simple! (No, this actually is not simple:)

signature

[recaptcha]


Thanksgiving is right around the corner! As has become the norm, I will be entertaining about 50 guests. As you can imagine, it is quite an undertaking. The process has forced me to maintain an organized kitchen, and as a result, I have become a much better cook.

I cook everything. This includes six or seven appetizers, soup, two twenty pound turkeys, 12 large turkey thighs (we are a dark-meat family), short ribs and another mystery dish. This year, I will be making veal stew. I also prepare about six or seven side dishes, including sweet potato pie, cranberry relish, and roasted mushrooms. I change the other three or four to add some unpredictability to my menu. 

How do I do this? Firstly, I spend about an hour making some physical changes to my dining room to accommodate everyone. Then, with the assistance of 3 other family members, I set the table, which takes about 3-4 hours. Making the table look different each year is a challenge so I start planning and coordinating my decor very early. My family helps me bring my vision to fruition.

The trick is to do as much as you can as early as possible. I start cooking and freezing about 2 weeks before the holiday. I buy my nonperishables a week before and my produce two days before Thanksgiving. I also prep early on too. Thankfully, I have family members who help me prep and cook on Wednesday, and we always have so much fun. They sleep at my house so they are here Thanksgiving morning, thankfully, (no pun intended).

So, now you can see how I accomplish hosting  50 guests and staying somewhat sane. Throughout the years, I have learned a few things, the most important of which is that when entertaining, your guests always come first. Thanksgiving is my families’ favorite holiday. I am honored that everyone chooses my home for this annual celebration. It is a blessing that I will never take for granted. Of course, my family did not start out this large. But nieces and nephews are getting married and having children, so it gets bigger every year. I will always find a place for them. No one misses Thanksgiving at my house. For that, I am grateful.

I will be taking the next week off to prepare for Thanksgiving. I wish all of you a very happy holiday!

Happy Thanksgiving!

It’s that simple!

signature

[recaptcha]


Thanksgiving is fast approaching and I am enjoying experimenting with new and creative recipes. I was intrigued by this asparagus recipe because of its cooking method.

In my humble opinion, anything that is coated with breadcrumbs and cheese is going to be mouthwatering, including asparagus. This recipe did not disappoint. The asparagus was delicately baked, and the breadcrumbs were beautifully browned and crisp. It was also amazingly light, not heavy like most breaded foods.

The asparagus spears were coated with flour, eggs and a mixture of Parmesan and panko breadcrumbs, and roasted in the oven at a high temperature for 12-14 minutes. The result was an oven- baked, healthy side dish, perfectly flavored with a wonderfully crisp texture. This will definitely be my new, go to recipe!

This recipe is courtesy of Kitchn and will serve 4 people who will be thrilled with this crunchy, flavorful, vegetable!

Ingredients for Super-Crispy, Oven-Baked Asparagus Fries

3 tbsp. olive oil, divided
1 cup breadcrumbs
Flour for breading (about 3/4 cup)
1 1/2 cups panko breadcrumbs
2 large eggs
1-pound asparagus 
1 cup freshly grated Parmesan cheese
1 tsp. kosher salt
1 tsp. freshly ground black pepper
Nonstick olive oil spray

Preheat oven to 435.

Line a rimmed baking sheet with parchment paper.

Using a pastry brush, brush about 1 tablespoon of the oil on the paper. Set aside.

Pour the breadcrumbs and panko into a large resealable plastic bag, gently press any excess air out, and seal securely.

Squish and smash the breadcrumbs with your hands, kneading the bag gently so it does not break. Set aside.

Line up 3 rimmed dishes or containers that are as long as the asparagus spears. 

Pour the flour into the first.

Add the eggs to the second dish. While lightly beating,  drizzle in remaining 2 tablespoons olive oil.

Combine the panko-breadcrumb mixture, Parmesan cheese, salt and black pepper in the remaining dish.

Rinse the asparagus and remove any tough, thick or white ends by snapping them off or cutting them off with a sharp knife. (Or you could peel them, as I do).

Place 3-4 spears at a time into the flour and turn to coat it on all sides. (I am showing you 1 at a time)

Lift a spear out of the flour and gently pat off any excess flour.

Place the spear in the egg mixture and turn to thoroughly coat. 

Immediately place the eggy spear into the breadcrumb mixture and turn to coat completely on all sides, again patting it gently so the breadcrumbs will stick and the tips are not broken.

Place on the prepared baking sheet.

Repeat it with all the remaining asparagus spears, lining them up in a row, close together, but not quite touching.

Spray the asparagus with the nonstick olive oil spray.

Bake the asparagus in the oven until crisp and crunchy, about 12-14 minutes. Remove the tray from the oven halfway through the cooking time and turn each asparagus spear over to ensure that it is evenly baked, nicely browned and crunchy.

It’s that simple!

signature

[recaptcha]


What a great idea—a peanut butter and jelly sandwich disguised as a bar! Imagine the possibilities. This recipe successfully turns the traditional peanut butter and jelly sandwich into a delicious dessert or snack for anytime of the day. They are too hard to resist.

Both the top and bottom of the bar are made with lots of creamy peanut butter mixed into the dough. The middle layer is filled with a generous portion of raspberry jam, and a salty, nutty topping adds the perfect finish.

Are you drooling yet? You should be, because these bars are beyond description. Fabulous, amazing and awesome are just a few words that come to mind. But don’t take my word for it; try it yourself. They are quick and easy to prepare. If you don’t have raspberry jam, use any kind you like, I am sure it will be just as delectable. Put your aprons on and make these bars–you will be so happy that you did!

This recipe is courtesy of Ina Garten’s Barefoot Contessa at Home, and will serve 6-8 people who will overjoyed with this salty, sweet, jammy bar of goodness!

Ingredients for Peanut Butter and Jelly Bars

1/2 pound (2 sticks) unsalted butter at room temperature, plus more for greasing the pan
1 1/2 cups sugar
1 tsp. pure vanilla extract
2 extra-large eggs, at room temperature 
2 cups creamy peanut butter (16 ounces if you have 8 ounce jar)
3 cups all-purpose flour, plus more for dusting the pan
1 tsp. baking powder
1 1/2 tsp. kosher salt
1 1/2 cups raspberry jam (12 ounces if you have 8 ounce jar)
2/3 cups salted peanuts, coarsely chopped

Preheat the oven to 350.

Grease a 9 x 13 x 2-inch baking pan.

In the bowl of an electric mixer fitted with the paddle attachment, cream the butter and sugar on medium speed until light yellow, about 2 minutes.

With the mixer on low speed, add the vanilla, eggs, and peanut butter and mix until well combined.

In a small bowl, sift the flour, baking powder, and salt.

With the mixer on low, slowly add the flour mixture to the peanut butter mixture.

Mix until well combined.

Spread two thirds of the dough in the prepared pan, using a knife to spread it evenly.

Spread the jam evenly over the dough.

Drop small globs of the remaining dough evenly over the jam. Don’t worry if all the dough isn’t covered; the dough will spread when it bakes.

Sprinkle with the chopped peanuts and bake for 45 minutes, until golden brown.

Cool and cut into small squares.

It’s that simple!

signature

[recaptcha]


I am addicted to salt and vinegar potato chips, so when I found a recipe for baked potatoes with salt and vinegar, I knew it would be a winner.

And as I expected, it was. The potatoes absorbed the salt and vinegar during the boiling process, and turned deliciously crispy after they were baked and broiled. Some advice: when you turn your oven to “broil”, you must check the potatoes every 1-2 minutes to prevent them from burning. Take them out of the oven when they reach your desired level of brown.

I will be making these delectable potatoes again and again. They were so sinfully good.

This recipe is adapted from Bon Appetit, and will serve 4 people who will become serious salt and vinegar potato addicts.

Ingredients for Crispy Salt-and-Vinegar Potatoes

2 pounds baby Yukon Gold or Fingerling Potatoes, halved
1 cup plus 2 tbsp. distilled white vinegar
2 tbsp. kosher salt plus 1/2 tsp. set aside
1/2 tsp. freshly ground black pepper
2 tbsp. (good) olive oil
2 tbsp. chopped fresh chives
Flaky sea salt, (such as Maldon)

Add the halved potatoes, 2 tablespoons kosher salt, and 1 cup vinegar to a large pot. 

Add enough water to cover potatoes by 1 inch and bring to a boil. Boil for 25 to 30 minutes or until fork-tender.

Preheat oven to 425.

Drain potatoes.

Pat them dry with paper towels.

Line a baking sheet with parchment paper.

Mix the potatoes with olive oil, 1/2 teaspoon of salt and pepper and remaining 2 tbsp. vinegar until generously coated.

Evenly spread the potatoes into the prepared baking sheet.

Bake for 25 minutes.

After 25 minutes, broil the potatoes until they are crispy, checking every 1-2 minutes to ensure that they do not burn. 

Allow them to brown to your liking—-this may take anywhere from 5 to 10 minutes. 

Once they are crispy, remove them from the oven.

Season with additional salt to taste.

Sprinkle with chives.

It’s that simple!

signature

[recaptcha]