Do you think you have the willpower to eat just one piece of these shortbread bars? If you think you do, chances are you will realize you were wrong while reaching for a second serving. These are one of the most addictive bars I have ever made. There are just four ingredients, they are delicious, easy and quick! Anyone can make them, and I guarantee everyone will enjoy them!

The author of this recipe adapted it from her grandmother. She calls it “the easiest, most foolproof recipe in the world”.

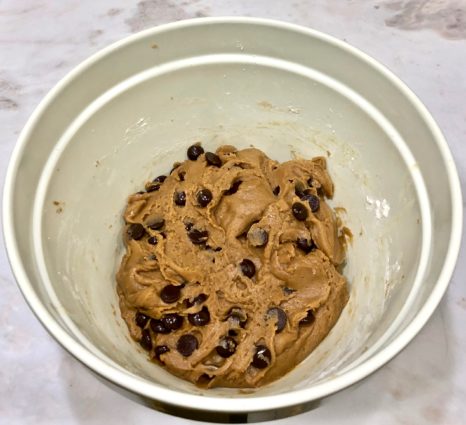
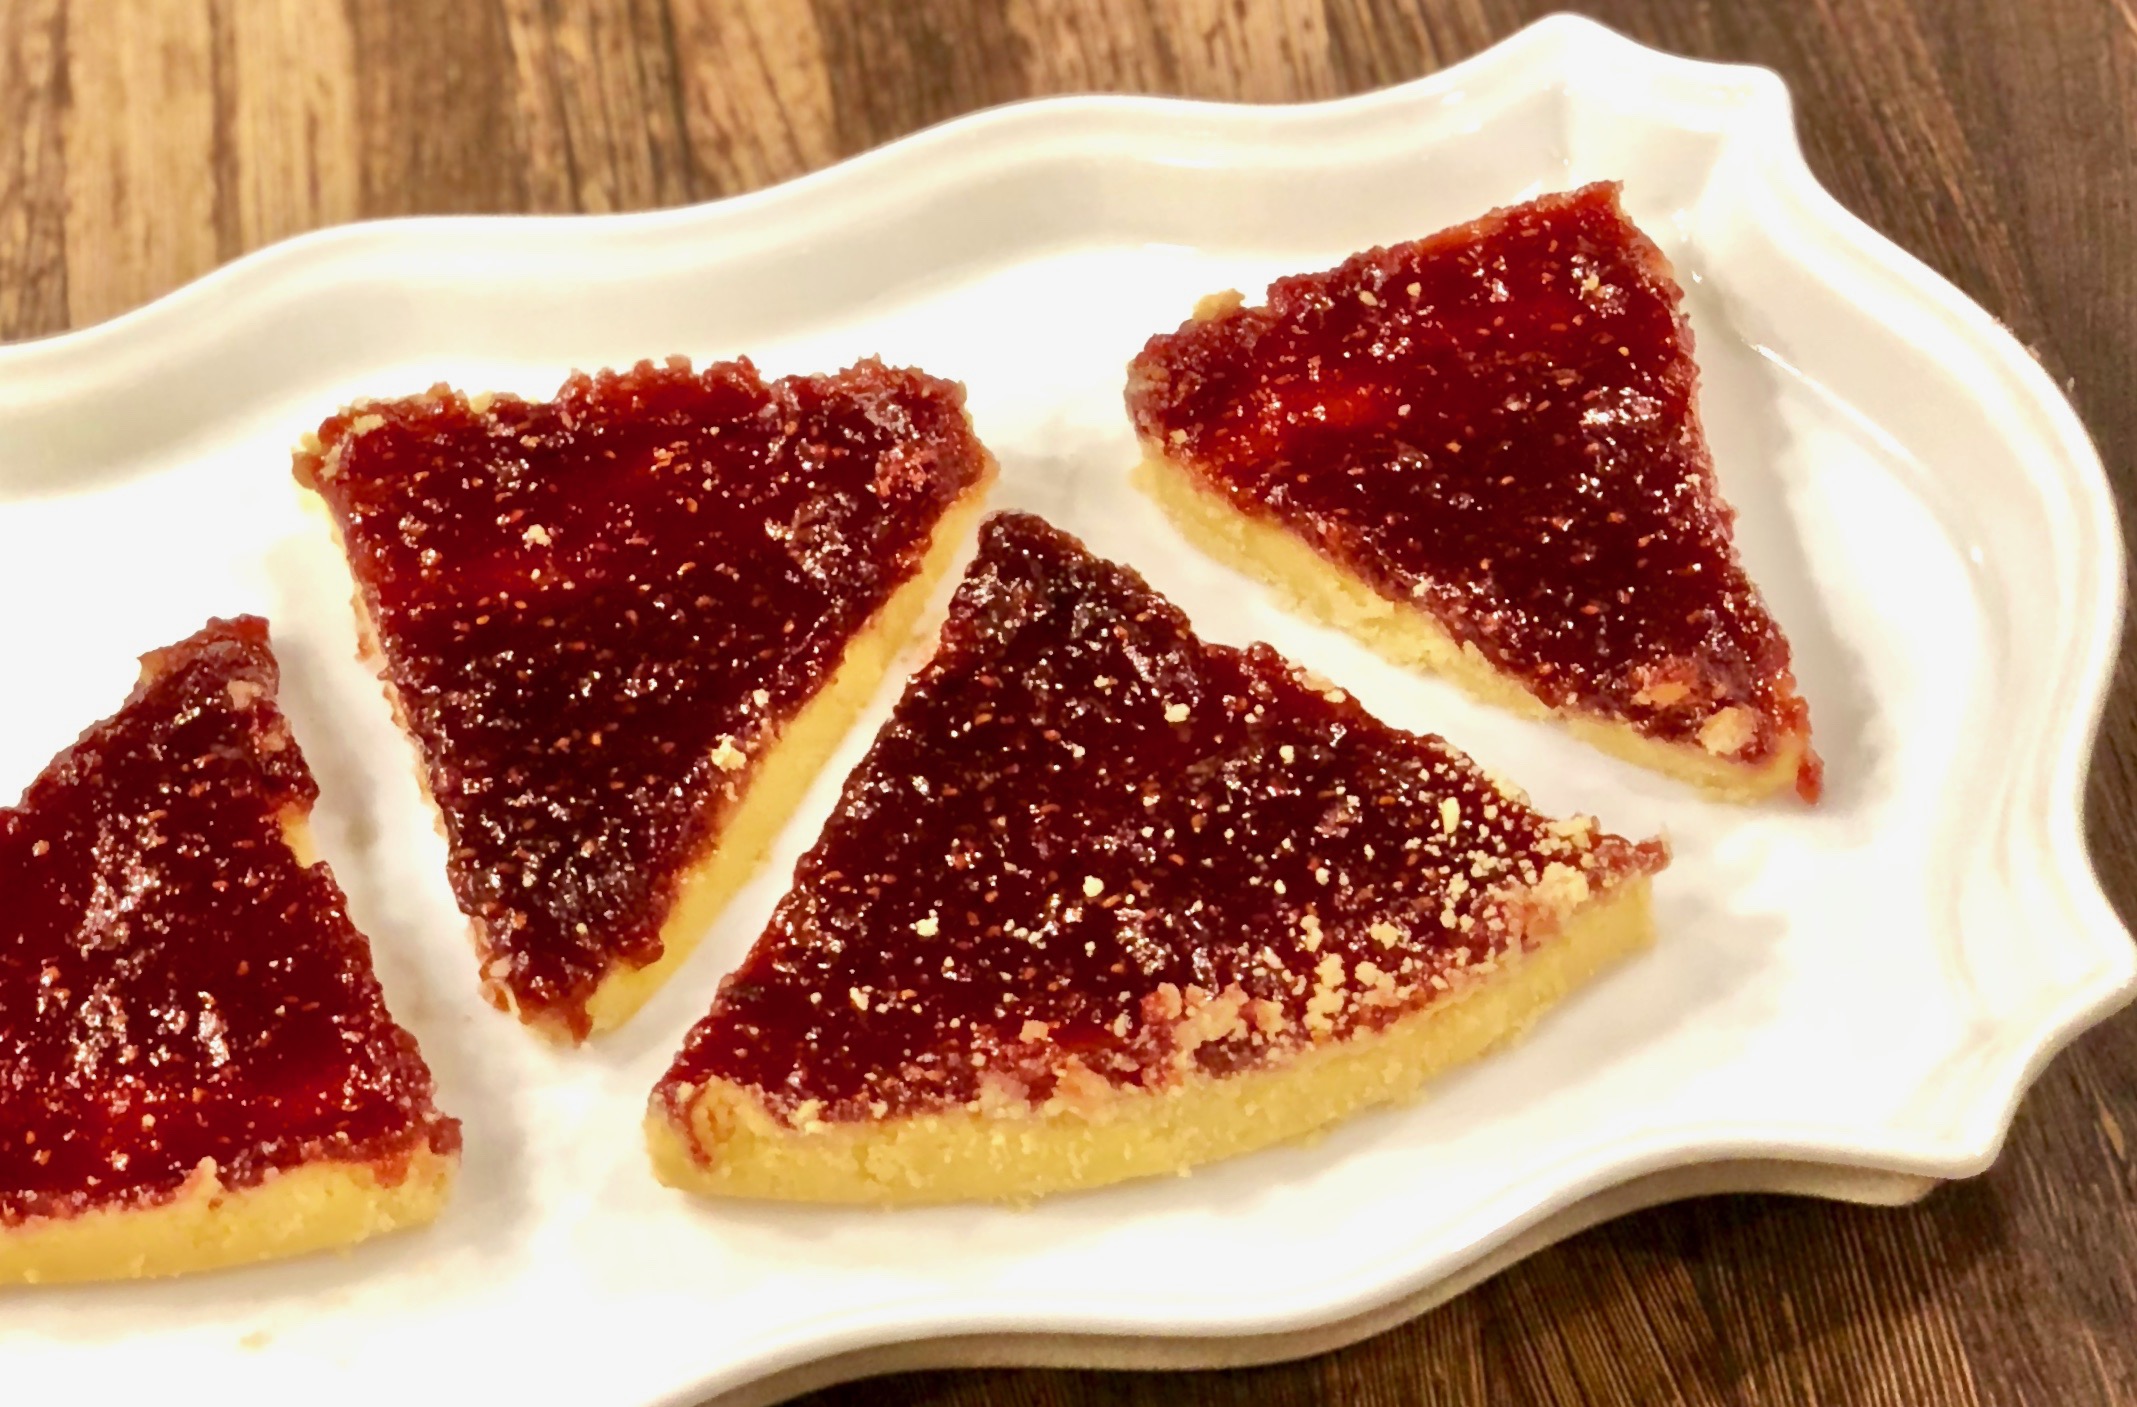
In the original recipe, three simple ingredients are combined to make the dough. They also give you an option to add your favorite fruit preserves, which I did. If you stick to the classic they call it “shortbread”; if you add the preserves they call it a “fruit bar”. Regardless of what you chose to add or call them, these bars are simply delectable. The dough comes together smoothly, and the brown sugar gives it a subtle, warm caramel flavor. Add your favorite preserves and you have perfection. They make a great gift too, because of their presentation and size. I sent a batch to my husband’s office and they loved them.

I spend hours pursuing my cookbooks to find the absolute best, simple recipes to share with you. I think I hit a home run with this one! There is no excuse not to make these bars. They are perfect for breakfast, as a snack or dessert.

This recipe is courtesy of “Food 52” and will make 16 pieces, but everyone will love them so much you might want to double up the ingredients and make two batches!

Ingredients for Brown Sugar Shortbread

1/2 cup salted butter, at room temperature
1/4 cup light brown sugar
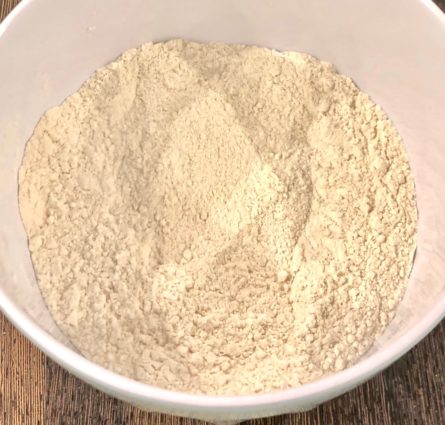
1 1/2 cups all-purpose flour
Jam or preserve of your choice

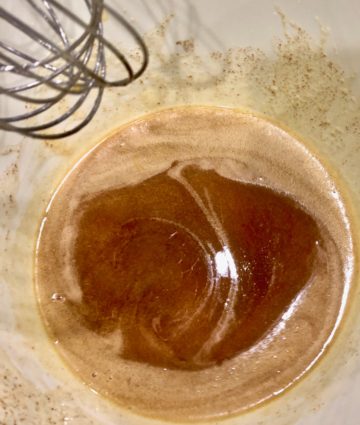
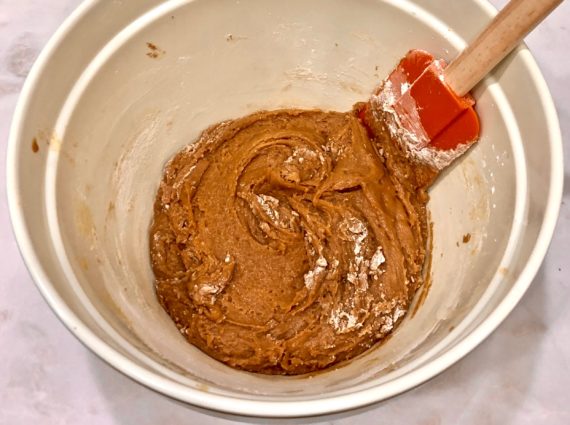
Using an electric mixer or creaming vigorously with a wooden spoon, beat the butter and sugar until fluffy and pale.

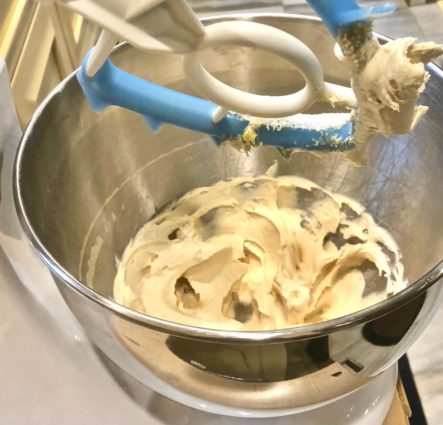
Add the flour and stir until incorporated.

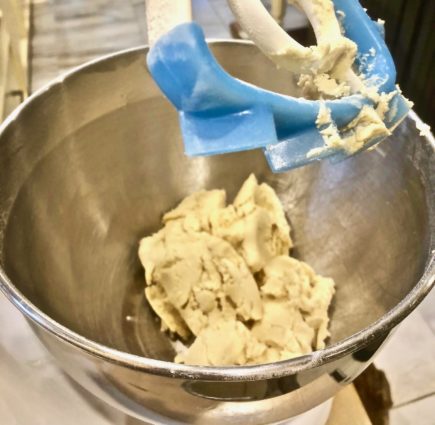
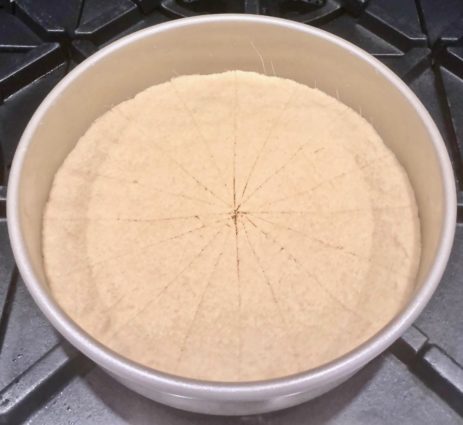
Transfer the dough to an 8-inch cake pan (square or round) and press it firmly with your fingers.

Prick the dough evenly across the surface with a fork.

If you are not going to add the preserves, score the dough into even columns or triangles, using a very sharp knife.

If you are going to add the preserves, you do not need to do this.

Cover with plastic wrap and refrigerate for at least 20 minutes before baking.

Preheat oven to 325°F.

Bake for about 25 to 30 minutes, until the dough is a light golden brown and the surface looks dry; watch carefully so it does not get too dark. 

(The shortchanged bread will get darker as it cools in the pan, so you’ll want to pull it out just before it has reached the desired color.)

Remove from the oven and immediately cut it using the scored lines as guides. Let cool in pan before separating the pieces.

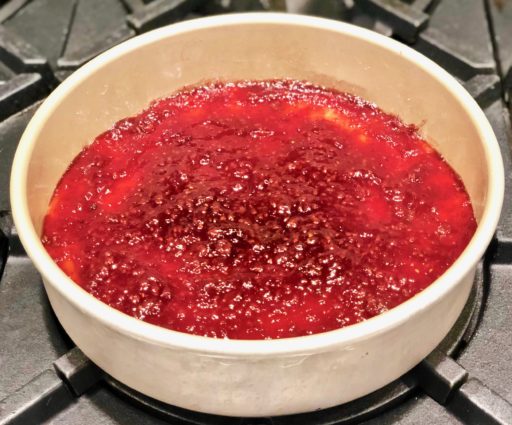
If you are adding a preserve to it:

Bake the shortbread for 20 minutes, until it is the lightest shade of gold.

Remove from the oven and let it cool slightly.

Spread your favorites fruit preserves over the top.

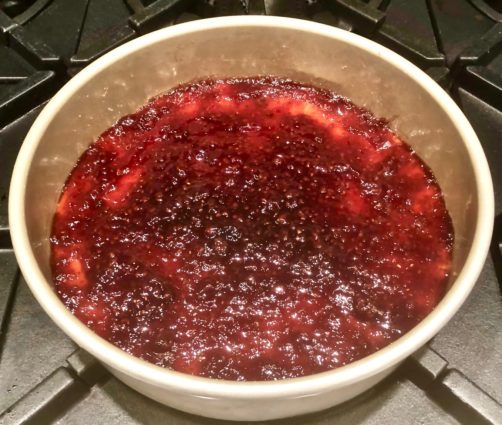
Bake for 10 to 15 minutes longer, until the jam is set.


It’s that simple! 

signature

[recaptcha]


It looks like pasta and cooks like pasta, but it is not! It’s spiralized sweet potatoes! Spiralizing vegetables has become very popular, but I wasn’t caught up on this new cooking trend until recently.

There are a few reasons. First, I do not like zucchini, and people were seemingly only captivated by spiralized summer squash. Second, it was one more thing for me to clean up. I bought a spiralizer with every intention of using it, but I never have. It is still in its box somewhere in my house. The truth is, I saw these ready-to-use sweet potato noodles in my grocery store and could not resist. I love sweet potatoes and I’m always looking for creative ways to prepare them, it was nearly too good to be true! If you’re busy like me or work full-time, buy the spiralized vegetables in your store, ready-made, no guilt necessary. If you love to spiralize, then feel free!

Whatever you choose, the quick pick-up or the extended prep, this recipe is a “must try”. The spiralized sweet potatoes are amazing because they disguise themselves as pasta and are the perfect alternative if you want to avoid carbs. I decided to use them in my interpretation of carbonara, which thoroughly satisfied my pasta craving. The only problem was trying to keep the noodles intact, they break apart quite easily. This time I did not succeed, (see picture above) But hey, practice makes perfect!

This dish turned out to be spectacular. Even my pasta-loving family thought it was crazy-good. You are going to love this recipe and I am sure you will be making it again and again. 

This recipe will serve 4 people who will be delighted with this yummy, “looks like pasta, but is not” recipe!

Ingredients for Sweet Potato Noodles Carbonara with Spinach

2 large sweet potatoes, spiralized
2 tbsp. olive oil
2 garlic cloves, minced
1/2 cup shallots, chopped
1 cup cubed pancetta
2 large eggs
1/2 cup grated Parmesan cheese
1 tsp. kosher salt
1/2 tsp. freshly ground black pepper

Place a large pot of salted water over high heat until boiling. 

Add the sweet potato noodles to the pot, turn heat to medium-high and let noodles cook for 1 1/2 to 2 minutes. You want the noodles tender, but not too soft.

Reserve 1/2 cup of potato water.

Drain the noodles and return them to the pot. 

Add the eggs, Parmesan cheese, salt and pepper. (Try not to break the noodles, like I did!)

Pour in small amounts of reserved noodle water as needed. You want just enough to get the consistency you prefer and add as  much as you need to cook the eggs through.. You may not need the full 1/2 cup of potato water for this.

Heat olive oil in a medium sized skillet over medium-heat.

Add the pancetta and cook, stirring frequently, until it is crisp.

Stir in the shallots and cook, until softened, about 2 minutes.

Add the garlic, and cook for 1 minute.

Place the spinach in the skillet and cook until it is just wilted, but still a bright green about 1 1/2 minutes.

Add the spinach mixture to the noodles and gently toss to combine (If you can, keep your noodles long and whole, I could not, but it still tasted great).

Transfer to a serving plate and serve warm.

It’s that simple!

signature

[recaptcha]


When I started writing this blog, I embarked on a new and wonderful food journey. At first, I used all my own recipes, but when they ran out, I began to research recipes and choose the ones I thought were amazing. There have been a lot of them. I love searching for recipes and I have become pretty good at choosing the best ones. I also, of course, post my own “new” recipes.

That being said, my family has been complaining lately that they wish I would make some of my old standbys. Those recipes that you could make with your eyes shut. Now I try to incorporate a few of my “oldie but goodie” recipes more often during the week. Those recipes have become very special to them.

This is one of the new recipes I found and I think it is amazing! Although the steps may seem long on paper, in reality, they are easy and fast to prepare. I love the combination of couscous and red lentils. Not only do they taste delicious, they also make a beautiful presentation. The preserved lemon juice is the star of this recipe. It makes this dish truly special and makes every bite perfectly blended, fresh and well-seasoned.

Just a note, it is really important not to overcook the red lentils. My first time around, they were mushy and unappealing. Start to check if they are done a minute or two before the directions tell you to. My lentils were cooked in about 4 minutes. So, set your timers!

This recipe is courtesy of Food and Wine and will serve 4 people who will adore these refreshing, lovely combination of ingredients.

Ingredients for Couscous with Red Lentils and Preserved Lemons

1/3 cup sugar
Salt and freshly ground black pepper
1 large lemon, very thinly sliced
1/4 cup plus 2 tbsp. extra-virgin olive oil
1/2 cup couscous
1 cup red lentils
5 ounces arugula, leaves torn (I use baby arugula)
1 tbsp. fresh lemon juice
1/2 cup toasted shelled unsalted pistachios, coarsely chopped

To make the preserved lemons:

In a small saucepan, boil 2 cups of water.

Add the sugar, 1 ½ teaspoons of salt and 1/2 teaspoon of pepper.

Stir until the salt dissolves.

Add the lemon slices and cook over moderately high heat until softened, 15 minutes.

Transfer the lemon slices to a plate.

Boil the liquid until it has reduced to 1/3 cup, about 3 minutes.

Let cool.

Whisk in 1/4 cup of the olive oil.

To make the Couscous:

Bring 3/4 cup of water to a boil in a saucepan.

Add 1/2 teaspoon of salt and the couscous.

Remove pan from heat, cover and let stand for 5 minutes.

Fluff with a fork.


To make the Lentils:

Bring a medium saucepan of water to a boil.

Add the lentils and cook over moderately high heat until tender, but not mushy, 6 minutes.

Drain, transfer to a bowl and add the couscous.

To put it all together:

Stir all but 1 tablespoon of the lemon oil into the couscous and season.

Toss the arugula with the lemon juice and remaining olive oil.

Season with salt and pepper.

Transfer the arugula to plates, mound the couscous on top and drizzle with the remaining lemon oil.

Top with lemon slices and pistachios.

It’s that simple!

signature

[recaptcha]


What a perfect short-on-time dish this is! 

Cod is a mild-tasting, white, flaky fish. Its mellow flavor allows it to be very versatile when cooking it. There are so many different ways of preparing this tasty fish. As an alternative to the panko breadcrumbs in this recipe, you could substitute regular breadcrumbs, cornflake crumbs or even crushed crackers such as ritz or saltines.

When it comes to seasoning, you can use oregano, thyme or basil. You can switch out the lemon for orange, or chop up some garlic and add it to the panko mixture. Poached, seared or baked, cod will blend with just about any flavor and come out tasting delicious. I think this recipe is a simple, fast and delightful way of preparing this fish. It is a healthy dish as well! Delicious, yet low in calories, and packed with healthy vitamins and omega-3 fats. This is a recipe that everyone in your family will enjoy.

This recipe will serve 4 people who will be elated with this wonderful, nutritious dish.

Ingredients for Baked Cod

3 tbsp. butter
1 cup panko crumbs
4 (1/2 pound) center cut, thick pieces of cod
Zest of 1/2 lemon
Juice of 1/2 lemon
1 tsp. kosher salt
1/2 tsp. freshly ground black pepper
1/4 cup dry white wine
2 scallions, white ends only, chopped 
1 tbsp. fresh parsley, chopped

Preheat oven to 400°F.

Melt butter in baking dish in the oven while it is heating up.

Mix panko with salt and pepper.

Dip cod into melted butter.

Roll into panko crumbs.

Make sure cod is thickly coated with panko crumbs. You may have to repeat these steps to achieve desired thickness.

Top the cod with the lemon zest, juice, and white wine.

Place in oven and bake for 20 minutes. 

Fish should flake easily with a fork when done.

Garnish with scallions and parsley.

It’s that simple!


signature

[recaptcha]


When my younger son was a little boy, he always wanted to go to our local mall. Once we got there, he would run right to the store that made giant chocolate chip cookies that he loved. They were even bigger than a cake! Many parents chose them for their child’s birthday cakes, because they were so popular with the kids. 

Recently, my son happened to be looking through one of my cookbooks. When he saw this chocolate chip cookie recipe, he immediately requested that I make it. I think it brought back happy childhood memories for him. I was happy to oblige.

This cookie is made in a cast iron skillet. No mixer needed. No scooping out the dough. No cookie sheets. The skillet magically cooks the cookie so the middle has that ooey, gooey soft center and a crisp outer edge. The result is a perfectly baked cookie that is super easy to make, and even more luscious to eat. A big scoop of vanilla ice cream and a tall glass of milk and you are in heaven.

It doesn’t get better than this.

Don’t forget to sign up for my email so you don’t miss a recipe!

This recipe is courtesy of The Perfect Cookie and will serve 8 or more people who will be over-the-moon with delight!

Ingredients for Chocolate Chip Skillet Cookie

1 3/4 cups all-purpose flour
1/2 tsp. baking soda
12 tbsp. unsalted butter
3/4 cup packed dark brown sugar
1/2 cup granulated sugar
2 tsp. vanilla extract
1 tsp. salt
1 large egg plus 1 egg yolk
1 cup semisweet chocolate chips

Adjust oven rack to upper-middle position and heat oven to 375°F.

Whisk flour and baking soda together in a bowl.

Melt 9 tablespoons butter in a 12-inch cast-iron skillet over medium heat.

Continue to cook, stirring constantly, until butter is dark golden brown and has a nutty aroma, about 5 minutes.

Transfer browned butter to a large bowl and stir in remaining 3 tablespoons butter until melted.

Whisk in brown sugar, granulated sugar, vanilla and salt until incorporated.

Whisk in egg and yolk until smooth with no lumps, about 30 seconds.

Let the mixture stand for 3 minutes, then whisk for 30 seconds. Repeat process of resting and whisking 2 more times until mixture is thick, smooth and shiny.

Using a rubber spatula, stir in flour mixture until just combined, about 1 minute. 

Stir in chocolate chips.

Wipe skillet clean with paper towels.

Transfer dough to now-empty skillet and press into even layer with spatula.

Bake until cookie is golden brown and edges are set, about 20 minutes, rotating the skillet halfway through baking.

Using potholders, transfer the skillet to wire rack and let cookie cool for 20 minutes.

Slice cookie into wedges and serve.

It’s that simple!

signature

[recaptcha]