There are so many people out there who love to eat breakfast for dinner. Since I don’t have an appetite in the morning, I am one of them! This recipe is perfect for everyone alike, it can be eaten for breakfast, lunch or dinner.

Stratas are a bake made with eggs and bread. You could describe it as a bread pudding, but I think that is a stretch. The best thing about strata is that you can prepare it ahead of time and cook it the day you need it. 

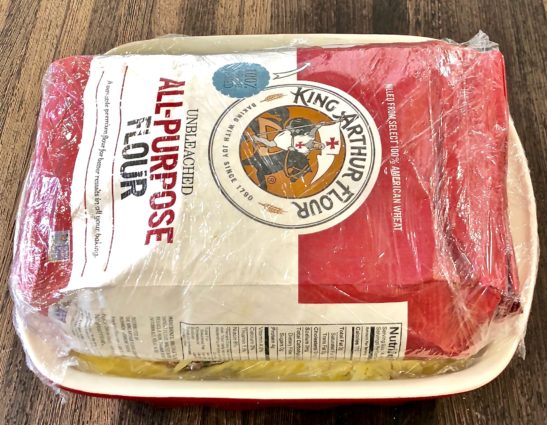
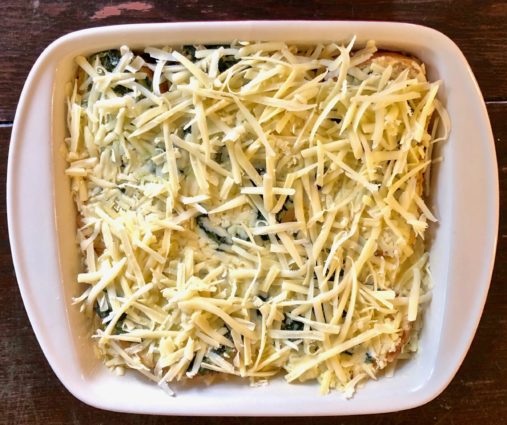
In this recipe, they put plastic wrap around the strata and weighed it down. You really don’t have to do this, you can place it in the refrigerator without it. I think they wanted to give a specific shape. Just make sure you keep it in the fridge for over an hour if not more, so the ingredients have time to infuse well. The strata gets puffy and beautiful while baking in the oven, and kind of depuffs 5 minutes after you have taken it out. No worries, it will still taste amazing.

Another reason strata is amazing, you can use whatever ingredients you have in your pantry or fridge (in addition to the eggs and bread). When it comes to this dish, the more bread the better. It may seem like a lot of steps, but they are simple and you will cook up this dish in no time! 

I loved this recipe, because it was a little more refined than a bread pudding, with all the same delicious taste. I loved the combination of spinach and Gruyere cheese. The addition of the wine gave it a more sophisticated taste. It was fun to make and honestly even more fun to eat.

This recipe is courtesy of Cooks Illustrated and will serve 4-5 people who will become regular finatics of breakfast for dinner!

Today’s hint: When cracking eggs, I tap them lightly on the counter into a separate bowl first. This way if any eggshells fall into the bowl you can scoop them out easily. If the egg shell is difficult to remove, try using a larger piece of eggshell to remove it. Works every time!

Ingredients for Breakfast Strata with Spinach and Gruyere

8-10 (1/2-inch thick) slices French or Italian bread
5 tbsp. unsalted butter, softened
2 large shallots, minced
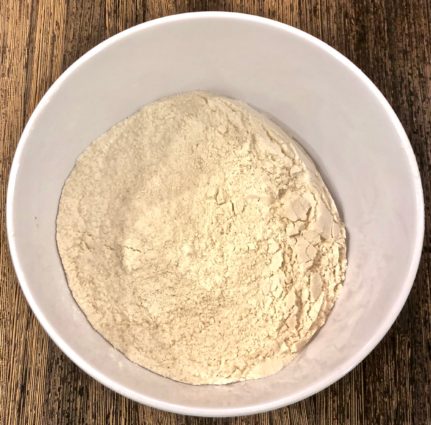
10 ounces frozen chopped spinach, thawed and squeezed dry
Salt and pepper
1/2 cup white wine
6 ounces Gruyere cheese, shredded, (1 1/2 cups)
6 large eggs
1 3/4 cups half and half

Adjust oven rack to middle position and heat oven to 225°F.

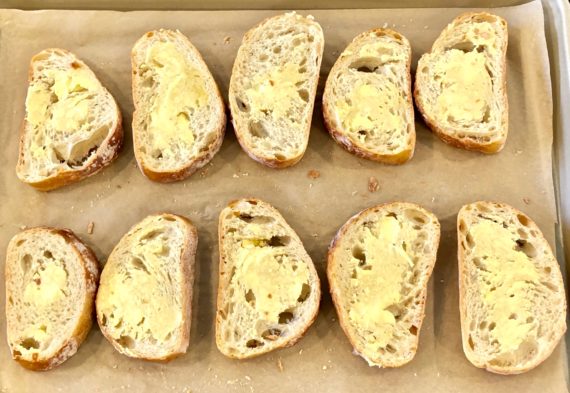
Arrange bread in single layer on baking sheet and bake until dry and crisp, about 40 minutes, flipping slices halfway through baking.

When cooled, butter the bread slices on 1 side with 2 tablespoons butter; set aside.

Meanwhile, melt 2 tablespoons butter in 10-inch nonstick skillet over medium heat.

Sauté shallots until softened and translucent, about 3 minutes.

Add spinach, season with salt and pepper, and cook, stirring occasionally, until spinach is warmed through, about 2 minutes.

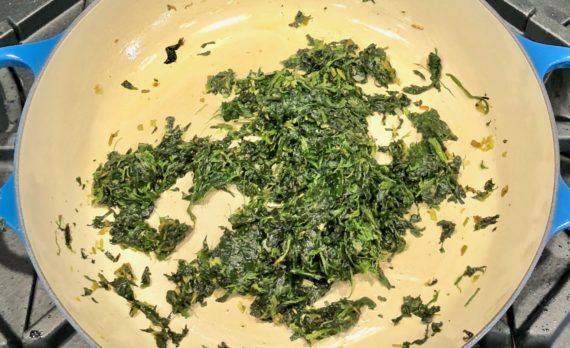
Transfer to medium bowl; set aside.

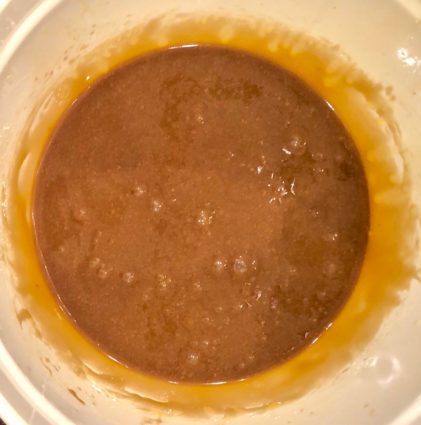
Add wine to skillet, increase heat up to medium-high, and simmer until reduced to 1/4 cup, 2 to 3 minutes; set aside.

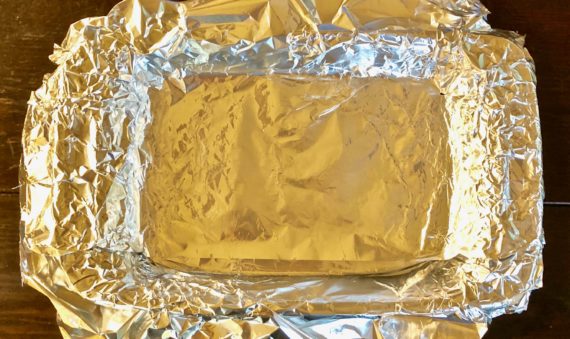
Grease 8-inch square baking dish with remaining 1 tablespoon butter.

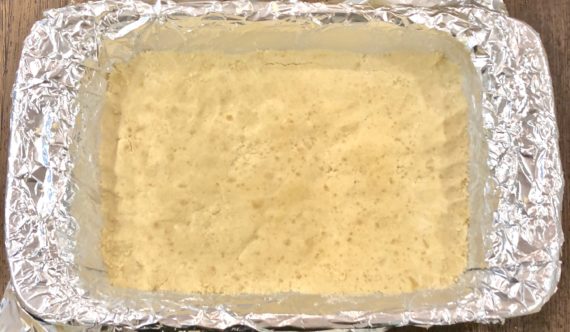
Arrange half of bread slices buttered side up in single layer in dish.

Sprinkle half of spinach mixture and 1/2 Gruyere evenly over bread slices.

Repeat with remaining bread slices, remaining spinach mixture, and 1/2 cup Gruyere.

Whisk eggs in medium bowl until combined, then whisk in half and half, reduced wine, and 1 teaspoon salt and pepper.

Pour egg mixture evenly over bread layers.

Wrap dish tightly in plastic wrap, pressing plastic flush to surface of strata.

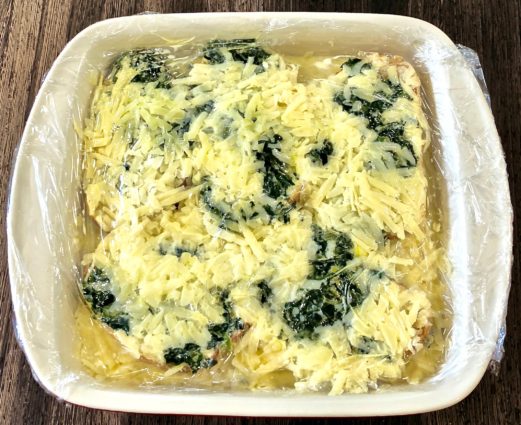
Weigh down strata (I used a flour package) and refrigerate for at least 1 hour or up to 24 hours.

Heat oven to 325°F.

Remove dish from refrigerator and let sit at room temperature for 20 minutes.

Remove weights and plastic and sprinkle remaining 1/2 cup Gruyere evenly over the top of strata.

Bake until the edges and center are barely puffed and edges have pulled away slightly from sides of dish, 50 to 55 minutes.

Let cool on wire rack for 5 minutes.

Serve.

It’s that simple!

signature

[recaptcha]


I know it is summer and you might not think you want another sweet potato dish. As I was cleaning out my pantry I noticed that I had some sweet potatoes that were in urgent need of cooking, or they would go bad. The result was so incredible, I knew I needed to share it with you.

If you ever find yourself in that position, you’re going to want to have this recipe on hand. One upside of the weather not fully agreeing with the season yet, turning on the oven to roast these wasn’t so bad! 

As it turns out, this is one of the best sweet potato recipes I have ever made. This dish will definitely be on my Thanksgiving menu, it was just that fabulous. Usually, I can never get my sons to eat sweet potatoes. They gave it a try, and they loved them so much they even asked that I make it again. (WHAT?!)

I have come to the conclusion that sweet potatoes should always be eaten in tandem with brown sugar and maple syrup. They go together like peanut butter and jelly. For this recipe, I used bourbon and it gave the sauce an additional depth of flavor that is as dramatic as it is amazing. Of course, the vanilla extract topped it off to make it just perfect.

This is an absolutely superb side dish. It is courtesy of Kosher By Design and will serve 8-10 people who will be delighted by this sweet potato dish even if it is summer!

Ingredients for Glazed Sweet Potatoes

4-5 pounds sweet potatoes, peeled
4 tbsp. (1/2 stick) margarine or butter
1 cup dark brown sugar
1 tbsp. vanilla extract
1/4 tsp. salt
1/4 cup whiskey or bourbon

Preheat oven to 375°F.

Cut the sweet potatoes into 1/2-inch slices.

Steam the sweet potatoes for 10 minutes or until soft but not mushy.

Remove potatoes from steamer and set aside.

In a small saucepan, melt the butter over medium heat.

Add the brown sugar, vanilla, and salt, stirring until the sugar is dissolved.

Stir in the whiskey or bourbon and cook for 5-10 minutes or until slightly thickened, stirring occasionally.

Spray a 9 x 13-inch glass baking dish with nonstick cooking spray.

Place the sweet potatoes in the pan.

Drizzle the sauce over the top.

Bake uncovered for 1 hour. 

Baste with the sauce every 10 minutes to keep the potatoes from drying out.

It’s that simple!

signature

[recaptcha]


Visiting my local farmer’s market is one of my favorite pastimes in the summer. There is nothing better than walking through and knowing that everything you buy was freshly grown. You know you are getting the highest quality food at an affordable price, as well as doing your part to help the local economy!

On my most recent visit, I got a few tomatoes, a bagful of fresh corn and some delicious treats from a baking vendor. Then I headed home to cook it all to my heart’s content. It is a wonderful way to spend a warm, sunny day in the summer.

There are some things you should know before going to a farmer’s market. It can be intimidating so here are some tips to help you get through it and thoroughly enjoy it.

Bring cash. Very few vendors I know take credit cards, and cash is always much easier.

Take a walk through the entire market before you buy anything. Take mental notes (or written if you prefer) of the booths you will want to return to. 

Bring your own large tote bag to throw all of the items you buy in. This will make them much easier to carry. 

Try something new. Last year I was visiting a vendor that had several foods I did not recognize. He let me try them. Sure enough, minutes later I was buying sea asparagus. It is a smaller version of asparagus that has several stalks emanating from the main one. It has a crunchy texture and a salty flavor. I bought it and made a delicious salad with it. Just goes to show, you never know! I will be looking for it again this year. 

Don’t be afraid to ask questions. The vendors know how the food was grown, if any pesticides were used and how is best to store them.

Pick up your big purchases last so you do not have to carry them with you the entire time of your visit.

Now that you know some things about a farmer’s market, next time you visit make sure to pick up the ingredients for this recipe! It is an amazing version of a carbonara. It requires all the same ingredients plus extra veggies and a wonderful mix of aromatic herbs.

The bacon adds a nice, smoky flavor, while the cheese and corn lends a sweet and creamy texture. The crushed red pepper is a spicy surprise. This dish is finger licking good. I wouldn’t put it on your short on time list, but I would put it on your “must try” list.

This dish is courtesy of Half Baked Harvest, by Tieghan Gerard. All of her recipes are amazing, and I will be trying many more of hers in the future. It didn’t say how many people it will serve so I am going to say about 4-6 people who will relish this savory, sweet and spicy version of a summer carbonara!

Ingredients for. Summer Carbonara

2 pints heirloom or cherry tomatoes
2 tbsp. extra-virgin olive oil, plus more for serving
1/2 cup chopped fresh herbs (such as basil, oregano, and dill)
4 garlic cloves, minced or grated
Kosher salt and freshly ground black pepper
1 pound bucatini pasta
4 thick-cut bacon slices, chopped
3 large eggs, beaten
3/4 cup freshly grated Parmesan cheese
3 ears corn, grilled, roasted or boiled and kernels sliced from the cob
Zest and juice of 1/2 lemon
1/4 cup chopped fresh thyme or oregano, plus more for serving
Pinch of crushed red pepper flakes
8 ounces burrata cheese (optional)

Preheat the oven to 400°F.

In a 9 x 13-inch baking dish, combine the cherry tomatoes, olive oil, 1/4 cup of the fresh herbs, half the garlic, and a generous sprinkle of salt and black pepper.

Toss well to coat.

Roast for 10 to 15 minutes, or until the tomatoes collapse.

Remove from oven and add the remaining 1/4 cup fresh herbs.

Meanwhile, bring a large pot of salted water to a boil over high heat.

Cook the pasta until al dente according to the package directions.

While the pasta cooks, in a large skillet, cook the bacon over medium heat until the fat renders and the bacon is crispy, 2 to 3 minutes.

Add the remaining garlic and cook 30 seconds to 1 minute, or until fragrant.

Reserve 1/4 cup of the pasta cooking water, then drain the pasta and add it to the skillet with the bacon.

Give it a good toss and cook for about 2 minutes, until warmed through.

Beat together the egg and Parmesan in a medium bowl.

Remove the pasta from the heat and pour over the egg-cheese mixture, tossing quickly to ensure the eggs do not scramble until the sauce thickens.

Thin out the sauce with just a little bit of the reserved pasta water, adding it slowly until the sauce reaches your desired consistency.

Add the tomatoes and all the juices from the baking dish, the corn, lemon zest, lemon juice, and thyme or oregano.

Gently toss to combine.

Season with black pepper, salt, and the red pepper flakes.

Divide the pasta among plates and top with a drizzle of olive oil, freshly torn burrata cheese, if desired, and fresh herbs.

It’s that simple!

signature

[recaptcha]


I love mushrooms! I can say with confidence that I could eat them every day. There is just one problem with that, no one else in my family will eat them. For this reason, I do not get to cook them often. I even try to get my boys to taste them time and time again by ordering them when we go out to eat. Same answer: No. 

When I saw this recipe, I knew I would have to try it, even if it meant giving most of it away. I am really glad I went for it and you will be too! 

Cooking the mushrooms down is very easy, you just have to watch them carefully. Especially if you use a grill pan on your stove top, like I did. Don’t forget to turn your exhaust fan on, as this preparation will create a good deal of smoke. If it is warm and you can grill it outside, that would be ideal. 

The second component in this recipe is just as simple as the first. I always have breadcrumbs on hand because I make them myself and freeze them. I combine several different kinds of bread, which I think gives it a great variety of flavors. 

This recipe has a perfect ingredient list. It is so delightful and rich in flavor and texture. Truthfully, it would be pretty average if it weren’t for the dressing, it gives the mushrooms a bit of a bite and tang.

This recipe is courtesy of Finecooking.com. It will serve 2 people who will savor every bite and dream of the lemony-garlicky flavor that consumes these delicious mushrooms!

Ingredients for Portobellos with Breadcrumbs

4 medium portobello caps, wiped clean with a damp towel  and gills scraped out with a table knife
1/4 cup extra-virgin olive oil; plus more for brushing
Kosher salt and freshly ground black pepper
1/2 cup coarse fresh breadcrumbs
1 1/2 tbs. minced garlic
2 tbs. dry white wine
1 tbsp. fresh lemon juice
2 tbsp. finely chopped fresh flat leaf parsley
Pinch of crushed red pepper flakes.

Prepare a grill pan on your oven or gas grill to medium-high.

Brush the portobellos on both sides with oil and season with salt and pepper.

Position a rack in the upper third of the oven and heat it to 350°F.

Grill the portobellos gill side up until grill marks form on one side.

Flip and continue to grill until tender, about 2 to 3 minutes more.

In a small bowl, toss the breadcrumbs with 1 tablespoon of the oil; transfer to a small rimmed baking sheet and bake, stirring occasionally, until golden, about 7 minutes.

In an 8-inch skillet, heat the remaining 3 tablespoons of the oil over medium heat.

Add the garlic and cook, stirring occasionally, until golden, about 2 minutes.

Add the wine and lemon juice and simmer vigorously over medium heat for 1 minute.

Off the heat, stir in the parsley, red pepper flakes and 1/2 teaspoon of salt.

Arrange the portobellos gill side up on a plate.

Drizzle with the dressing.

Sprinkle with breadcrumbs and serve.

It’s that simple!

Finally planted my herbs!

signature

[recaptcha]


It is finally time to tend to my garden! I have been working on it for about 20 years now. I love to plant, it is so wonderful to watch flowers bloom and herbs flourish year after year.

I plant perennials every year in my yard. Why? Because many of them don’t come back like they are supposed to! When my garden begins to grow again, I have to take note of all the bare spots. I don’t quite understand this phenomenon. Last year our garden was lush and beautiful, yet here spring is, and I see those annoying bare spots that must be filled. Although I intentionally plant flowers that are meant to return with the good weather, I still end up spending the same amount of time and attention on my garden every year.

I really don’t mind, because I do love taking trips to the plant nursery. The one that I go to near my house is gorgeous, and I enjoy every minute I get to visit it. I just wish I knew their secrets!  I will keep you updated with pictures of my garden while it is growing. I go out there every morning to check on it and marvel at how lovely and sweet smelling it becomes. 

Speaking of sweet, summer is rapidly approaching, which usually means lightening up your diet a bit, but you have to give into your sweet cravings once in a while! This is the perfect recipe for transitioning into everyone’s favorite season.

The crust tastes light, yet it is rich with flavor and is the perfect home for the nutty, candied topping. The filling has just the right amount of sweetness with the combination of brown sugar and butter. The corn syrup adds that sticky, melt in your mouth perfection. Each bite is better than the last. I’ll bet you can’t eat just one. And, although the recipe calls for the flakey salt as optional, do not leave it out! It is the crown of these delicious bars. Trust me, you are missing out on something really special if you don’t indulge.

This recipe is courtesy of The Perfect Cookie, by America’s Test Kitchen. It will make 24 bars that people will be going “nuts” for!

Ingredients for Ultra nutty Pecan
Crust:

1 3/4 cups all-purpose flour
6 tbsp. granulated sugar
1/2 tsp. salt
8 tbsp. unsalted butter, melted
Ingredients for Topping:

3/4 cup packed light brown sugar
1/2 cup corn syrup
7 tbsp. unsalted butter, melted and hot
1 tsp. vanilla extract
1/2 tsp. salt
4 cups (1 pound) pecan halves, toasted
1/2 tsp. flake sea salt (optional)

For the crust:

Adjust oven rack to lowest position and heat oven to 350°F.

Make foil sling for 13 by 9-inch baking pan by folding 2 long sheets of aluminum foil.

First sheet should be 13 inches wide, the second sheet should be 9 inches wide.

Lay the sheets of foil in pan perpendicular to each other, with the extra foil hanging over pan.

Push foil into corners and up the side of the pan, smoothing foil flush to pan.

Grease foil.

Whisk flour, sugar and salt together in bowl.

Stir in the melted butter with a wooden spoon until dough begins to form.

Using your hands, continue to combine until no dry flour remains and small portion of dough holds together when squeezed in palm of your hand.

Evenly scatter 1-tablespoon pieces of dough over surface of pan.

Using your fingertips and the palm of your hand, press and smooth dough into an even thickness in bottom of pan.

For the topping:

Whisk brown sugar, corn syrup, melted butter, vanilla, and salt in bowl till smooth (mixture will look separated at first but will come homogeneous), about 20 seconds.

Fold pecans into sugar mixture until nuts are evenly coated.

Pour topping over crust and spread into an even layer with spatula, pushing edges into corners. (there will be bare patches.)

Bake until topping is evenly distributed and rapidly bubbling across entire surface, 23 to 25 minutes.

Transfer pan to wire rack and sprinkle bars with sea salt, if using. Let bars cool completely in pan, about 1 1/2 hours.

Using foil overhang, remove bars from pan. 

Cut into 24 pieces before serving. 

Bars can be stored at room temperature for up to five days.

It’s that simple! 

signature

[recaptcha]