This past Father’s Day I entertained 15 people at my home. The usual guest list is about 20 plus, so this was a rather small gathering for me. Regardless of the size of the party, it takes time to plan a menu, although my blog really helps. My husband usually lets me do my own thing, but this year he wanted to plan it with me.

When it came time to pick the entree, I made some suggestions, like london broil, chicken, salmon or steak. His idea: hot dogs and hamburgers. I laughed and said, “surely you don’t want to have to grill on Father’s Day…let me make some london broil and you can relax”. But he insisted on a classic BBQ. I let it go, knowing I would bring it up again the next day.

I asked him again, and he was firm. I guess when a man wants a hot dog and a hamburger he’s gotta have it! And who am I to deny him on a day to celebrate him as a father? So we had them, and although I had something less conventional in mind, I must say he did a great job.

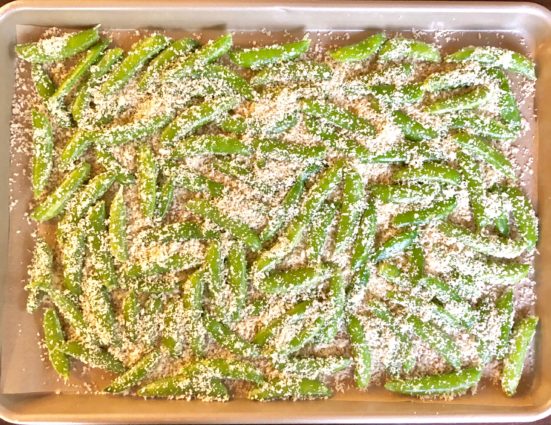
The sides are always the hardest to choose. If you remember, my rule is to never to prepare a dish you have never made before when you are expecting company. I really wanted to try the garlicky green beans and potatoes, but I didn’t get a chance to try making them in advance, so I took my chances. 

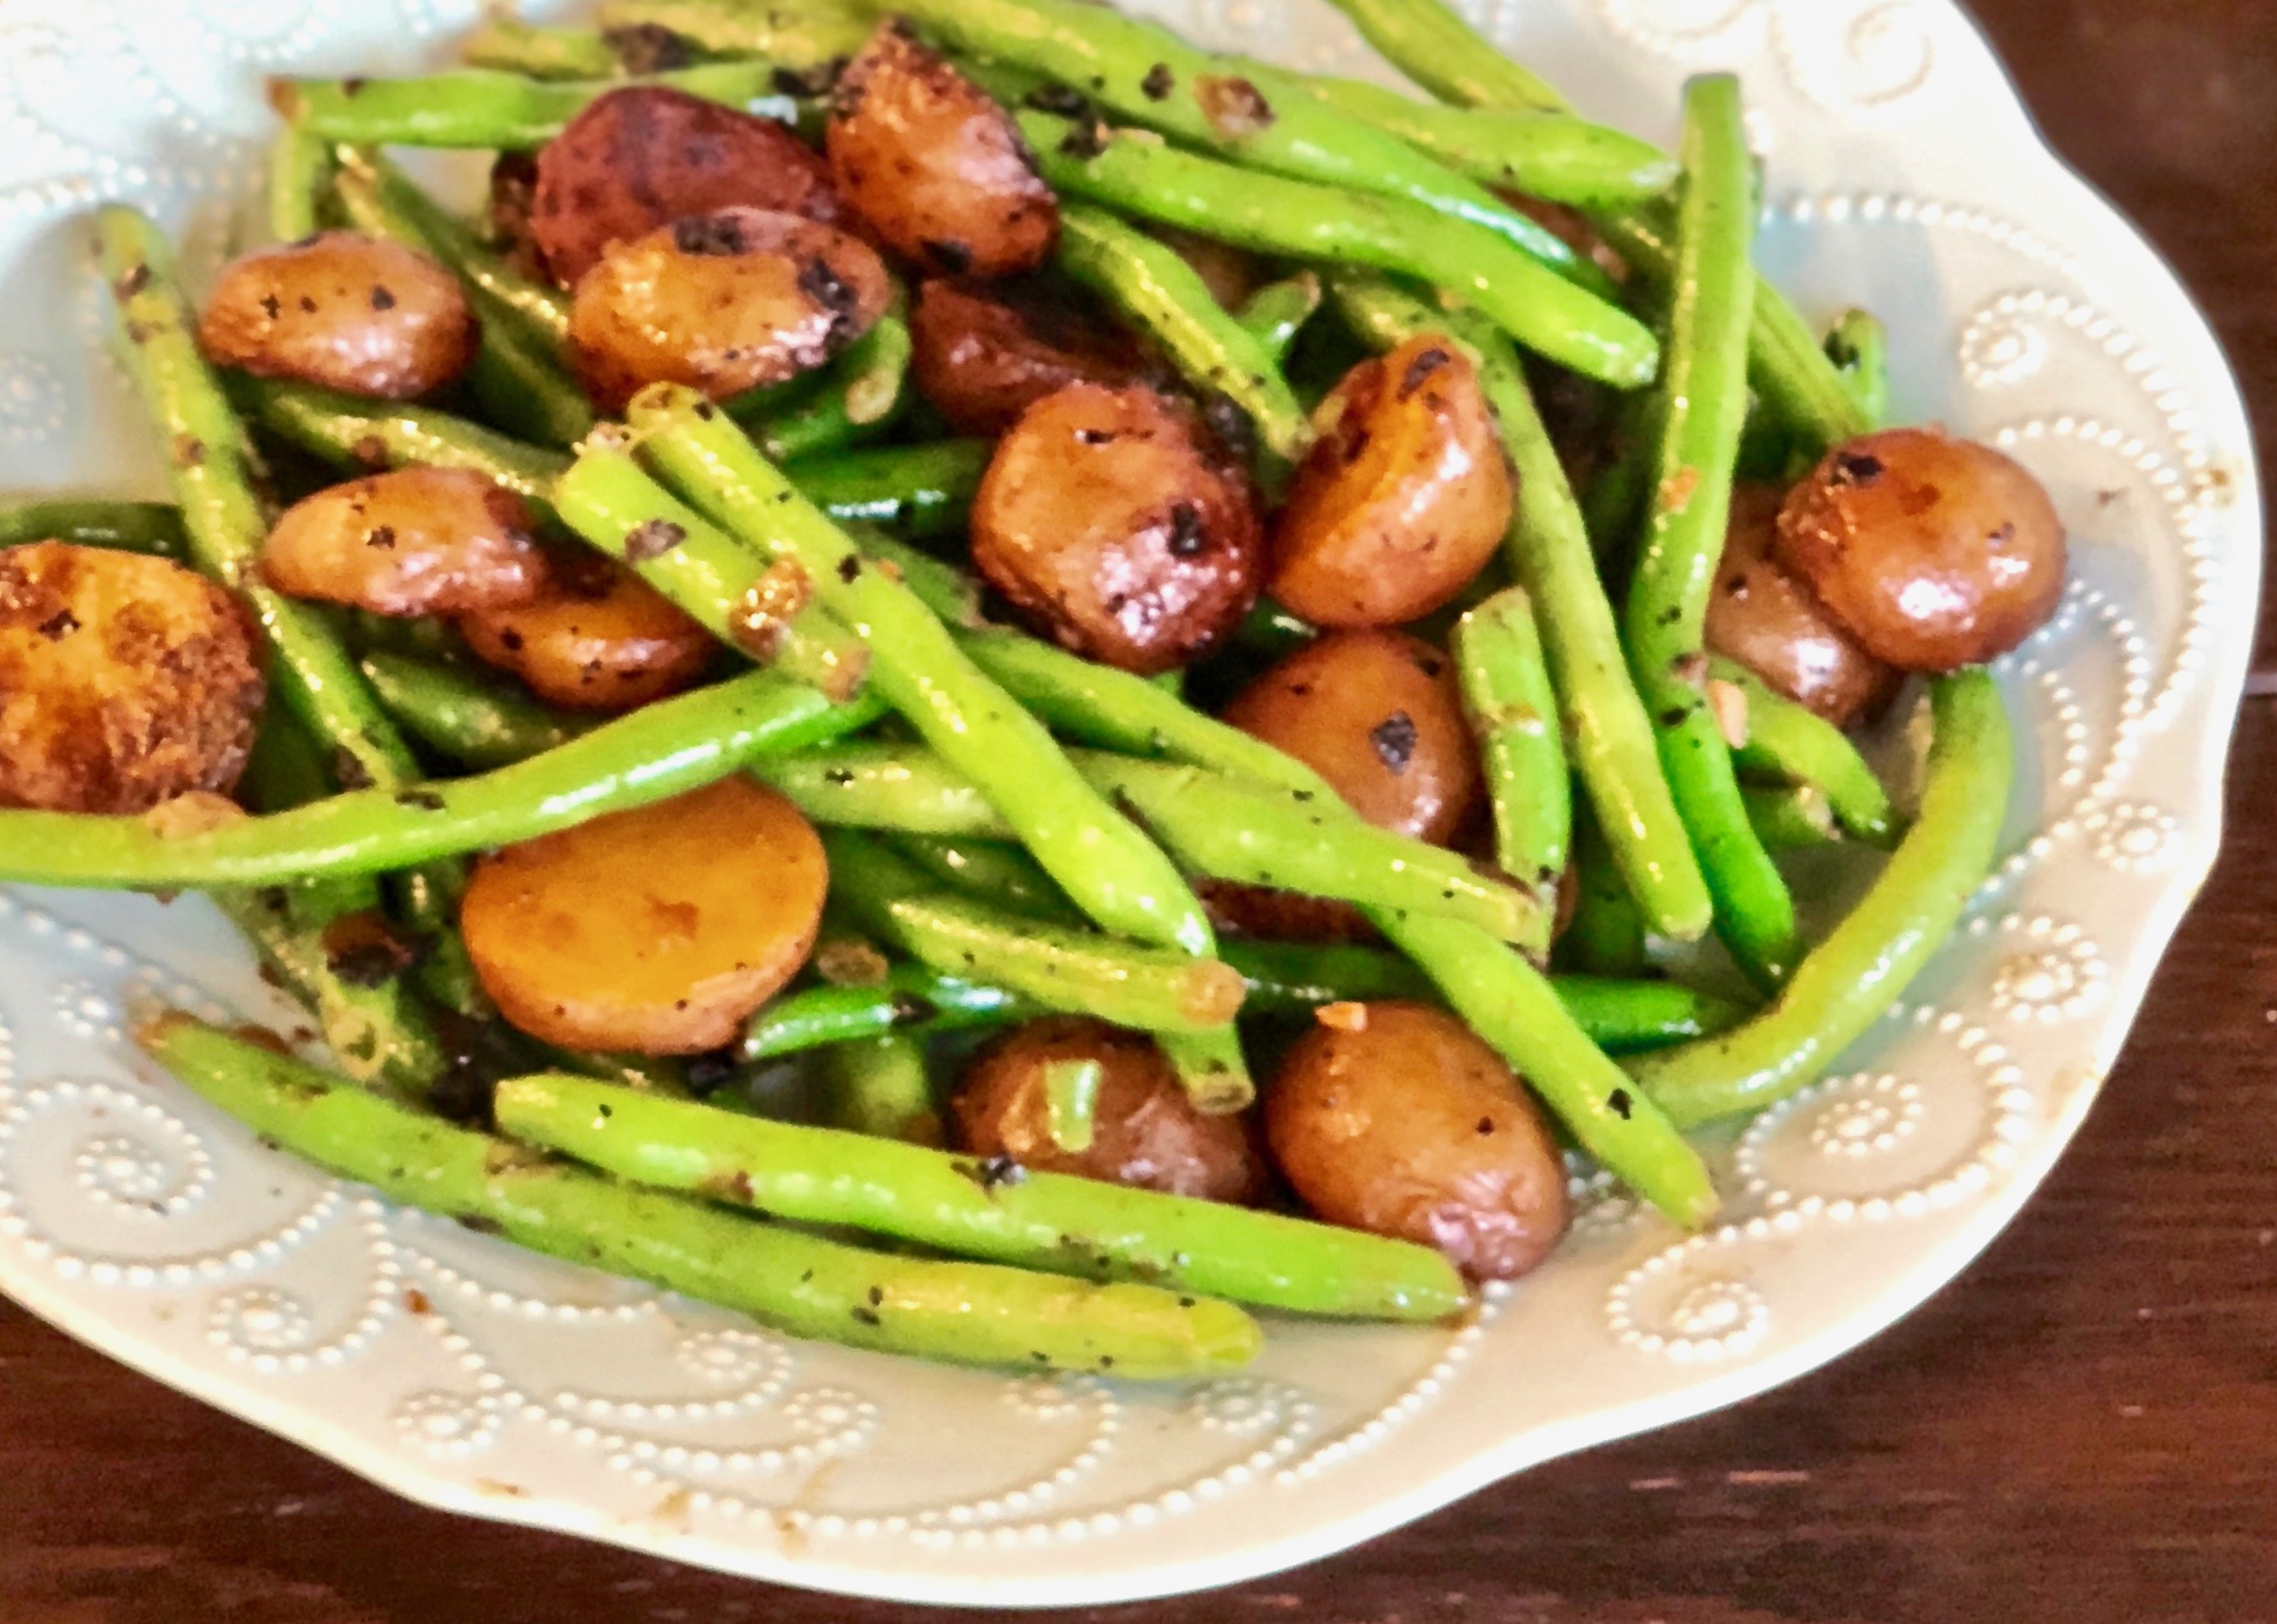
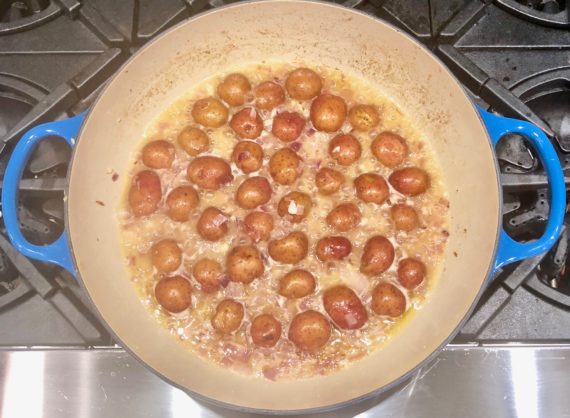
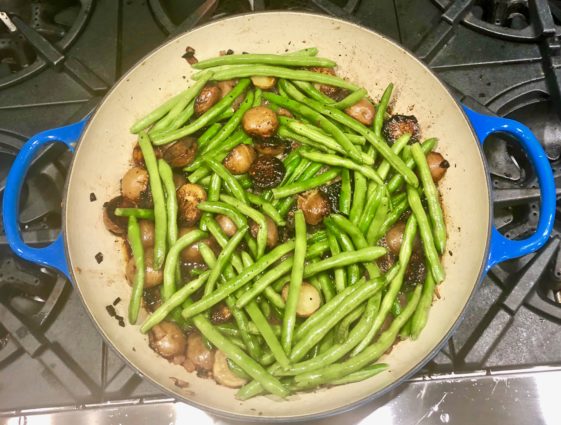
They turned out beautifully, and this dish was a big hit! It was easy to make, but your guests will think you had been cooking all day. Just a few notes, I used 3 cloves of garlic, but you can cut it down to two if you prefer. You must watch the potatoes carefully, even if you are setting your timer. If there is not enough liquid they will easily burn (some of mine did, but I was able to save most of it, and leave the badly burned ones out of the picture). If you need more liquid just add a little in. Also, watch the green beans carefully, and take them immediately off the heat when they turn bright green. They will continue to cook after you have removed them from the heat and you don’t want mushy, unappealing, green beans.

This one is definitely a keeper. The potatoes are caramelized until they are irresistibly flavorful and the green beans are crisp and prepared superbly.  The chicken broth is absorbed beautifully and the wine adds a hint of sophistication to the taste. I know you are going to love this one!

This recipe will serve 6-8 people who will want to leave extra room on their plate for a huge helping of this perfect side dish.

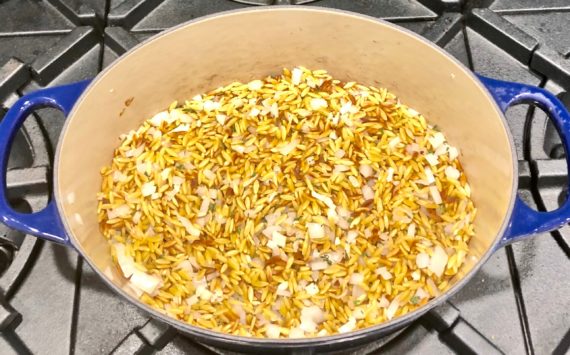
Ingredients for Garlicky Green Beans and Potatoes

2 tbsp. olive oil
3 tbsp. butter
1/2 large red onion, chopped
2 pounds green beans
15 small red potatoes, cut into halves
2 or 3 large garlic cloves, chopped
1/4 cup chicken broth
1/4 cup of wine, plus 1/4 set aside
1 tsp. kosher salt
1/2 tsp. freshly ground black pepper

Heat olive oil and butter in a medium skillet over medium heat.

Add onions and cook until translucent, about 4-5 minutes.

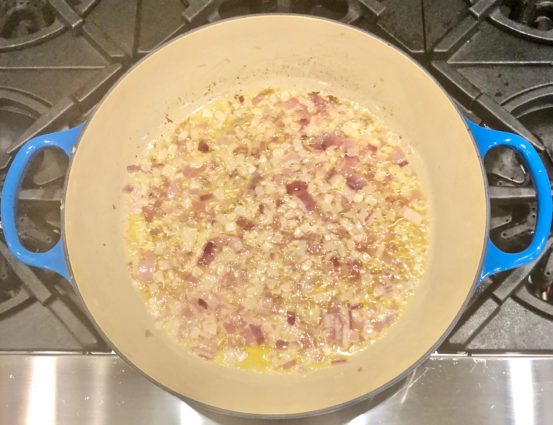
Stir in garlic and cook for 1 minute.

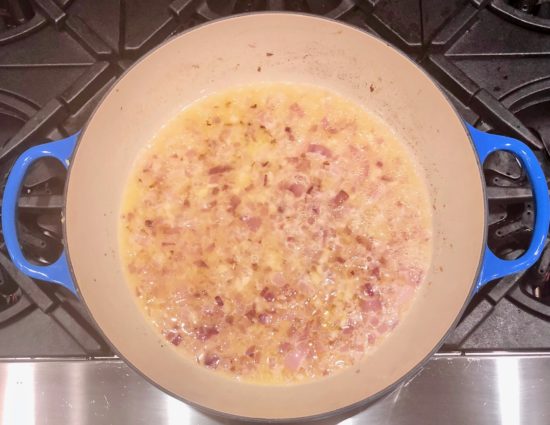
Pour in chicken broth and 1/4 cup of wine, and heat until wine has reduced, about 2-3 minutes.

Add potatoes, cut side down, and let cook about 5 minutes, or until the cut side has turned golden brown.

Add in 1/4 cup of wine and green beans.

Cook until green beans have turned bright green and immediately remove from heat.

Serve hot.

It’s that simple!

signature

[recaptcha]


We just finished planting our flower garden, it is growing fast and coming out so beautifully!  It may seem strange to rejoice when it rains in the summer, but I know my flowers are getting watered sufficiently. Through all my years of gardening, I have learned that rainwater has something special in it. It just makes my plants look that much more magnificent. All my hard work is starting to pay off. Now everyday I can look forward to watching them grow and flourish. I have a balcony off of my bedroom where I can drink my coffee and enjoy the charming view.

I have not planted this year’s food garden yet. I am hoping it is not too late, because I love to watch it grow as well. Usually, I plant tomatoes (which never seem to do well), cucumbers, green onions, cauliflower and kale. I never plant zucchini, because, well, I’m just not fond of it. My family enjoys it, however, I seldom prepare it.

This recipe changed my mind. The zucchini noodles are not cooked. I was surprised, but realized after tasting this dish, that it was the consistency of the cooked noodles that I disliked. These noodles were crunchy and I found that more to my liking, as the added salt made them taste much less watery. I also cheated and bought the already spiralized zucchini in my supermarket and you should too! It makes things so much easier.

It does not get any simpler than this recipe. There is no cooking involved, (perfect for a warm summer day, especially if you are short on time). The recipe did not include the time needed for toasting the pine nuts, but it does not take long.

I loved everything about his wonderful salad. It has the perfect amount of freshness to it for the summer. The ingredients are light and yet delicious and combined very nicely together. The lemons gave it a nice zing, and the honey added a pleasant sweetness to it. Everything about this dish is enjoyable. A “must try”, especially if you love zucchini.

This recipe is courtesy of Cuisineathome.com and will serve 4 people who will savor the refreshing taste of this pleasant salad! 

Ingredients for Zoodle “Pasta” Salad

3 zucchini, spiralized
1 tbsp. kosher salt
Zest of 1 lemon
Juice of 1 lemon
3 tbsp. olive oil
1 tbsp. garlic, minced
1 1/2 tbsp. honey
1 cup basil, torn
1/2 cup pecorino cheese, grated
1/4 cup toasted pine nuts

Toss zucchini and salt in a strainer set over a bowl.

Let sit 20 minutes.

Preheat your oven to 400°F, and place the pine nuts in for 7-8 minutes. 

Meanwhile, in a medium bowl whisk together the lemon zest, lemon juice,  olive oil, garlic and honey.

Season with salt and pepper.

Rinse zoodles; dry in a salad spinner.

Toss together zoodles, basil, pecorino cheese and toasted pine nuts.

Dress with vinaigrette.

Serve immediately.

It’s that simple!

signature

[recaptcha]


One of the things I love about summer is the seasonal produce that comes out. To name a few, watermelon, cherries, strawberries blueberries, peaches, and apricots can be purchased freshly grown right now. The strawberries are so sweet and delicious, I could eat a whole package of them!

Sugar snap peas are a cross between English shelling peas and Chinese snow peas. 

This delicious delicacy is generally in season from late winter until the end of Spring. They are adorned with natural sweetness and have a satisfying crunch when you bite them. They are both a fruit and a seed and are packed with lots of great nutrients. They do not have a membrane in the pod, and like snow snap peas, we are able to eat the entire pod. After all, who wants to peel all the pods anyway?

This recipe takes sugar snap peas to a whole new level! They are coated with olive oil and rolled in a heavenly mixture of Parmesan cheese and panko breadcrumbs. This gives this delightful little vegetable even more of a tasty crunch. Then they are roasted to magnificence at a high heat. Make sure you set your timer for this one, and check them constantly. They should be a beautiful, bright green when you take them out of the oven.

This recipe will serve and will serve 6 people who will devour this crispy, yummy side faster than you can “snap” your fingers!

Ingredients for Garlic Parmesan Sugar Snap Peas

3 cups sugar snap peas
3 tbsp. olive oil
1/2 cup panko crumbs (or breadcrumbs)
1/4 cup grated Parmesan cheese
Zest of one lemon
Juice of one lemon
1 tsp. salt 
1/2 tsp. freshly ground black pepper

Preheat oven to 400°F.

Grease a baking sheet with cooking spray or line it with parchment paper and set aside.

In a separate bowl, mix together the panko crumbs and parmesan cheese.

In another bowl, mix the sugar snap peas, lemon zest and juice, salt and pepper.

Add the panko crumbs to the sugar snap peas and toss to combine.

Arrange on previously prepared baking sheet in a single layer.

Add any remaining panko crumbs on top of the peas.

Roast for 15 to 20 minutes, or until crispy, turning once during cooking.

Remove from oven and serve immediately.

It’s that simple!

signature

[recaptcha]


The best thing to do during the summer months is take things outside and use your grill. Juicy burgers and steaks are summer staples, my mouth waters just thinking about them. You can grill your favorite vegetables, too! Instead of pasta, try spiralizing zucchini, squash or sweet potatoes. You can even grill summer fruit like peaches, pineapple or watermelon. The grilling process can caramelize the natural sugar, making them even more sweet and delightful.

Summer is the time for salads, fruity desserts, and frosty drinks. It is great to have lemonade or iced tea on hand so I make a pitcher or two a week. What I enjoy even more is whipping up some frosty margaritas, daiquiris or Pina Coladas. Here’s a tip: you can use your leftover berries to make pies or jam!

This dessert or snack is perfect for summer because you do not need to use your oven. These Special K bars are almost too easy to make. Inside is peanut butter combined with sweet delights like maple syrup and honey, then it is topped with a chocolatey shell. Are you drooling yet? Just place it in the fridge and you have a crunchy, enticing surprise that no one will be able to pass up!

This recipe is courtesy of Half Baked Harvest, by Tieghan Gerard. All of her recipes are so special. This one will make 18 to 20 bars, and trust me it is impossible to just have one!

Ingredients for Mom’s Special K Bars

Nonstick cooking spray, for greasing
1 cup creamy peanut butter
1/2 cup honey
1/2 cup pure maple syrup
1/2 cup sugar
6 heaping cups cornflakes
3 to 4 cups semisweet chocolate chips, melted

Grease a 9 x 13-inch pan with cooking spray.

In a large pot, combine the peanut butter, honey, maple syrup, and sugar.

Cook over medium heat, stirring until the mixture begins to bubble and the sugar has dissolved about 5 minutes – be careful not to let the peanut butter burn.

Remove the pot from the heat and immediately stir in the cornflakes.

Spread the mixture unto the prepared baking dish.

Put the chocolate chips in a medium microwave-safe bowl.

Microwave in 30-second intervals, stirring in between, until melted and smooth.

Spread the melted chocolate in an even layer over the peanut butter-cornflake mixture.

Tap the pan against the counter to smooth if needed.

Cover with plastic wrap and place in the fridge to harden for at least 2 hours.

Remove from the fridge 10 minutes before serving.

Cut into bars and devour.

It’s that simple!

(How cute are these dogs dishes I just bought?!)

signature

[recaptcha]


I love watching plants grow inside and allowing their beautiful vibrant colors to fill up a room. Unfortunately, I do not have a green thumb, so I do not have as many plants in my home as I would like. As I have mentioned before when talking about my indoor plants, although I give it my all, most of them inevitably die.

Last year for Mother’s day, my cousins gifted me a lemon tree. I had just renovated my kitchen, and the new tree complemented the theme. Loving lemons the way I do, it was one of the most thoughtful gifts I had ever received. My joy and appreciation was quickly overtaken by fear, I was scared to death I would kill my tree.

Much to my surprise and careful nurturing, that lemon tree is still living in a bright sunny place in my kitchen and I have even gotten some lemons from it! To this day, I love my lemon tree and give it all the attention and care it needs.

When I saw this recipe, I couldn’t wait to try it so I could use one of the lemons from my beautiful tree in it.

This dish is as easy and comforting as it gets. The orzo is first toasted to a nutty goodness and then cooked in chicken broth. It absorbs the flavor of the broth, so it comes out delicious and tender. The peas give it a hint of sweetness and beautiful color. The lemons deliver the right amount of twang and the gruyere cheese adds a savory wholesomeness.  The result is a mouthwatering, creamy pasta dish everyone will love.

This recipe will serve 4-6 people who will devour this dish of hearty, scrumptious perfection.

Ingredients for Lemon Orzo with Gruyere and Peas

2 cups dry orzo pasta
2 tbsp. olive oil
2 cloves garlic, minced
1/2 yellow onion, chopped
4 cups chicken broth
4 sprigs fresh thyme, leaves removed and chopped
Zest of 1 lemon
Juice of 1 lemon
1 1/2 cups frozen peas, thawed
1 cup grated gruyere cheese
1 tsp. kosher salt
1/2 tsp. freshly ground black pepper

In a skillet over medium heat add the olive oil.

When heated, add the orzo and cook, stirring occasionally until toasted, about 60 seconds.

Add the onions and cook until translucent, stirring occasionally, about 5 minutes.

Add garlic, cook for one minute, stirring occasionally.

Pour in broth, thyme and lemon zest.

Bring to a boil, cover, and turn heat down to a simmer.

Cook for 20-30 minutes, or until the orzo has absorbed the broth and is tender.

Remove the lid and stir in the lemon juice and peas.

Cook until the peas are bright green.

Add the gruyere cheese, salt and pepper.

Serve immediately.

It’s that simple!

Mitzie’s favorite spot!

signature

[recaptcha]