Risotto is a northern Italian dish in which rice is cooked in a broth (chicken, meat or vegetable), some butter and a good white wine. No matter how you cook it, the result is always a rich and wonderfully creamy consistency. This dish can contain other ingredients as well, but the base ingredients are always the same.

This rice preparation is used throughout the world and is one of the most widely eaten dishes. It is not an easy preparation and it takes time to perfect this skill. It will take thirty minutes or so to make a good risotto, and you must carefully watch it as it cooks. You slowly add in the broth one ladle at a time, however, the rice should not be covered in too much broth. You must be patient and let each ladleful carefully cook down before adding in another. It is certainly a learning process but if you do it correctly, you will be rewarded with a dish that has incredible flavor. 

I wish I could say I am one of those people who are proficient at cooking risotto, but (sigh), I am not. Which is why when I saw Ina Garten’s method, I knew I had to try it immediately. It may not be the luxurious type of risotto you would have placed in front of you at a restaurant, but I thought it was pretty damn good. In fact, I thought it was fantastic. You don’t have to stand over the stove for 30 minutes, and you still end up with the same scrumptious result.

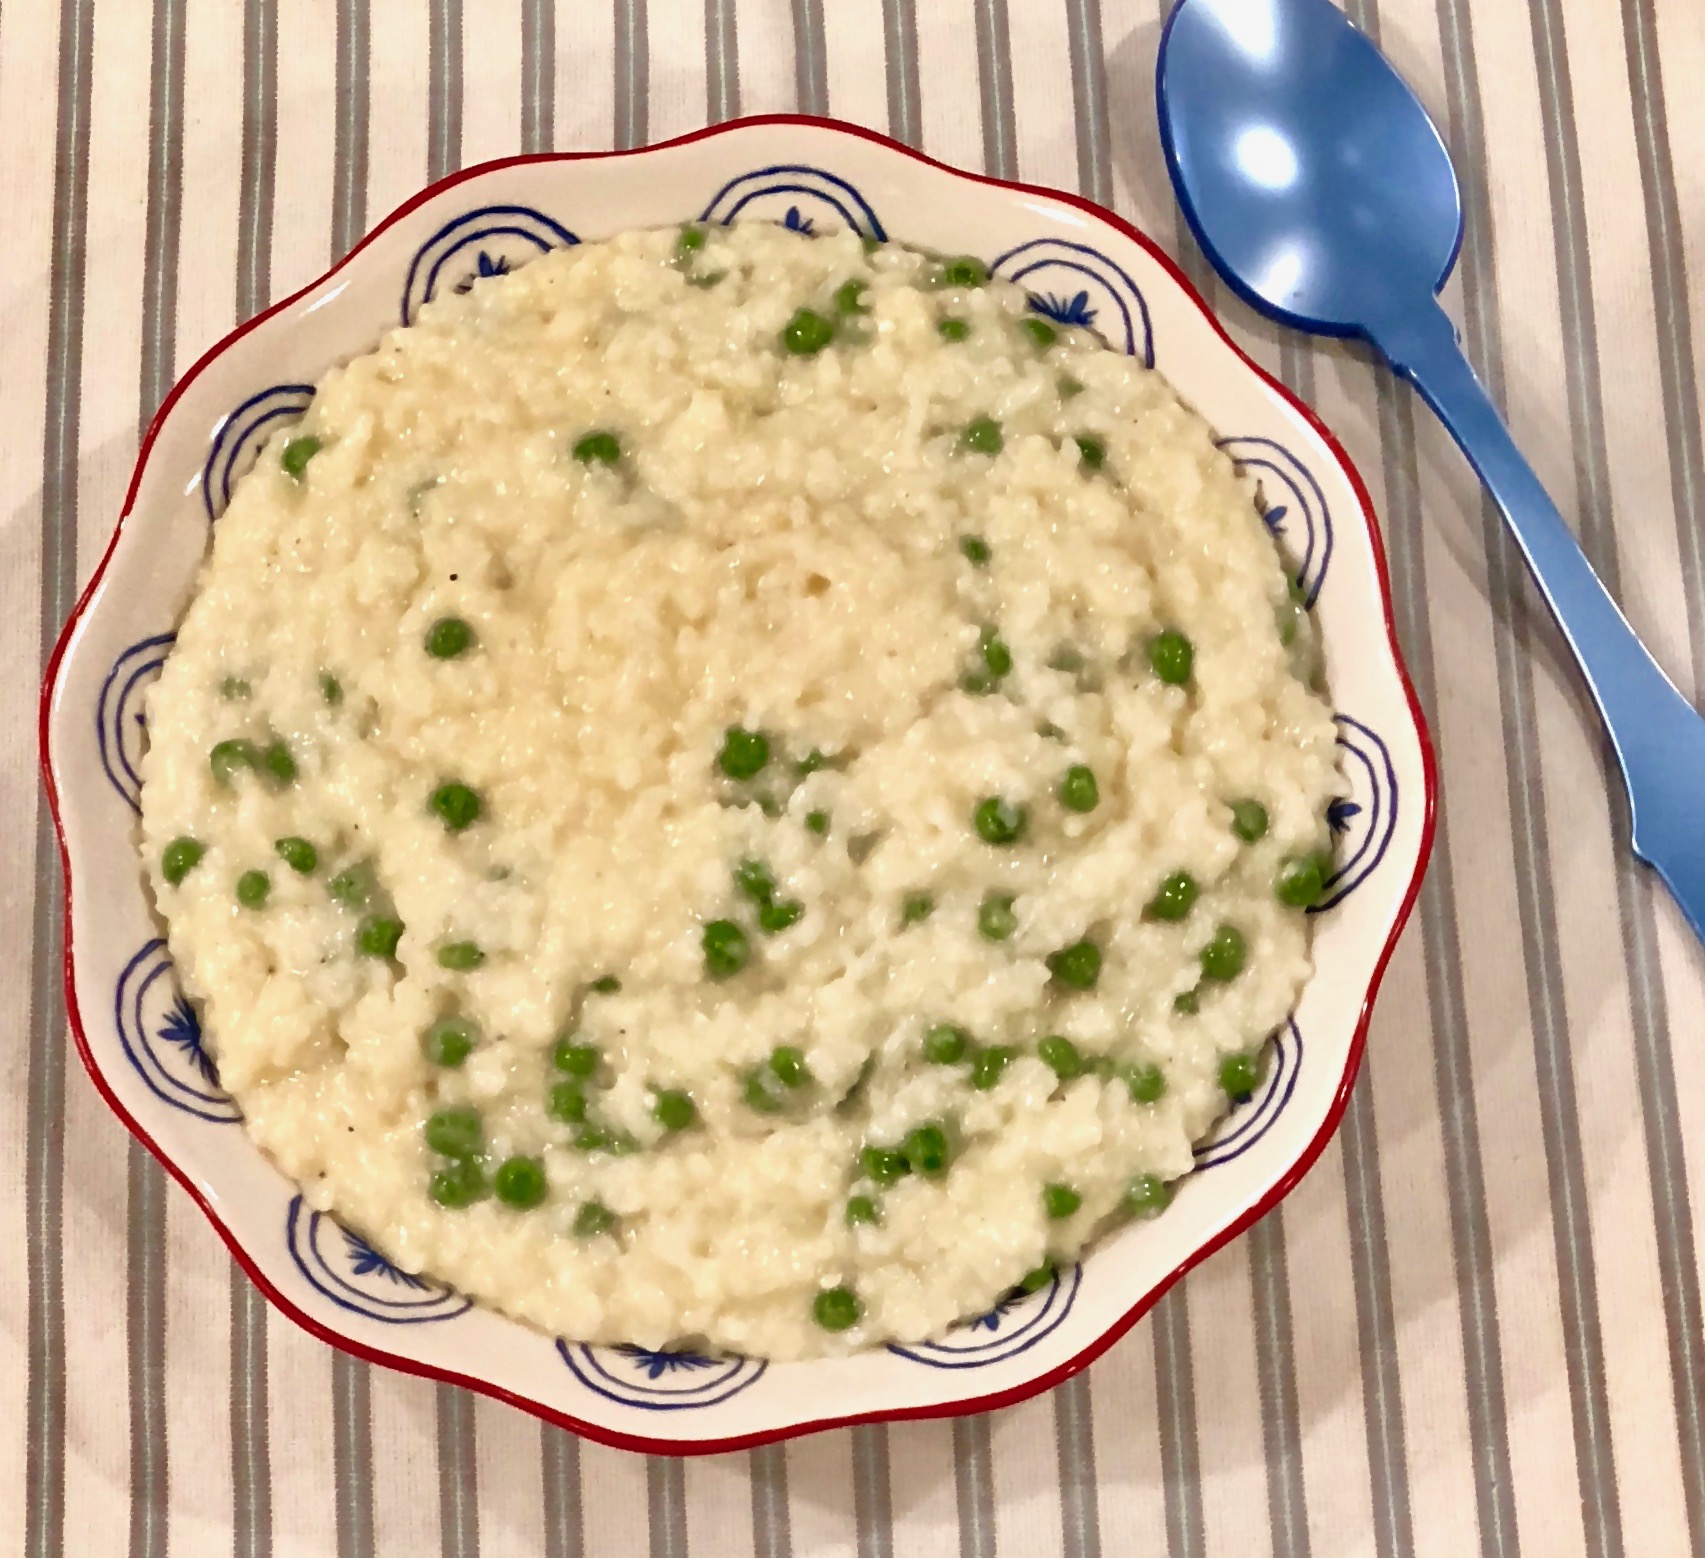
This risotto dish is one of my favorites ever. Ina never disappoints. Her recipes are always so reliable and delicious. This one epitomizes that enticing, creamy consistency you crave in a real risotto. The butter and wine give it an outstanding dimension of flavor. The peas add a sweetness and gorgeous color. The Parmesan cheese provides the silky, velvety texture. This is a satisfying, elegant dish that you can use for any family dinner or holiday. It is so easy and fast to make, you can accomplish many things instead of standing over the stove while you are waiting for it to cook. What is not to like about that?

This recipe is courtesy of Ina Garten, and will serve 4-6 people who just might think you are an accomplished risotto chef. (Hey, let them think so)!

Ingredients for Easy Parmesan “Risotto”

1 1/2 cups Arborio rice
5 cups simmering chicken stock, preferably homemade, divided
1 cup freshly grated Parmesan cheese
1/2 cup dry white wine
3 tbsp. unsalted butter, diced
2 tsp. kosher salt
1 tsp. freshly ground black pepper
1 cup frozen peas

Preheat oven to 350°F.

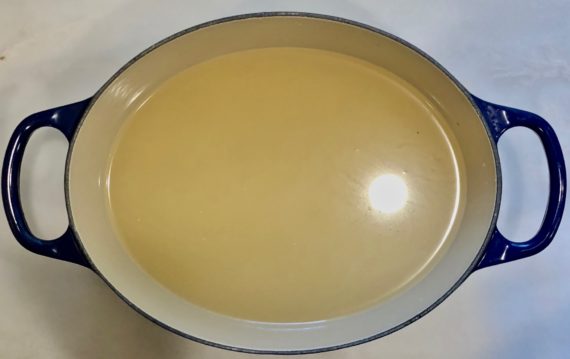
Place the rice and 4 cups of chicken stock in a dutch oven.

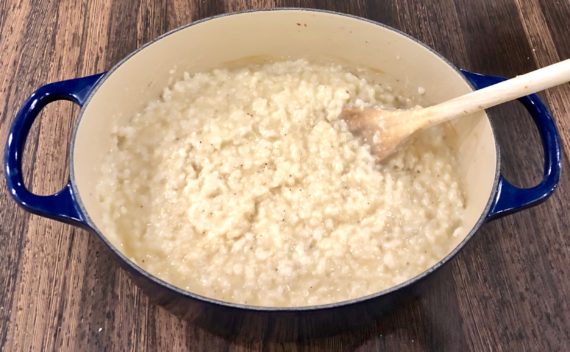
Cover and bake for 45 minutes, until most of the liquid is absorbed and the rice is al dente.

Remove from the oven, add the remaining cup of chicken stock, the Parmesan, wine, butter salt and pepper, and stir vigorously for 2 to 3 minutes, until the rice is thick and creamy.

Add the peas and stir until heated through.
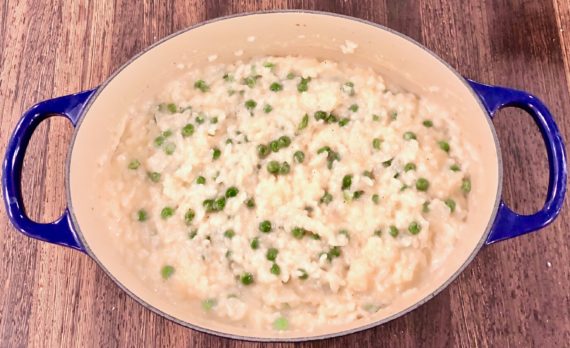
Serve hot.

It’s that simple!

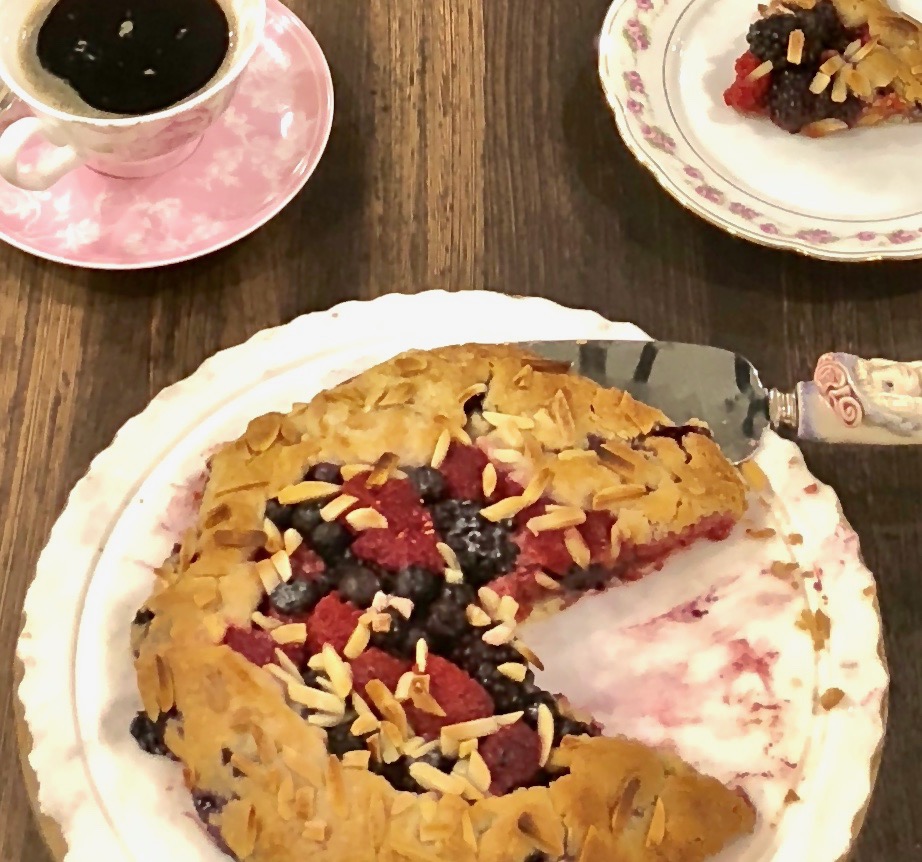
More flowers from my garden

signature

[recaptcha]


I remember when my husband and I moved into our home almost 25 years ago, (oh my!), he insisted on putting a pool in. I was not happy about that. First off, we had young children and you always worry about their safety, especially around a pool. Second, that just was not my first priority when it came to renovating our home. Well, he got his way and soon enough there were men coming daily to excavate our yard. They found a humongous tree trunk under our yard, which was an additional headache and expense. But in the end, we got our pool built and have enjoyed it tremendously throughout the years.

After children, the next step of course, were dogs. We love dogs and could never have just one at a time. For some reason, three seemed to be our magic number. We never had to worry about the dogs and the pool until we got our English Bulldog, Mazel. The summer after we got her, my husband had this premonition about her safety around the pool.

He was right. One early summer day when we had just opened the pool (her first time near it), and it was full of dirty disgusting water. We went out with the dog, just in case our concern for her safety was truly valid. Immediately, Mazel went running around and circling the pool in curiosity. Just as my husband yelled “Mazel don’t go in the pool”, she jumped right in. It was on purpose, too. You could tell that she knew. So, down she went. Swimming is no option for this large-headed dog. My husband jumped into the murky water, fully clothed, along with his watch, wallet, and glasses. He successfully rescued Mazel and his wallet, but his glasses and watch were in there until the water cleared. Mazel never went near the pool again.

Now that everyone knows their boundaries, my whole family, including my dogs love to hang out by the pool. That being said, I think that a nice, fruity summer dessert to bring poolside is in order! This recipe is an excellent choice. The berries combined with the sugar are scrumptious. The crust provides the perfect home for this beautiful crostata. The almonds add a tasty crunch. I have to say this was my first time preparing a crostata. It was hard to perfectly fold the edges over the berries. There was a lot of leakage and breaks in the dough. So who says it has to be perfect? I managed to pull it off for the pictures, but mine did not look anything like the picture in the magazine. You shouldn’t worry about it. It was still undeniably delicious even though it wasn’t picture perfect.

This recipe is courtesy of Cuisine, and it will serve 8 people who will be thrilled to be sitting poolside eating this delicious treat!

Ingredients for Berry Almond Crostata

1 cup fresh blackberries
1 cup fresh raspberries
(I added some blueberries)
1/4 cup granulated sugar
2 tbsp. cornstarch
2 tsp. pure almond extract
1 purchased refrigerated pie crust
1 tbsp. unsalted butter, diced
1 tbsp. unsalted butter, melted
1 tbsp. sliced almonds
1 tsp. sugar

Preheat oven to 450°F.

Line a baking sheet with parchment paper.

Toss together blueberries, raspberries, granulated sugar, cornstarch, and the almond extract for the filling.

Arrange pie crust on prepared baking sheet.

Spoon filling into center of crust, leaving a 2-inch border.

Dot filling with diced butter.

Fold edges of dough over filling, leaving center exposed, and press any loose edges down.

Brush melted butter over crust; sprinkle with almond and sugar.

Bake crostata until golden brown, 20 minutes.

Cool crostata until filling is set, at least 10 minutes.

It’s that simple!

signature

[recaptcha]


I know that cabbage can be a very controversial issue. It’s one of those vegetables that you either love or hate. The fact of the matter is, very few of us are born cabbage lovers, but as we get older we gave it another try. And guess what? We grow to like it!

I also know that cabbage is not the most exciting of vegetables. Many of us associate it with that dreaded cabbage soup we eat to lose weight. It’s 15 minutes of fame comes around every St. Patrick’s Day when it is paired with corned beef. Then of course once the holiday has come and gone, we forget about it. Many of our moms made stuffed cabbage, but did anyone really enjoy it as a kid? I know I wouldn’t go anywhere near it. My relationship with cabbage has come a long way.

You can find beautifully fresh, locally grown cabbage in most farmers markets. Now I can eat it raw, roasted, stuffed, steamed or in soup. Red or green, I am not picky. I love a good coleslaw and have even posted a few cabbage recipes on my blog in the past. I enjoy cabbage most when it is pan roasted, with some butter, salt, and pepper. This time I decided to add some color, as well as a few extra spices. And of course, Parmesan cheese because it just makes everything more delicious.

Well, as it turns out this one is a winner! The burst of color I added came from bright orange carrots and deep red onion, which become wonderfully sweet when you pan-roast them. As per usual, the most prominent flavor comes from the sauces, so the vinegar and hot sauce really take it over the top. Sprinkle it with Parmesan cheese and you are in heaven. 

This dish will serve and inspire 4-6 people who will change their cabbage intake from annually to weekly!

Ingredients for Caramelized Cabbage and Carrots 

4 tbsp. butter
1 small cabbage, core removed, sliced thinly
5 carrots, peeled into thin slices
1 small red onion, cut into thin slices
2 garlic cloves, chopped
1 tsp. apple cider vinegar
1 tsp. hot sauce, or more to taste
1 tsp. kosher salt
1/2 tsp. freshly ground black pepper
1/2 cup Parmesan cheese, grated

Melt butter in large pan over medium-low heat.

Turn up heat to medium-high, add the onion and cook until translucent, about 4-5 minutes.

Add the garlic and cook for 1 minute.

Stir in the cabbage and carrots and cook, stirring occasionally until the cabbage is tender and begins to brown.

Add in salt, pepper, vinegar and hot sauce and continue to cook for 1 minute.

Take off the heat and add in the Parmesan cheese.

Place in serving bowl, and serve hot.

It’s that simple!

signature

[recaptcha]


“Beans, beans, they’re good for your heart”. Never were truer words spoken. I absolutely love beans, especially when they are prepared from scratch. But I am no snob, I will eat them any way, fresh, frozen or canned. These tasty little legumes are one of the most versatile foods out there and are now considered a powerfood!

There are so many different kinds to choose from. There are black, navy, kidney, and pinto, to name a few. Beans are a healthy source of nutrients; they are high in fiber, protein, iron, vitamin B, zinc (which promotes eye health), potassium, magnesium and antioxidants. I recently learned they are known to help lower the risk of heart disease, colon cancer and help to maintain weight.

If that isn’t enough evidence that you should begin adding some more beans to your diet, consider this; they are very hardy, making you feel full and keep away hunger. Beans are the perfect meat substitute if you are weight conscious, and let’s face it, who isn’t looking to lose a couple of pounds? You can prepare them as an appetizer, snack, side or main dish.

This salad combines three beans beautifully. The green beans and celery provide crunch and vibrance. The pasta ups the carb presence, which makes it perfect for a main dish. It is dressed so uniquely and elegantly, making this salad unrivaled in taste and texture. This is a “must try”!

This recipe is courtesy of Southernliving.com and will serve 8 people who will love eating their beans in this unique, flavorsome presentation.

Ingredients for Three-Bean Pasta Salad

8 ounces uncooked small shell pasta
8 ounces fresh green beans, trimmed and cut into 1-inch pieces (about 2 cups)
1/2 cup thinly sliced celery (about 1 stalk)
1 (16-ounce) can pinto beans, drained and rinsed
1 (16-ounce) can red kidney beans, drained and rinsed
1 small shallot, minced
3 tbsp. rice wine vinegar
1 tsp. lemon zest
2 tbsp. fresh lemon juice (from 1 lemon)
1 tsp. Dijon mustard
1 tsp. honey
3/4 cup olive oil
1 tsp. kosher salt
1/2 tsp. freshly ground black pepper
1/4 cup thinly sliced chives

Cook pasta according to package directions with salted water.

Cook the green beans and celery in salted water to cover until tender-crisp.

Plunge into ice water to stop the cooking process, drain.

Combine pasta, green beans, celery, pinto beans, and kidney beans in a large bowl.

Combine shallot and vinegar in a medium bowl; let stand about 5 minutes.

Add lemon zest, lemon juice, Dijon mustard, and honey, stirring with a whisk.

Gradually whisk in the oil until well combined; pour over bean mixture.

Sprinkle with salt and pepper.

Toss gently.

Sprinkle with chives, and serve immediately.

It’s that simple!

Good morning, sunshine!

signature

[recaptcha]


One of the beauties of cooking in the summer is you get to take it outside to the grill.

While my family and I thoroughly enjoy grilling together, I absolutely hate cleaning my grill afterward. In the past, I have used the brush with the steel bristles. My advice to you: avoid at all costs. The bristles sometimes stick to the grill and can get into your food. Once, I had a friend who had to go to the hospital because he had one of these bristles stuck in his throat. They had to take him to the OR and take it out. At the time, I thought it was a fluke thing and continued to use the steel bristle brush to clean my grill.

One night, after I grilled some chicken, my son felt something stuck in the back of his mouth. Luckily he was able to take it out with his fingers, but sure enough, it was one of the bristles from the steel brush! I have never used it since and will never use it again. I loathe cleaning the grill now, and nothing seems to work.

Because of this terrible inconvenience, I do not use my grill as much as I would like. I know frying isn’t a summer thing, but now you know my reasoning! Since I like to find different ways to make vegetables, I had a strong feeling this recipe would be special to me.

As it turns out, I was right. The cauliflower came out a lovely golden brown, and the cayenne pepper added subtle yet evident heat. The lemon aioli dipping sauce is a refreshing addition to these beautifully fried cauliflower nuggets. I have a saying, “anything fried is good”. If you do not agree, try this recipe and it will make you a believer.

This recipe is courtesy of Purewow and will serve 4 people who will be so grateful that you decided to fry cauliflower in spite of the warm summer evenings.

Ingredients for Cauliflower Nuggets

2 eggs
1 1/2 cups all-purpose flour
1 tsp. garlic powder
1 1/4 tsp. salt
1/4 tsp. freshly ground black pepper
Pinch of cayenne pepper
1 head cauliflower, cut into bite-size florets

Lemon-Pepper Aioli

1/4 cup mayonnaise
1 lemon, zested and juiced
1 tsp. freshly ground black pepper
1/4 cup chopped fresh parsley, or as needed for garnish

For the Cauliflower Nuggets:

Pour 2 to 3 inches of oil into a large saute pan.

Heat the oil over medium-high heat until it shimmers on the surface and a thermometer placed in the oil reads 350°F. (If you drop a small piece of cauliflower in, and it bubbles and stays at the surface, then you are good to go).

Line a baking sheet with a few layers of paper towels.

Whisk the eggs in a small, shallow bowl.

Whisk the flour with the garlic powder, salt, black pepper and cayenne in another large, shallow bowl.

Working with a few pieces at a time, dip the cauliflower into the egg until it is well coated. 

Then dip the cauliflower into the flour mixture and toss to coat.

Repeat with the remaining cauliflower.

Set the pieces aside.

Working in batches, fry the cauliflower until evenly golden brown, 6 to 9 minutes.

Remove the cauliflower with a slotted spoon and drain on the prepared paper-towel-lined baking sheet.

For the Lemon-Pepper Aioli:

In a medium bowl, whisk the mayonnaise with the lemon juice, lemon zest, and pepper to combine.

Garnish the finished cauliflower with parsley and serve immediately, hot, with the aioli on the side for dipping.

It’s that simple!

signature

[recaptcha]