Do you know the difference between pan-roasting and roasting?

Pan-roasting is a two-step process by which you cook something only part of the way in a cast-iron skillet on your stovetop (also known as a sear) and finish it in the oven. It is one of the simplest cooking techniques out there. It is most often used to cook meat or chicken, however many people pan-roast vegetables as well.

By pan-roasting, you will get a super-crispy texture on the exterior of your protein or vegetable. If you are searing parts of a chicken, it is used to brown the skin and get it get it nice and crispy. If you are searing a steak it will crisp the outside and lock all the juicy flavor on the inside. The same goes for vegetables. This process will leave your vegetable with a flavorful caramelized crust! The browned bits that come from pan-roasting are delicious in their own way too, so do not discard them. You can also work them into any sauce you may be making for your dish.

Sure, it is an extra step but you will have dishes that are perfectly cooked – inside and out. Use a meat thermometer to make sure you have reached the desired cooking temperature. This way you will never have to cut into a steak or chicken, letting all their beautiful juices escape.

Roasting, on the other hand, is a one step process by which you cook food in an uncovered pan in the oven. Like pan-roasting, it is commonly used for large cuts of meat, and to intensify the flavors of vegetables. When you want to roast a vegetable, toss it with some olive oil, salt and pepper, place it in the oven and you will have an exceptional side dish!

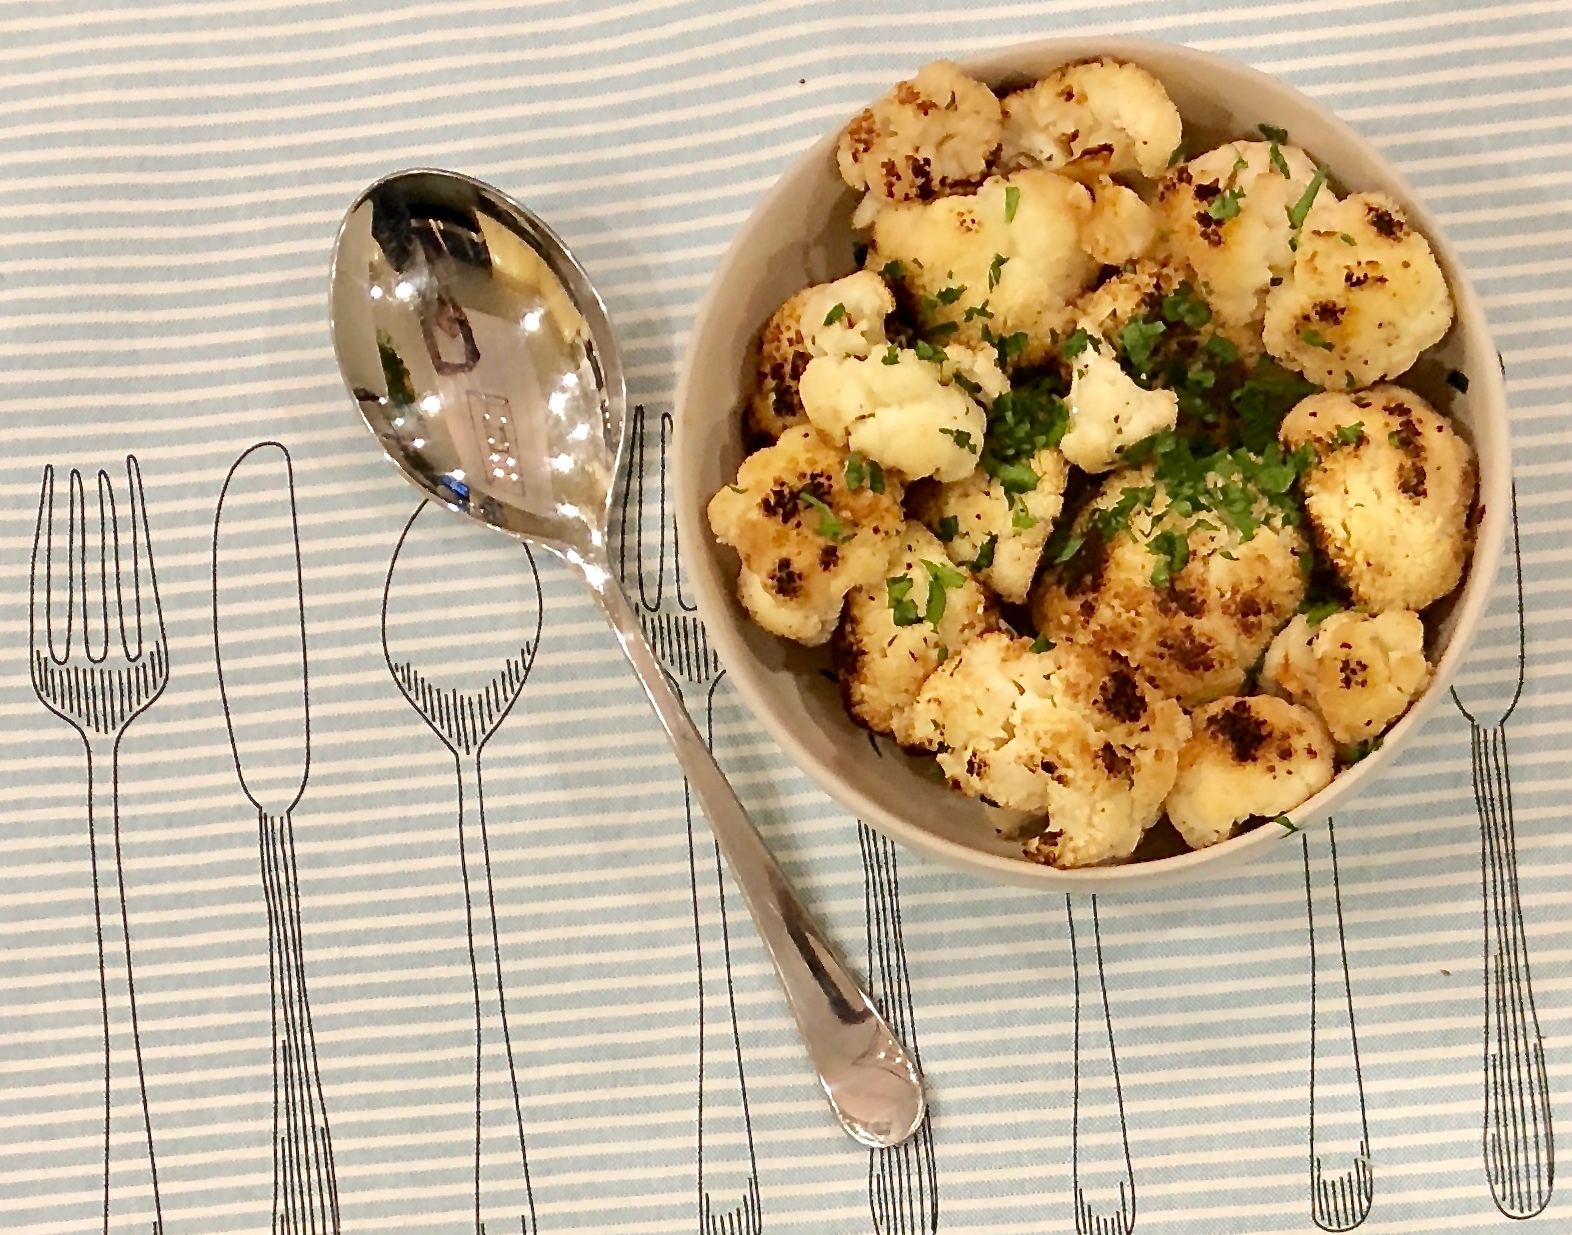
This cooking process is one that turns boring cauliflower into a mouthwatering side. It is first pan-roasted, beautifully caramelizing the cauliflower and adding a sweetness to it, then it is finished off in the oven. The author says that “surprisingly, this is one of their most requested recipes” and I can understand why. I changed it up a little. I did not have time to make her garlic confit, (which I will definitely do next time), so I used plain garlic and it was still wonderful.

This recipe is loosely adapted from Gjelina, and will serve 4-6 people who will have never experienced cauliflower like this before!

Ingredients for Roasted Cauliflower with Garlic, Parsley and Vinegar:

1 head cauliflower, trimmed and chopped into large florets
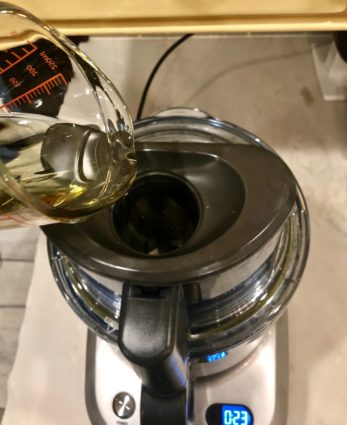
1/3 cup extra-virgin olive oil
Kosher salt
Freshly ground black pepper
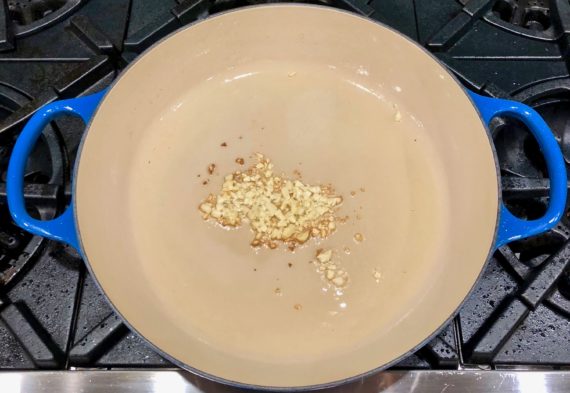
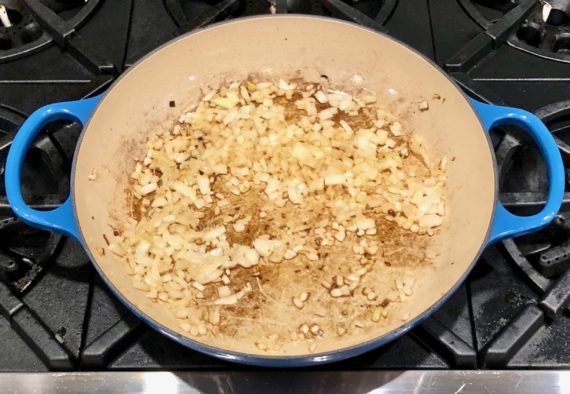
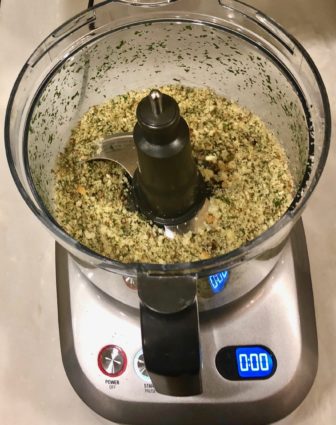
3 cloves garlic
2 tbsp. chopped fresh flat-leaf parsley
1/4 tsp. crushed red pepper flakes
2 tbsp. red wine vinegar

Preheat oven to 500°F.

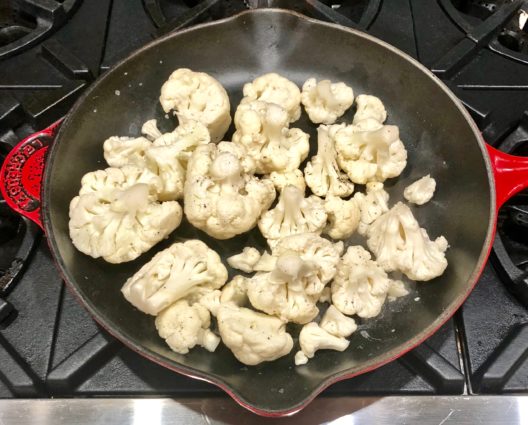
In a medium bowl, toss the cauliflower with the olive oil and season with salt and pepper.

Heat a large cast iron frying pan over high heat.

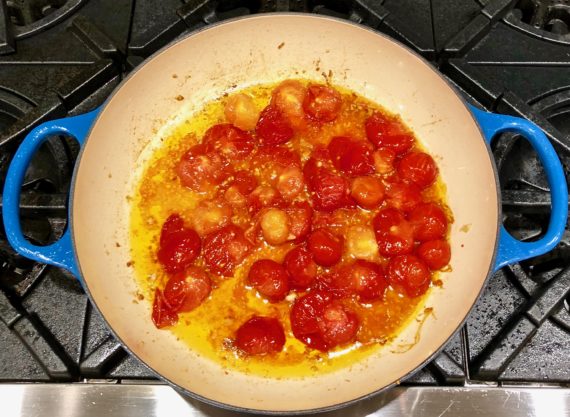
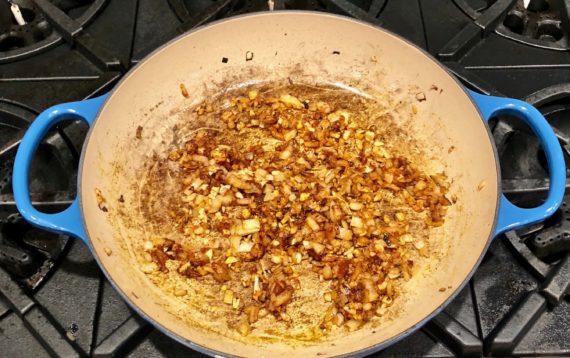
Dump the cauliflower into the hot pan and cook until starting to brown, about 3 minutes.

Transfer the pan to the oven and roast the cauliflower, undisturbed, until well seared, about 5 minutes.

With a spatula, toss the cauliflower with the garlic and turn to side that is not brown.

Cook for 3 minutes.

Remove from the oven, add the parsley, red pepper flakes, and vinegar and stir to distribute the seasonings.

Season with salt and pepper.

Transfer to a serving platter.

Serve warm or at room temperature.

It’s that simple!

signature

[recaptcha]


When I was young, I wish I had taken more of an interest in cooking. I loved to do sports and be with my friends, but cooking just was not my thing.

My mother was a wonderful cook. She never ventured out of her usual repertoire, but the meals that she prepared were delicious. She was a creature of habit, salmon cakes on Monday, fried chicken on Friday, steak on Sunday. It was not the fanciest of food, but it always fresh, and well-seasoned. She made so many great soups that I wish I could replicate. I have tried, but they never come out as good.  

When I first began to cook, my mom was around to teach me some things and I am so grateful for that. “Always taste”, she would tell me and “add salt as needed”. She also tried very hard to help me with the quantities, but it was difficult because she never used exact measurements. A pinch of this, a handful of that or “this much”. I think that is one reason I could never truly reproduce her beloved recipes. 

Over time, our cooking styles became very different. I started collecting cookbooks that introduced me to new types of food, how to cook them and I loved learning new techniques. My mom learned how to cook from her mother and her recipes were handed down from her European parents.

When I started to cook differently, she became inquisitive, understanding, and developed a new appreciation for new cuisines. I introduced her to a whole new world of cooking, and the student became the teacher in that aspect. I changed the way she thought of food, how to prepare it, cook it and present it. I loved learning these things and she loved watching and helping me. I don’t think she had ever used a cookbook even after watching me, but I know she was happy when I began to explore new recipes.

She was particularly proud of my Thanksgiving table. She would come and help, proudly putting dishes out that she never would have made herself. My mom always taught us the importance of family. When all of our family, aunts and uncles and cousins included, would come, her eyes would light up with joy that we were all together. But I think she was most proud that I had taken something she loved, cooking, and made it an intermix of old and new. 

I think my mom would have really loved this recipe, it is one of my favorites for sure. It is made with simple ingredients that combine superbly. The tomatoes are delicately pan-roasted with golden brown garlic. The basil provides a wonderful fragrance and color, while the chilies give it a little heat. It is then topped off with breadcrumbs and Parmesan cheese, making this dish perfect in every way. The book says it is a summer recipe, but I have enjoyed it all year round!

This recipe is courtesy of Six Seasons and will serve 6-8 people who will twirl up each bite with more and more delight.

Ingredients for Spaghetti with Tomatoes, Garlic, Basil and Chiles:

Kosher salt and freshly ground black pepper
Extra-virgin olive oil
1 or 2 garlic cloves, smashed and peeled
3 cups cherry tomatoes (aim for a mix, but definitely include Sun Golds if you can)
1/2 teaspoon dried chile flakes
1 big handful basil leaves
8 ounces spaghetti or linguine
1 tablespoon unsalted butter
Dried breadcrumbs (optional)
Parmigiano-Reggiano, for serving (optional)

Bring a large pot of water to a boil and add salt until it tastes like the sea.

Heat a large skillet over medium-heat.

Add a couple of tablespoons olive oil, then garlic, cook slowly to toast so it is very soft, fragrant, and nicely golden brown (about 5 minutes).

Make sure not to burn garlic – you want a nice toasted piece of garlic that you smash into the sauce in a minute.

Add a little more than half of the tomatoes to the pan (about 1 1/2 cups). They will sizzle and spatter because of the moisture meeting the oil, so have a lid handy to cover the pan if things get too lively.  

Cook until the tomatoes burst and break open. (If some are stubborn and aren’t bursting, poke them to move things along (about 5 to 8 minutes). 

Take the pan off the heat and gently smash the tomatoes with the back of a spoon.

Add the chile flakes and season generously with salt and pepper. 

Return to the heat, add half the basil, reduce the heat, and cook down to thicken the sauce a bit more (another 5 minutes).

Meanwhile, add the pasta to the boiling water and cook (1 to 2 minutes) shy of al dente according to package directions. 

With a ladle or a measuring cup, scoop out about a cup of the pasta water and set it aside.

Drain the noodles well.

Increase the heat under the sauce to medium-high, add the pasta, and toss it in the pan along with a good splash of the pasta water.

Add the rest of the tomatoes and cook the sauce, stirring everything around so the pasta drinks up the sauce and finishes cooking and the newly added tomatoes get warm. 

Once the noodles are properly cooked, add the remaining basil, a healthy drizzle of olive oil and the butter.

Take the pan of the heat and toss, toss, toss.

Taste and adjust your seasoning.

Serve as is, or with a handful of breadcrumbs and a shower of grated Parmigiano.

It’s that simple!

signature

[recaptcha]


Today was the first day it was actually cold out, and it’s looking like it will be this way all week. I woke up surprised. I actually had a sweater on today, but a lot of people were walking around in tee shirts. I couldn’t believe it. They are not ready to let go of the summer, that’s for sure!

As I have said, I love the fall. I enjoy the cool mornings, the warmth when the sun shines in the day and the windy nights. Although the leaves are falling and the days are getting shorter, the trees have not really changed color and I am especially looking forward to that. I do have to admit that I am not a fan of the acorns falling on my car. 

This is a busy time for me as I have already begun working on my Thanksgiving festivities. I am excited to say that we recently began a new tradition for the holiday! Each year a family is assigned to pick a charity that has meaning to them and every person is asked to contribute to the charity. I base the colors I use to decorate my home on the charities logo. I can’t say what it is yet, because every year I like to surprise everyone. The charity that is picked has a special meaning to that part of the family, and when they share the story behind it, it becomes meaningful to all of us. One year we gave to The American Heart Foundation. The bartender that we hired for the evening donated his entire tip because his grandmother had stents put in a few weeks earlier. How nice was that? People feel good about giving, so our Thanksgivings have become even more sentimental.

This apple cinnamon bread is a perfect dessert for fall, and is going on my Thanksgiving list. It has two delectable layers of apples, cinnamon, and brown sugar. The butter warms your mouth with each bite. This dish is so amazingly aromatic, your neighbors might even get a whiff while it bakes.

This recipe is courtesy of All Recipes and will serve 10 people whose senses will be captivated by this delicious dessert.

Ingredients for Apple Cinnamon Bread

1/2 cup brown sugar
1 1/2 tsp. cinnamon
1/2 cup (1 stick) unsalted butter, room temperature
2/3 cup sugar
2 eggs
2 tsp. vanilla extract (I used a little more)
1 1/2 cups flour
1 1/2 tsp. baking powder
1/2 tsp. salt
1/2 cup milk
1 large apple, peeled and finely chopped (about 1 1 /4 cups chopped) -(I used Granny Smith) 

Preheat oven to 350°F.

Grease and flour a 9″ x 5″ loaf pan, and/or line it with parchment paper.

In a small bowl, combine the cinnamon and the brown sugar; set aside.

In the bowl of an electric mixer, beat butter until smooth, then add white sugar and continue to blend until fully incorporated.

Add eggs and vanilla and blend until well combined.

Slowly add flour, baking powder, salt and then milk.

Blend just until all ingredients are well combined. Do not over-mix.

Pour half of the batter into the prepared pan. 

Top batter with half of the diced apples and half of the cinnamon-sugar mixture.


Press apples and cinnamon sugar into the batter just a bit with the back of a large spoon. (I used my hand.)

Pour the remaining batter on top of the apple layer (spread as needed), then top with remaining apples and remaining cinnamon sugar.

Again, press the apples and cinnamon sugar into the batter a bit.

Bake for 50-55 minutes, or until a toothpick inserted in the center of the loaf comes out clean.

Cool in the pan for 15 minutes, then transfer to a cooling rack to continue cooling.

It’s that simple!

signature

[recaptcha]


I often use the word savory when describing the taste of various dishes. But how many people really know what it means?

Savory is used to describe a dish that is full of flavor. It also refers to a taste that contrasts something sweet. A flavorful bite is hard to describe, so it is difficult to truly understand what savory tastes like unless you have experienced it. Savory not only describes an appealing taste, but also something alluring in appearance or aroma. If you are a good cook, you know it the minute you taste it. If you were to describe foods that are sweet, cakes, fruit or candy would come to mind. When it comes to savory… it’s just not that easy.

If you have ever eaten aged meats or cheeses, like salami or Parmesan cheese, you have eaten something savory. A simple spice like fennel, cumin coriander or paprika added to your recipe will make it taste savory. If you’re thinkinking marjoram, tarragon, or thyme you are correct. Desserts can be savory too! Just add cinnamon cloves or nutmeg.

Best known for its culinary influence, savory is used year round. Summer savory has a spicy aroma that is pungent or peppery and is milder than that of the winter.

So, since we are speaking of savory, this recipe meets that description perfectly! This dish is bursting with tons of flavor. There are so many and they combine beautifully to make this a truly mouth-watering side.The smoked paprika stimulates curiosity in your taste buds. The olives and roasted peppers provide a rich, wonderful mix of taste and texture.I did not use the smoked almonds but feel free to put them it. I also used parsley instead of cilantro, since I am not a fan of it. This side was so absolutely delicious, I could not stop eating it. It is definitely going on my Thanksgiving menu. 

This recipe is courtesy of Simple, by Diana Henry, and will serve 6 to 8 people who will be amazed by this scrumptious and piquant dish. 

Ingredients for Smoky Couscous

1 1/4 cups couscous
1 1/4 cups boiling chicken or vegetable stock, or just boiling water
1/4 cup olive oil, divided
1 large onion, very finely sliced
2 garlic cloves, minced
1 1/2 tsp. smoked paprika
Juice of 1 lemon
2 tbsp. extra virgin olive oil
1//3 cup pitted green olives, coarsely chopped
2 1/2 tbsp. smoked almonds, coarsely chopped
A few roasted bell peppers from a jar, torn or chopped (optional)
Leaves from a small bunch of cilantro, chopped
Salt and pepper

Sprinkle the couscous into a bowl, pour the hot stock or water over it, and add half the regular olive oil.

Cover with plastic wrap and let it stand for 15 minutes.

Heat the remaining regular olive oil in a skillet and saute the onion over medium heat until soft and golden.

Add the garlic and smoked paprika and cook for a further minute.

Fork the couscous through. It should be fluffy, and not wet (if it is dry, add no more than 3 tablespoons extra stock or water and let it stand for a little longer).

Fork the onion mixture into the couscous.


Add the lemon juice, extra virgin olive oil, olives, almonds, bell peppers (if using), and cilantro.

Season with salt and pepper.

Gently toss together and serve warm or at room temperature.

It’s that simple!

signature

[recaptcha]


We have all had one of those days in the kitchen, where just about everything goes wrong. I am not a stranger to this. In fact, my mistakes have served me well and I have learned a lot from them. Here are some common cooking mistakes that myself and many others have made before.

Soggy salads. Even more of a pet peeve of mine than overdressing a salad, are you surprised? It is important to wash all of your greens, and it is just as important to dry them. I usually wrap them in paper towels to dry to get the best outcome, however, you could also use a salad spinner. I just find that it doesn’t dry the greens enough for me. They must be dried thoroughly or leafy greens will sit droopily in the bowl.

Overcooking hard-boiled eggs. Yes, it’s possible, and most people are probably guilty of this. After you boil an egg, check out the yellow part. If it is at all green around the edges, you have overcooked it! I have tried many methods and find this to work the best; place eggs uncovered in the pot emerged in water (about 1 1/2-inches over the eggs). Bring water to a boil, (you have to watch it) and take off the heat, cover them and set aside for 12 minutes. Pour them into the ice bath to stop the cooking process, then allow to cool for 15 minutes before peeling.

Cutting meat too soon. If you don’t let your meat sit for a bit before slicing, all the delicious juices will run out, leaving it dry. It is best to allow cooked meat a bit of downtime after removing it from the heat. This helps to re-disperse the juices so they stay inside. For smaller meat, like steak or chicken, give it about 5 minutes. For larger meats, such as a rib-roast or turkey, let stand for about 20 minutes. Loosely cover them with tin foil to keep it warm.

Overcooked turkey/roast. There is a simple solution for this. Use a meat thermometer. This takes all the guesswork out of the cooking process. Remember, always cook meat no less than 10 minutes of cooking time in instructions. The instructions usually do not allow for cooking time once you remove it from the oven.

Now on to our recipe for today!

As promised, this is another great recipe to make for Thanksgiving. Whenever I want something easy that I know will also be special, I turn to Ina Garten. She comes through every time. This is something you can get to the table in no time. Roasted tomatoes are so yummy, and here Ina combines them with thyme and parsley giving it a savory aroma. This is spot on, easy and delicious. There is no reason not to make it.

This recipe will serve 6 people who will praise you for introducing them to this simply delectable dish!

Ingredients for Cherry Tomato Gratin

3 pints cherry or grape tomatoes, halved
1 1/2 tbsp. plus 1/4 cup olive oil
1 tsp. dried thyme
Kosher salt and freshly ground black pepper
3 large garlic cloves, peeled
1/3 cup chopped fresh flat-leaf parsley
2 cups coarse bread cubes from a country bread (crusts removed)

Preheat oven to 400°F.

Place the tomatoes in a 9 x 13-inch ceramic dish.

Add the 1 1/2 tablespoons of olive oil, thyme, 1 teaspoon salt, and 1/2 teaspoon pepper and toss together.

Spread the tomatoes evenly in the pan.

Place the garlic, parsley, and 1/2 teaspoon of salt in the bowl of a food processor fitted with the steel blade and process until the garlic is finely chopped.

Add the bread cubes and process until the bread is in crumbs.

Add the 1/4 cup of olive oil and pulse a few times to blend.

Sprinkle the crumbs evenly over the tomatoes.

Bake the gratin for 40 to 45 minutes, until the crumbs are golden and the tomato juices are bubbling.

Serve hot or warm.

It’s that simple!

signature

[recaptcha]