Most of the meals I make are simple, clean and healthy.  However, when I have company I often make exceptions. You will see in future blogs that there will be many dishes that aren’t necessarily diet-friendly, but rather are indulgent and delicious! This upside-down apple french toast souffle is one of them!

 My niece Leslie gave me this recipe for Mother’s Day.  I consider myself fairly adept at scanning ingredients and judging whether a recipe will be tasty. Leslie had already tried this one with her friends, and it was a hit, making the decision easy for me.

When you look at these ingredients, what could be bad? Well, nothing! It certainly lived up to all expectations and, as I have said before, it is a crowd pleaser. I made it again for Father’s Day, taking pictures to make following the steps easier. No one complained!

I made it for two consecutive celebrations and everyone loved it the second time as much as the first.

I am sure you will too!

Ingredients for Upside-down Apple French Toast Soufflé
1 cup brown sugar
½ cup margarine or butter, melted
1 tsp. cinnamon
3 apples, cored, peeled and thinly sliced
½ cup raisins
1 challah, cut into 1 inch cubes
2 – 8 oz. packages of cream cheese cut into 1 inch cubes
12 eggs
2 cups whole milk
1/3 cup maple syrup


Spray 13×9 inch baking dish liberally with baking spray.
Combine the brown sugar, butter and cinnamon. Spread over the bottom of the baking dish.


Place thinly sliced apples on top of the mixture.

DSCF0337

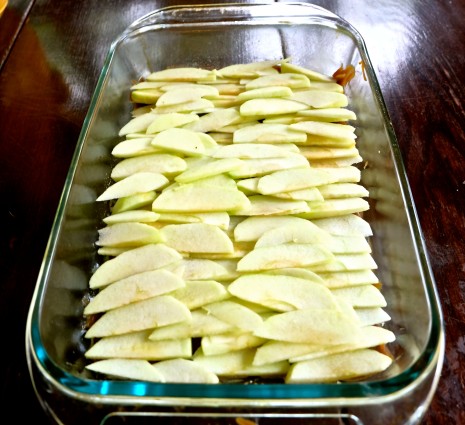
Sprinkle raisins on top.

Place half of the challah on top of apple raisin mixture.

Place the cubes of cream cheese over the challah.

Put remaining challah on top of cream cheese.

In blender mix eggs, milk and syrup.

Pour this mixture over the challah. Make sure to moisten every piece, including the top.

Cover and refrigerate overnight.

DSCF0367

Preheat oven to 375.

Bake covered for 35 minutes.

Uncover and continue to bake until top is lightly brown, about another 15-20 minutes.

DSCF0397

Let cool for 15 minutes.

Then flip over onto serving platter.

IMG_0112

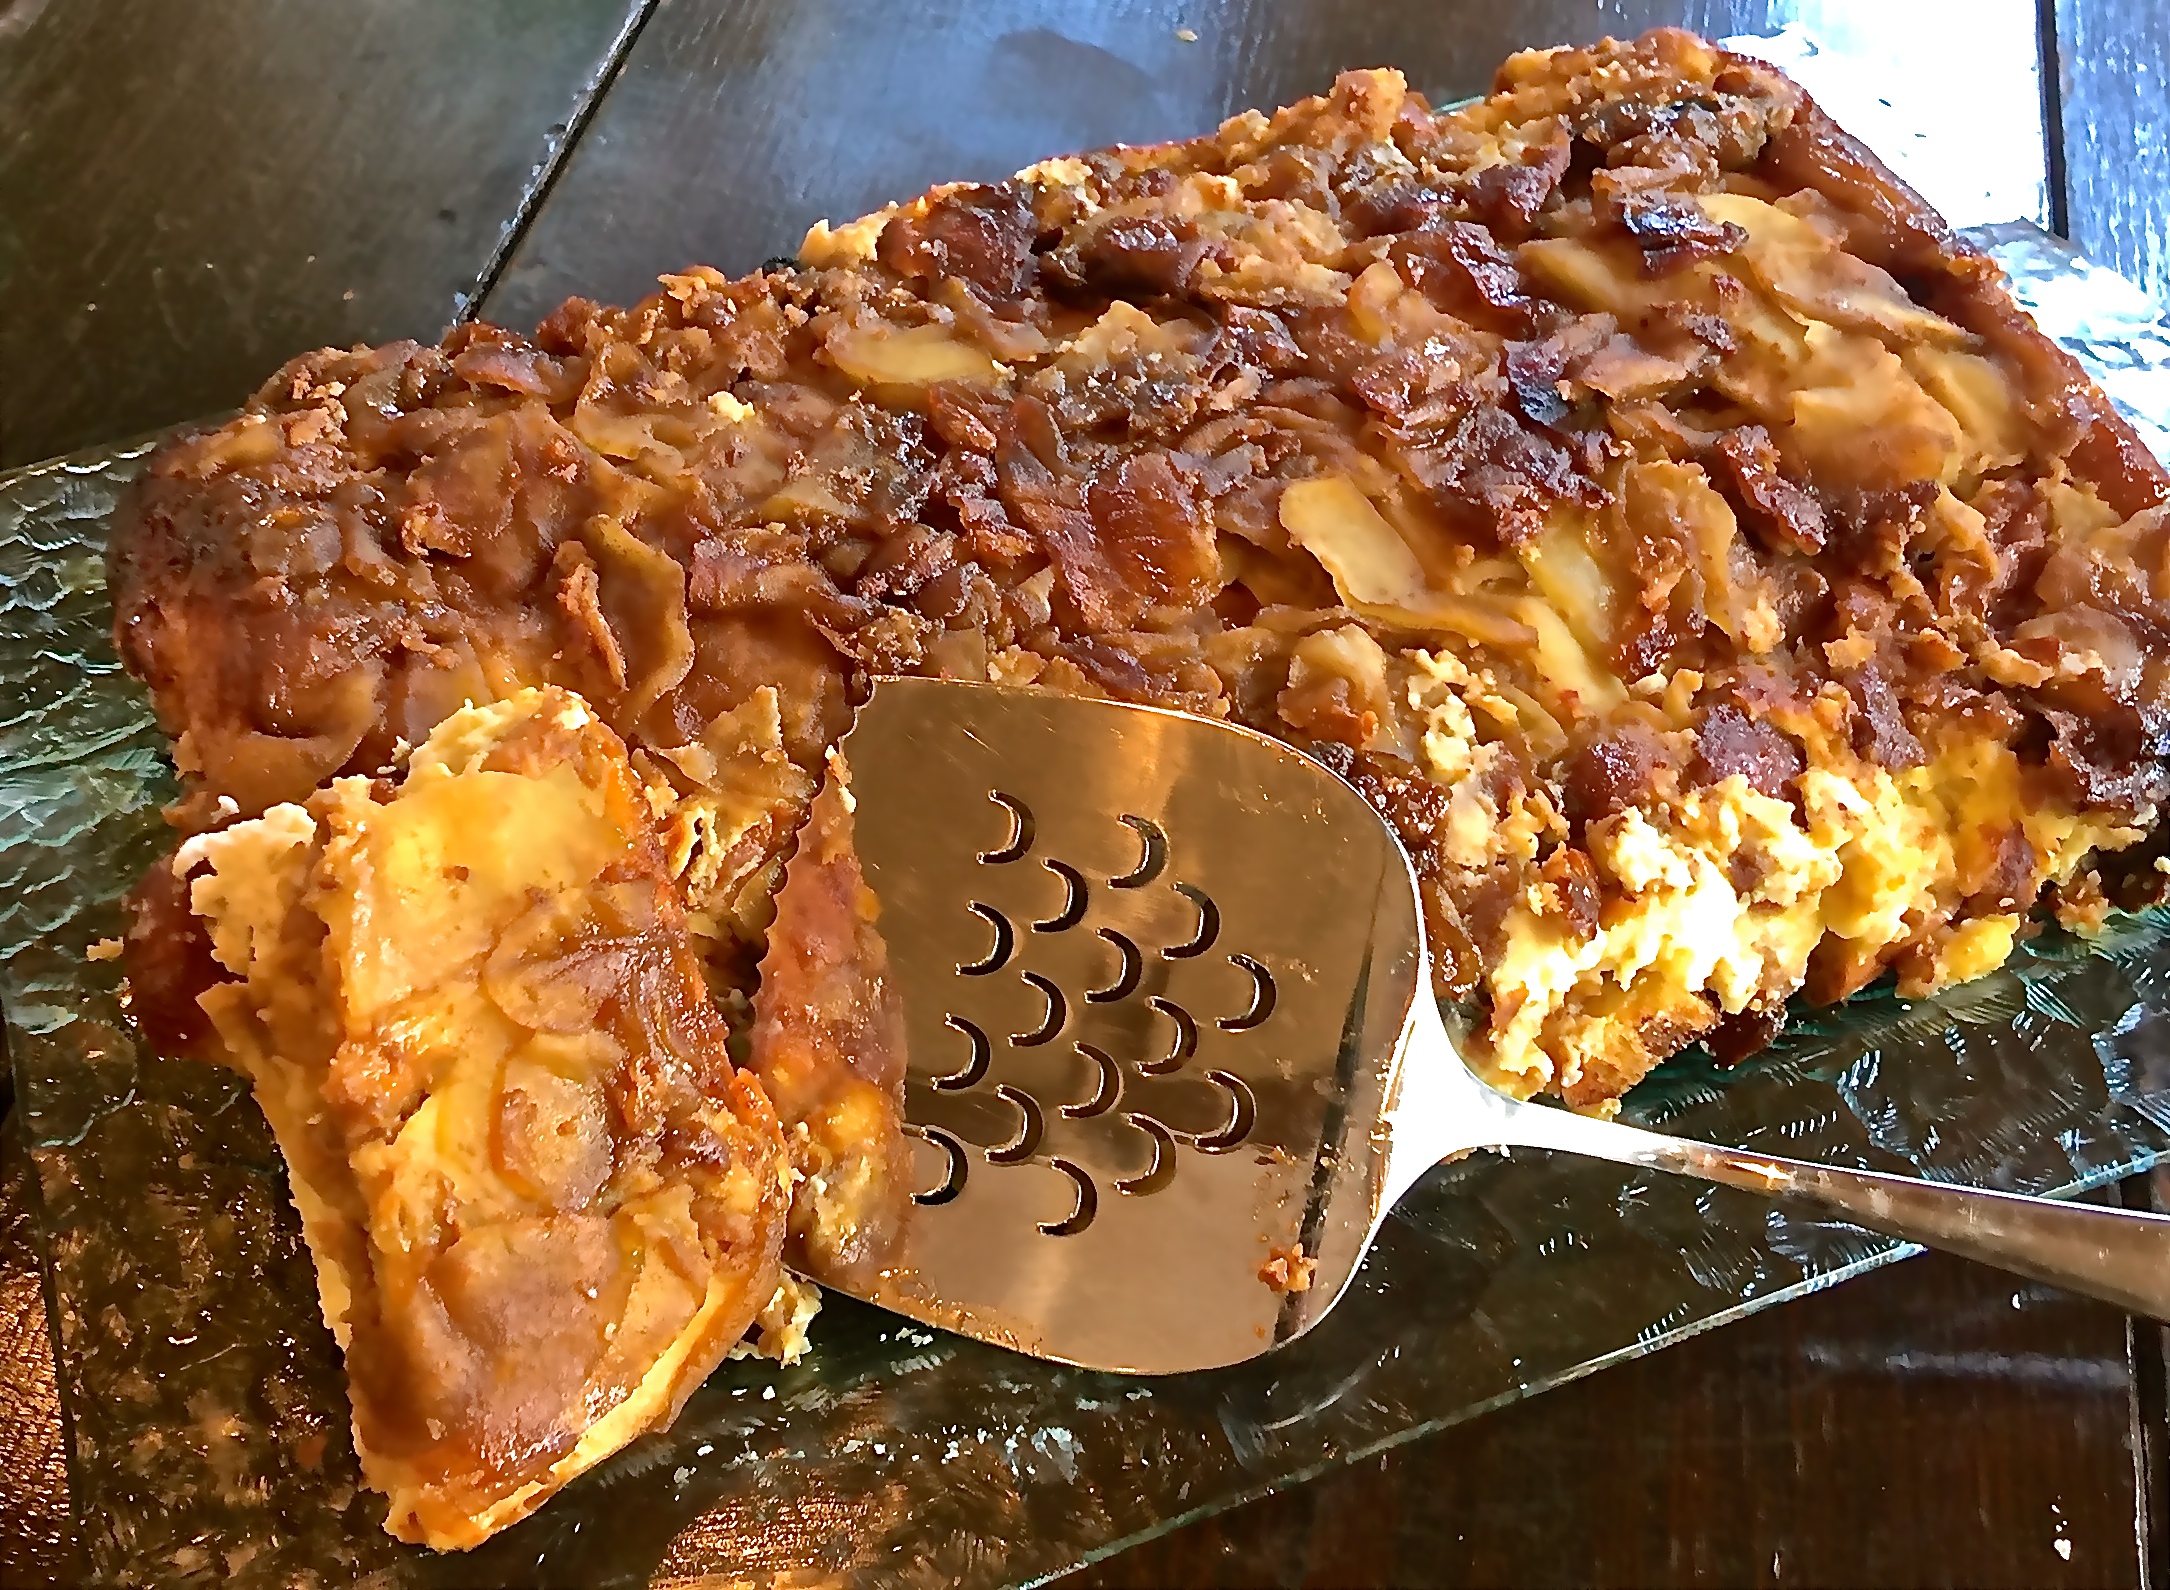
It’s that simple! It is also scrumptious! Hope you try it!

signature

[recaptcha]


I was lucky enough to get this recipe from my cousin Alan’s mother, Vera.

She is a lovely lady, born and raised in Germany. Her cooking and baking skills are amazing! She is the real deal and has authentic European knowledge.

She cooks without measuring, so it is quite a challenge trying to get a recipe from her. For this recipe, I made her simplify the ingredients so I could pass it on to you. Little did I know, when she  grew up in Germany, they weighed all the ingredients!

When I tried this recipe myself, it was difficult to convert it to the exact measurements that were necessary for me to bake it. After many phone calls to Vera, I succeeded! 

The season for these Italian plums used in this recipe is very short. When I tried to find them in my market they were called, “plum apricots”. If you can not find them, I am sure you could use apricots, apples or small peaches instead. 

IMG_1386

Whatever you use, be sure to try this recipe. It is easy and so delicious!

Ingredients for the Tart

5 pounds Italian plums (also known as plum apricots), pitted and cut open almost to the bottom, but not all the way.

DSCF0744
2 cups of flour
1/2 cup of sugar
1 egg
1 stick of margarine or butter, room temperature
1 tsp. vanilla
1 1/2 tsp. baking powder
Pinch of salt
1/2 tsp. milk if needed

Place all ingredients in a bowl, with the exception of the milk.

With your hands, gently knead mixture together. If the ingredients are not molding into dough or if they are dry, add the milk and continue to mix.

Roll up dough and place into  the refrigerator for 1/2 hour.

Set oven to 375.

Grease baking pan with margarine or butter, including the sides.

When dough is ready, press onto baking pan, including the sides.  You can use a rolling pin or the side of a glass to help you.

Put plums in rows onto dough, alternating them. (For example, place plums vertically for the first row and horizontally for the second row).

Bake for 30-40 minutes, on the bottom rack in oven. Start checking tart at 30 minutes. You want the dough to be a caramel-like color.

Let cool. Sprinkle sugar over tart.

Eat and be happy!

IMG_1408

It’s that simple!


signature

[recaptcha]


What makes a great salad? One that everyone asks for over and over again, of course! This salad stands out because of the ingredients I use. They compliment each other perfectly! 

This one has my “go to” staple; anchovies! It also includes other flavors that blend with the anchovies to make each bite both satisfying and enjoyable.   My family loves it and I often serve it when hosting a dinner or holiday get-together. 

The dressing is like icing on a cake… you can use it on any salad and it is very easy to prepare! I make all my salad dressings fresh, and you should too. However, that discussion is for another blog post that you will get to see very soon!

Try this one! It will soon be a favorite for your family, as well!

Ingredients for the Salad

1-2 heads romaine lettuce, chopped
3 red bell peppers, cut into cubes
2 english cucumbers, seeded and cut into cubes
2 (1) pint grape tomatoes, cut in half
6 eggs, hard boiled, grated
8 anchovies, chopped (feel free to use as much as you want)
2 tbsp. capers

Today’s Hint: An easy way to cut a red pepper!

First, cut off the bottom of the pepper.

DSCF0688

Now cut off each side the pepper, trying to cut between the white parts.

DSCF0689


Now you have separated the seeds and stem and can just throw it away! No washing all the seeds off the pepper!

DSCF0694

If needed, cut off any remaining white parts.

DSCF0695

Just cut the red pepper into cubes- it’s easy and makes no mess!

Make sure all ingredients are dry and place them into a large serving bowl.

DSCF0703

Don’t forget those delicious anchovies. When you chop them up, people won’t even know they are there!

DSCF0705

Ingredients for the Dressing

3 tbsp. mayonaise
1 clove garlic, minced
3 tbsp. balsamic vinegar
Juice of 1/2 lemon
2 tsp. dry mustard
1 1/2 tsp. Kosher salt
1/2 tsp. pepper
1/4 cup of olive oil

Mix all ingredients into a bowl, with the exception of the olive oil.

Very slowly, while still whisking, add olive oil.

DSCF0720

I do not like to dress the entire salad, unless I am serving it for a large crowd. If you do, add dressing very slowly, mixing each time you pour in some of the dressing. When salad has a little glisten to it, STOP!

Nothing is worse than an overdressed, soggy salad! So be mindful when you add the dressing.

You can also place the dressing in a small pitcher and have each person dress their own portion.

This is great for lunch, brunch or dinner.

I hope you enjoy it as much as my family does!

Please drop me a message and let me know!

It’s that simple!

signature

[recaptcha]


I just love this dinner! It is always my go to when I need to get a meal on the table fast. The next time you are trying to figure out what to make and may be thinking take-out, reconsider! By the time you figure out where you want to order from and who wants what, this can be prepared and on the table!

I am going to offer two ways to make the chicken. The first one you may choose to make if you have the time, or are having company. The second will be faster. Neither one takes long to prepare. Both will result in a moist, delicious bird that your family or company will love.

Broccolini is a vegetable that you don’t see too often in recipe magazines or books. I don’t know why because it is fantastic. It is very similar to broccoli, but with smaller florets and longer, thinner stalks and is also known as “baby broccoli”. It is a very delicate vegetable that only needs to be cooked briefly. This adds up to fast and simple in my book. Try it, I know you will love it!

Preheat oven to 375.

If you have the time, try adding this step first. You will need: (my essence, or yours!)

1 stick of margarine or butter melted
2 tbsp. fresh oregano (or 1 tbsp dried)
2 tbsp. fresh thyme (or 1 tbsp dried)
Juice of half a lemon
2 tsp. salt
1/2 tsp. pepper

Mix all ingredients together.

Take two fingers and place between skin and meat of chicken. Slowly and carefully separate the skin from the meat. (I know this looks bad, but in the end it tastes great!)

IMG_1114


With a spoon, pour melted butter mixture in between the skin and the meat.

IMG_1122

If you do not have the time, skip the first step and just prepare as follows;

Make your essence. Here is mine (just in case you missed it in my previous blog).

2 tbsp. garlic powder
2 tbsp. onion powder
2 tsp. oregano
2 tsp. thyme
1 tsp. kosher salt
1/2 tsp. black pepper
3 tbsp. paprika

Mix and sprinkle all ingredients (without the paprika) over entire chicken.  Make sure to get it under thigh and wings. Pat onto chicken. 

Next trickle on paprika and pat onto chicken as well.

I like to make my roast chicken on a vertical roaster. You can purchase it on amazon and it is very inexpensive. This method allows all the fat to drip down into the pan so you get a perfectly crisp chicken every time. If you don’t have a vertical roaster, you can place the chicken breast side up in a baking pan.

IMG_1125

Place vertical roaster in aluminum pan and put in oven.

Set timer for 15 minutes.

Turn oven down to 350 and roast for 1 hour. You may need a little more or less time depending on the size of the chicken.  Make sure to adjust your timer for 10 minute increments if needed.

Ingredients for the Broccolini

Preheat oven to 500.

3 tbsp olive oil
6 cloves of garlic, chopped
Juice of 1/2 lemon
2 tbsp. balsalmic vinegar
2 tsp. kosher salt
1 tsp. pepper

Wash and trim ends off broccolini. Place in bowl with ingredients and mix well.

Transfer to baking dish. Bake for 10 minutes. Take out when broccolini is bright green. Remember, it will still cook after you remove it from the oven!

IMG_1138

Dinner is done!

It’s that simple!

IMG_0624


signature

[recaptcha]


Tonight, I prepared a meal that is a little bit lighter than usual. I saw this in an issue of Cooking Light magazine and modified the ingredients to my families taste. For example, I substituted provolone cheese for goat cheese, knowing my family would prefer that.

I chose this recipe because it seemed fast, easy and healthy. I am usually right with my assessments. Not this time! It was easy and healthy, but it took much longer to prepare than I had anticipated. Give yourself time to prepare this one. Cooking and shredding the chicken takes time. 

It was worth it! The result was delicious and my family loved it! The dressing was delicate and gave the salad just the right flavor. The quinoa added a nice texture. I hope you try this one!

Ingredients for the Salad

2 cups diagonally cut carrots (sliced thin)
2 tsp. olive oil
1/2 tsp. Kosher salt plus another 1/2 set aside for the dressing
Cooking spray
1 1/2 cups cooked quinoa
1 1/2 cups shredded skinless boneless chicken breast
1/2 pound provolone cheese
1 1/2 cups cherry tomatoes, halved
1/2 cup thinly sliced green onion
1/2 cup fresh parsley leaves, chopped

Ingredients for the Dressing

5 tbsp. plain reduced fat greek yogurt
3 tbsp fresh lemon juice
1 1/2 tbsp honey
3/4 tsp cumin
1/2 tsp black pepper

Combine yogurt, salt, lemon juice, honey, cumin and pepper into a bowl and whisk together. Set aside.

Preheat oven to 450.

Combine carrots, oil and 1/2 tsp. salt and toss.

IMG_0693

Lay out onto flat baking sheet coated with cooking spray. Place in oven for 15 minutes until tender. Set timer! If they brown and carmalize, even better!

Lower oven heat to 350. 

Season both sides of chicken with salt and pepper. Place in oven for 20-25 minutes, depending on the thickness of each breast. Set your timer! Reset timer for 5 minutes increments if they are not fully cooked until they are ready to come out. Remember they will continue to cook when you remove them from the oven, so allow time for that or you will have overcooked chicken breasts!

When they have cooled, shred chicken into small pieces.

Cook quinoa according to package directions. allow it time to cool.

Todays hint: When you are washing any kind of salad greens, put them into a bowl filled with cold water and a teaspoon of lemon juice or white vinegar. Let them sit for a while. All of the dirt will fall down to the bottom of the bowl. Gently lift greens out of bowl. Rinse them one more time under water. Set greens on paper towels and gently roll the greens up in the towel to dry. Make sure you dry the salad greens well because any wet ingredient in a salad will make it soggy!

Combine all ingredients into a large bowl.

Dish out each serving separately, and add a small amount of dressing to each dish.

Now this may have taken some time as I said, but it was worth it!IMG_0721

Enjoy!

It’s that simple! Phew!

signature

[recaptcha]