2020 is finally gone!  Hooray! The holidays here were very quiet, just me, the hubby, and my two sons. I was not happy: I missed the festive celebrations with my family and friends. I had no tables to decorate, no menus to plan, no invitations to send. It was very weird for me, and very sad. Sure, it was nice to be with my sons on New Year’s Eve, as all of us usually go our separate ways, but as we rang in 2021, it was unusually quiet. As we watched the ball drop in New York, we remarked that it was strange not to see the crowds of people. All the same, I was glad to say goodbye to the old year and bring in the new one.  I hope that this year will be good and prosperous for all.

Quinoa (pronounced keen-wah) is an ancient crop that has been eaten by the South American people for 5,000 years. It means “mother grain” in the Inca language. While some people refer to it as a grain, it is actually a seed. It is gluten-free, comes in different colors and is just plain delicious!

This hardy little seed looks a little bit like couscous, but is smaller in size and crunchier in texture. Quinoa is rich in lysine, which promotes tissue growth throughout the body, has a very high range of anti-inflammatory benefits and is rich in nutrients such as iron, magnesium, vitamin-E, potassium and fiber. Have I convinced you to try it yet?

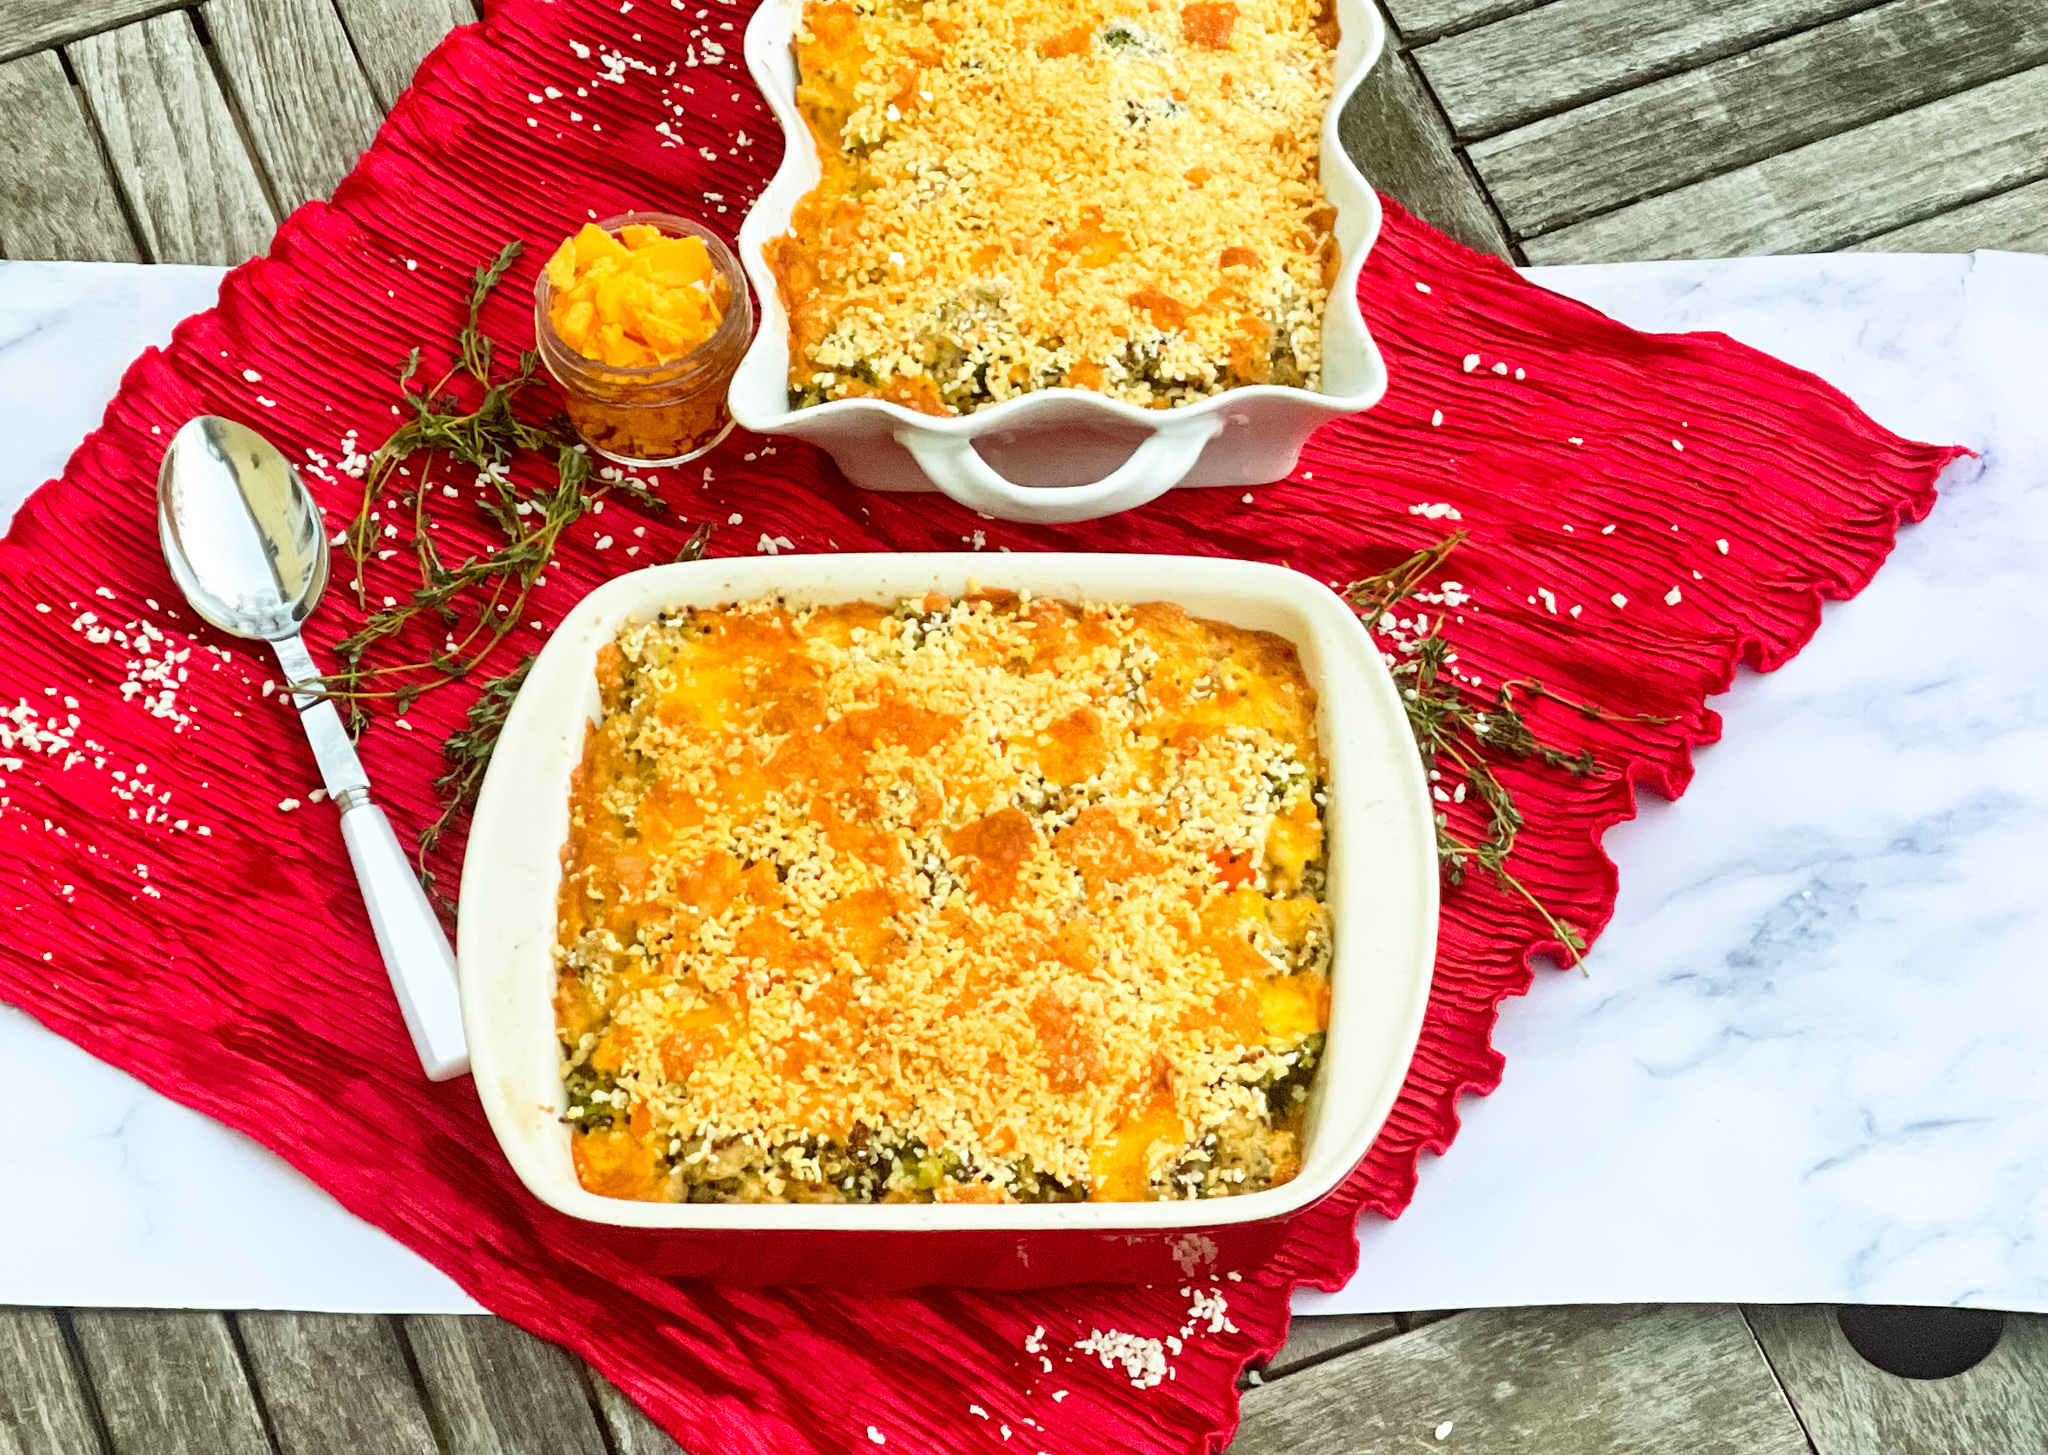
Quinoa is also a very versatile food. It can be used in soups, salads, side dishes, and stuffing. I loved this recipe for so many reasons, foremost because it offers a healthy dish after all the heavily holiday food you may have eaten.  This dish is perfect as a main or side dish. The quinoa flavor is a cross between brown rice and oatmeal, and it is deeeelicious. It is fluffy, creamy (and a little crunchy), and nutty. The broccoli, carrots, and sausage add additional depth, and will leave you happy and satiated if you cook this up as a main course. The thyme gives this dish a mild minty flavor that is savory with a little bit of sweet and peppery at the same time. The crushed red pepper flakes bring it a nice hot kick. It is then topped off with panko crumbs for delightful crunch, and cheddar that adds gooey cheesy goodness. This is the perfect modern comfort food, and I’m sure you and your family will love it!

This recipe is courtesy of Cooking Light and makes 12 servings for all to enjoy.

Ingredients for Cheesy Sausage, Broccoli and Quinoa:

2 ½ cups water 
2 cups uncooked quinoa, rinsed and drained 
1 ½ tablespoons olive oil, divided 
½ cup chopped yellow onion 
½ cup chopped carrot 
4 (4-oz.) links sweet chicken Italian sausage, casings removed 
¼ cup all-purpose flour 
2 tablespoons unsalted butter 
2 garlic cloves, finely chopped 
2 cups whole milk 
2 cups unsalted chicken stock (such as Swanson) 
6 cups chopped fresh broccoli florets 
1 tablespoon chopped fresh thyme, divided 
½ teaspoon kosher salt, divided 
½ teaspoon freshly ground black pepper, divided 
¼ teaspoon crushed red pepper 
½ cup whole-wheat panko (Japanese breadcrumbs) 
4 ounces cheddar cheese, shredded (about 1 cup)

Preheat oven to 400°F.

Bring 2 1/2 cups water and quinoa to a boil in a large saucepan.

Reduce heat; cover and simmer 12 to 14 minutes or until liquid is absorbed.

Remove pan from heat; let stand 5 minutes.

Heat a large Dutch oven over medium-high.

Add 1 tablespoon oil to pan; swirl to coat.

Add onion, carrot, and sausage; cook 7 minutes, stirring to crumble sausage.
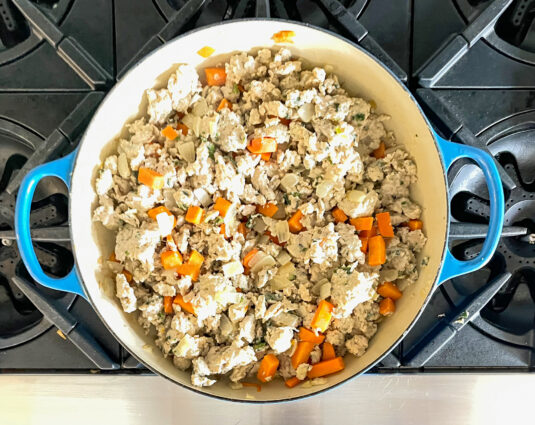
Remove sausage mixture to a bowl with a slotted spoon.

Add flour, butter, and garlic to drippings in pan; cook 2 minutes, stirring frequently.

Add milk and stock; bring to a boil.

Cook 2 minutes, stirring constantly with a whisk.

Reduce heat to medium; stir in broccoli, 2 teaspoons thyme, 3/8 teaspoon salt, 3/8 teaspoon black pepper, and red pepper.
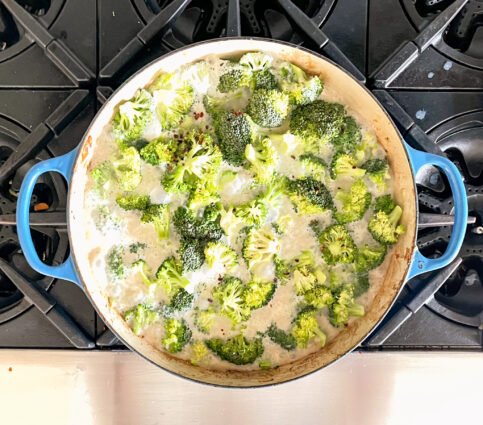
Cover and cook 2 minutes.

Stir in quinoa and sausage mixture.
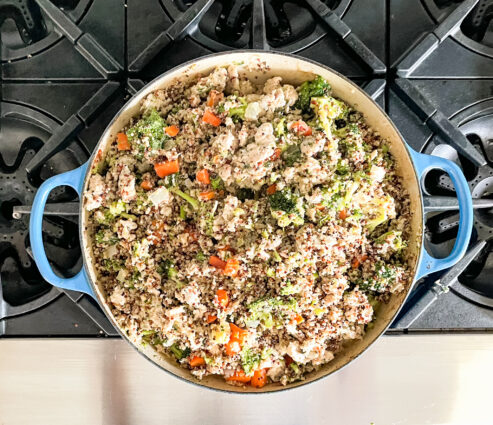
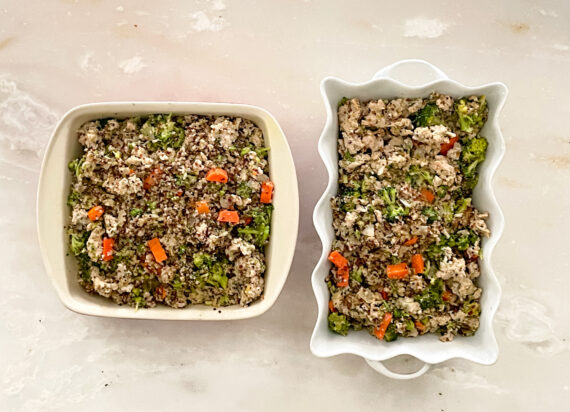
Coat 2 (8-inch) square microwave-safe glass or ceramic baking dishes with cooking spray.

Divide quinoa mixture between dishes.
Combine remaining 1 1/2 teaspoons oil and panko in a bowl; add remaining 1 teaspoon thyme, remaining 1/8 teaspoon salt, remaining 1/8 teaspoon black pepper, and cheddar.
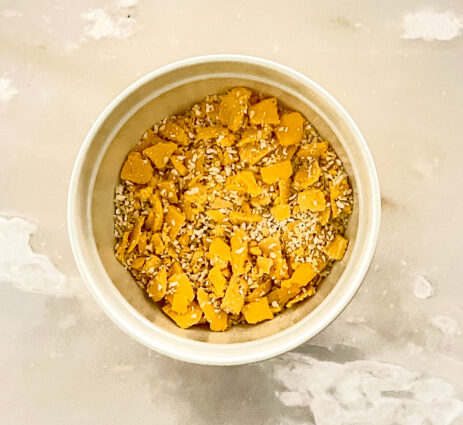
Sprinkle cheese mixture evenly over casseroles.
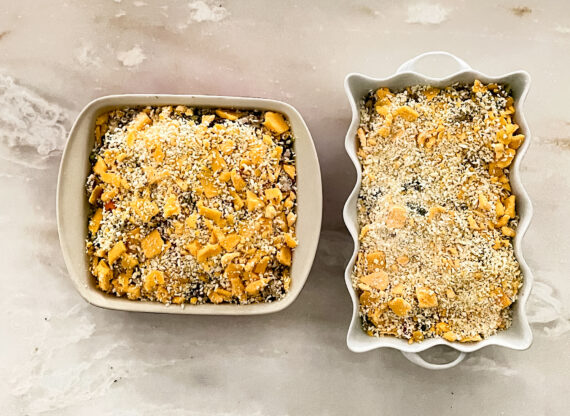
Bake at 400°F for 18 minutes or until browned, or follow freezing instructions.

FREEZE: Cool unbaked casseroles completely; cover tightly with aluminum foil. Freeze up to 2 months. THAW: Remove foil. Microwave at HIGH 20 minutes or until thawed. REHEAT: Cover with foil and bake at 375°F for 25 minutes; then broil 5 minutes or until golden brown.

It’s that simple!
signature

[recaptcha]


After months of “winter,” the colder weather is finally here and for some, it is a very hard time of the year. The shorter days and the sharp cold can cause all of us to feel a little down. Of course, the isolation of the pandemic is making this even worse. I know for myself, I hate the shorter days because I just can’t seem to adjust my schedule. 

We can do all our chores during the morning hours, but once 4:00 pm rolls around and the sun starts to set, we feel like the day has ended. It seems that as soon as I’ve gotten up in the morning, it is time to make dinner. It is not uncommon to feel fatigued, sad, and all around tired. We can find it hard to find the motivation to exercise, go for walks, or even go out at all, because of the cold.

You wake up and it is dark, and as you do your work or chores, find yourself working until dark as well. I think that January is a particularly difficult time, because the holidays have ended and we tend to isolate more and miss getting together with people as well. Our holidays this past year have been reduced to having just immediate family and we have missed seeing our extended family, which makes the post-holiday blues even worse. 

There are some things we can do to make ourselves feel better. Try to minimize the time you spend watching the news. It will make you less stressed and anxious. Focus more on a movie or show that will give you a good laugh. Watch what you eat. According to Very Well Mind, foods high in Vitamin D such as fish oil, milk, orange juice, and yogurt can help to balance your mood.

Get your sleep schedule on the right track. Going to bed at the same time and getting up at the same time will stabilize both your mood and your schedule. Try, and I know this is hard, to do some kind of physical activity, such as yoga, weight training, or some kind of aerobic exercise during the day. Bundle up and take a walk. I know that when I go out for a run or walk, I am cold for a short period of time, but then I warm up and begin to actually enjoy being out. Break up your goals and do them in small increments. Eventually you will see that working up to your goal is much easier than you think.

Or, like me, you can cook. I find it very therapeutic to chop vegetables and follow a recipe through. I feel like I have accomplished something, although I really do hate the cleanup after a meal. But as I clean, I find that doing it in an orderly way can be quite cathartic.

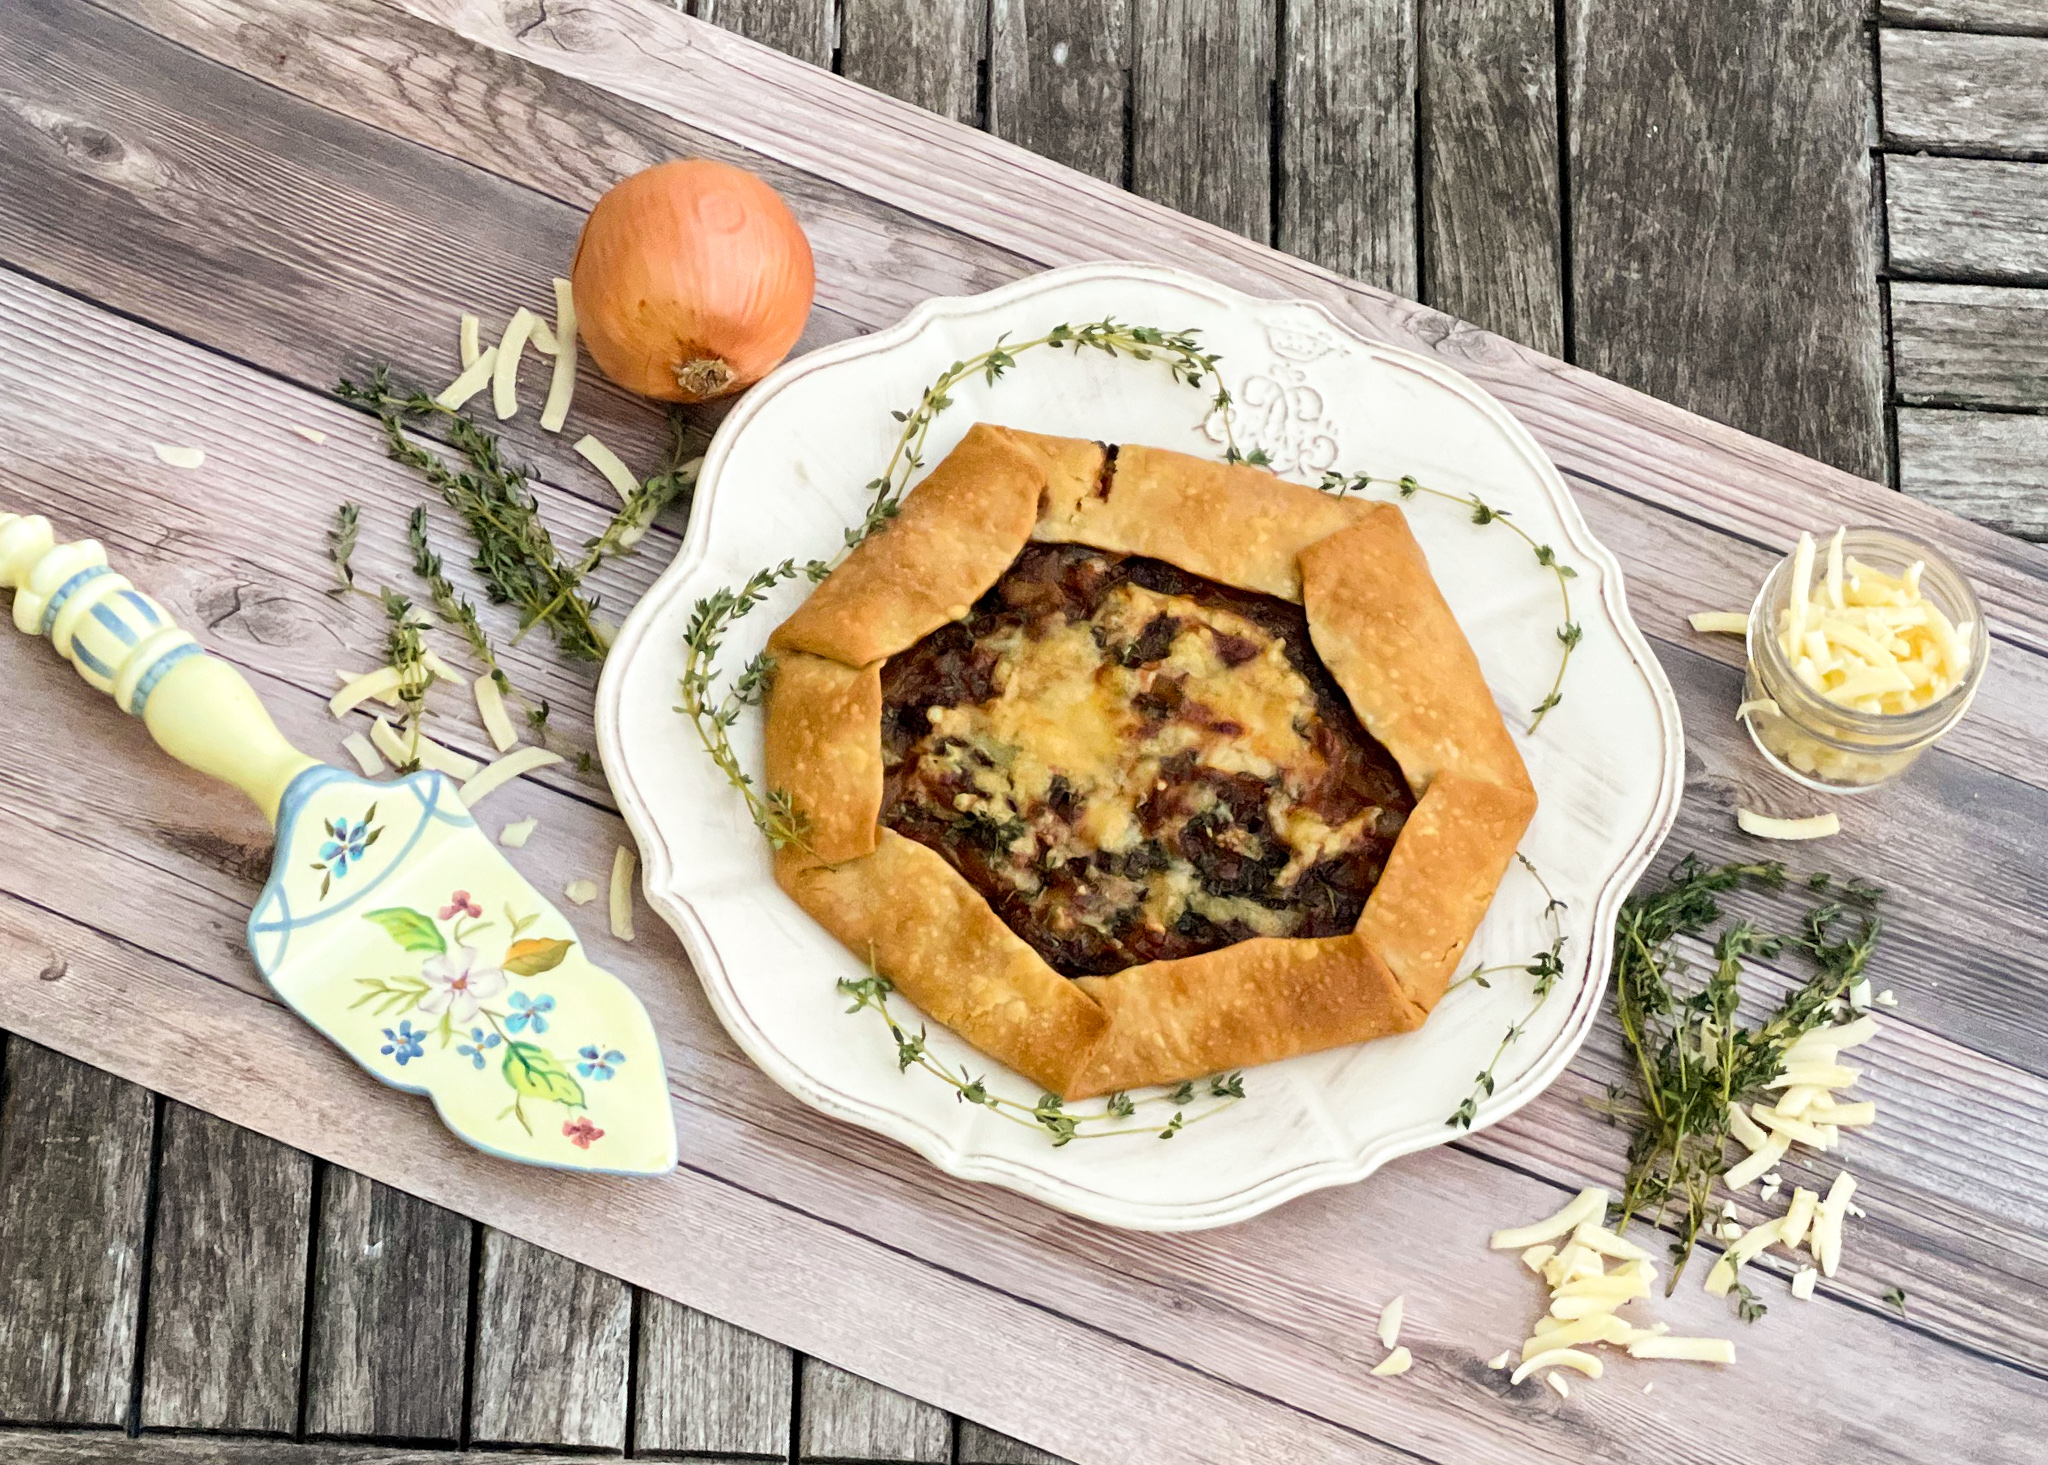
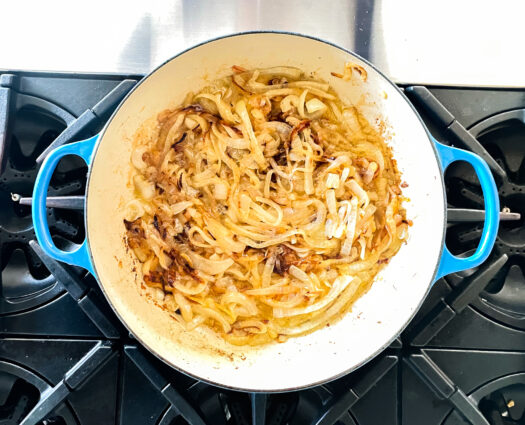
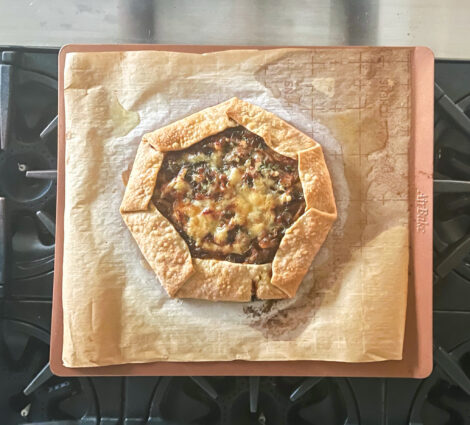
Even better, you can make this delicious tart. Who does not love caramelized onions? This may take you a good bit of time to do, but it is so worth it. If you do not want to make the dough, find some store bought dough like I did, and it will still be wonderful. After you brown up the onions, it is then flavored with balsamic vinegar and thyme, giving this tart a nice savory and tangy flavor. The addition of the cheese adds gooey, cheesy goodness. This tart is worth every minute you put into it, and may just make your day that much better.

This recipe is courtesy of SimplyRecipes and will serve 4 people who will love to relax with this warm and savory winter tart.

Ingredients for Rustic Onion Tart:

1 recipe for butter sour cream pastry dough* or 1 packaged, flat pie crust 
3 medium sized red and/or yellow onions (enough for 5 to 8 cups, sliced)
2 tablespoons extra virgin olive oil
1 tablespoon butter
Salt
1 teaspoon balsamic vinegar
1/2 teaspoon fresh thyme, chopped, or 1/4 teaspoon dried thyme
3/4 cup (not packed) roughly grated Gruyère Swiss cheese

For the Sour Cream Pastry Dough:

1 1/4 cup (160 g) all-purpose flour
1 teaspoon salt
5 ounces of butter (1 1/4 sticks), cubed
1/4 cup sour cream

If you are making the dough:

I admit I bought store made dough and it was still fantastic. If you want to make the dough from scratch, here are the directions:

If you are making a crust from scratch, prepare the dough and let it chill in the refrigerator while you are cooking the onions.

To prepare the dough, whisk the flour and salt together in a large bowl.

Cut the butter into the flour with your hands or with a pastry cutter, until the mixture resembles a coarse meal.

Add the sour cream and use a fork to incorporate it into the dough.

Gather the dough into a ball and shape it into a disk.

Wrap it with plastic wrap and chill for at least an hour.

Peel and slice the onions, lengthwise from stem to root.

Caramelize the onions:

Heat olive oil and butter in a large, heavy-bottomed sauté pan on medium heat.

Once the butter has melted, add the onions and sprinkle a little salt over them.

Cook, stirring occasionally for 10 minutes, until the onions have softened and are translucent.

Reduce the heat to medium low and cook for an additional 40 minutes, stirring occasionally, until the onions are well browned.

Add balsamic vinegar and cook for 10 minutes more, until onions are completely caramelized. Remove from heat.

Roll out the dough:

Preheat the oven to 450°F.

Remove the dough from the refrigerator and let stand for 5 minutes before rolling it out.

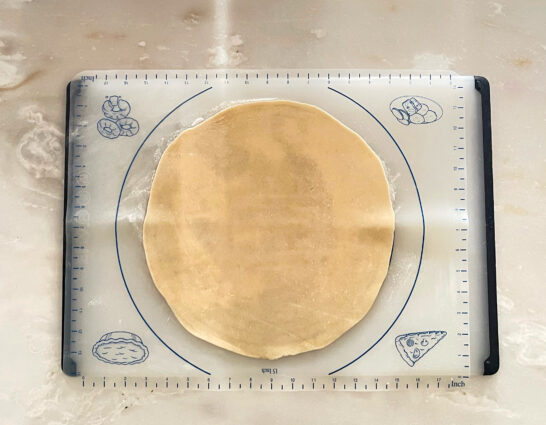
Roll out the dough on a lightly floured surface to a 13-inch diameter.

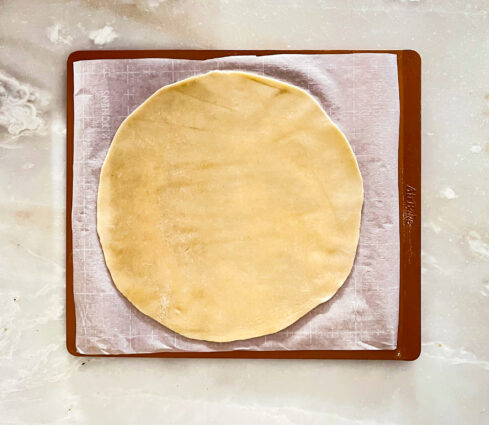
Transfer the crust dough to a cookie sheet lined with parchment paper.

Layer the cheese and onions onto the dough: 

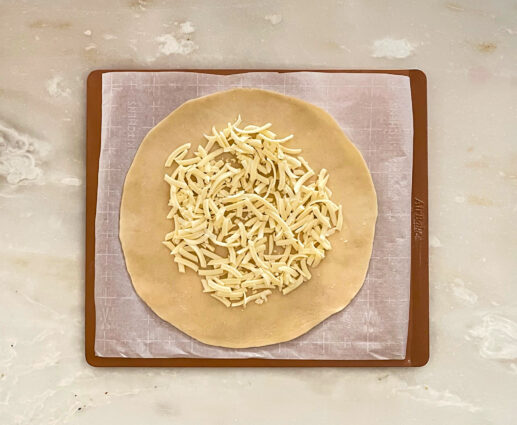
Place all but a couple tablespoons of the cheese in the center of the dough.

Spread to within 1 1/2 inches from the edges.

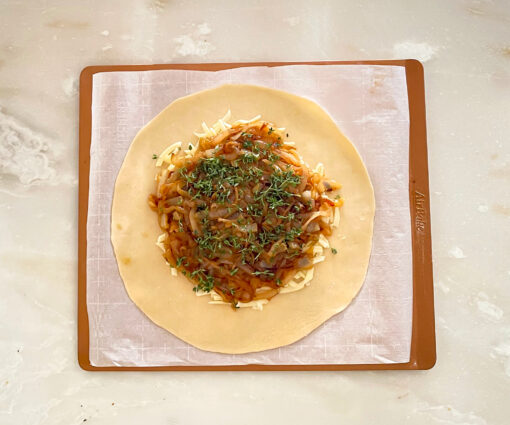
Add the caramelized onions, layering them on top of the cheese.

Sprinkle with thyme.


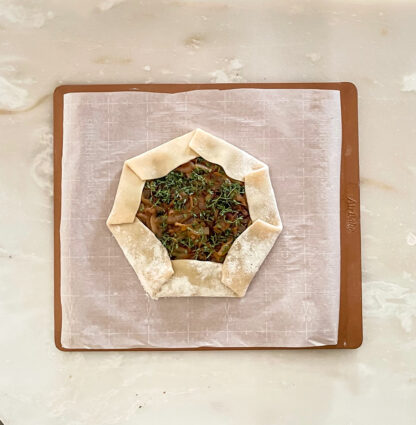
Fold the edges of the crust dough over so that a small circle of onion is still showing in the centre of the tart.

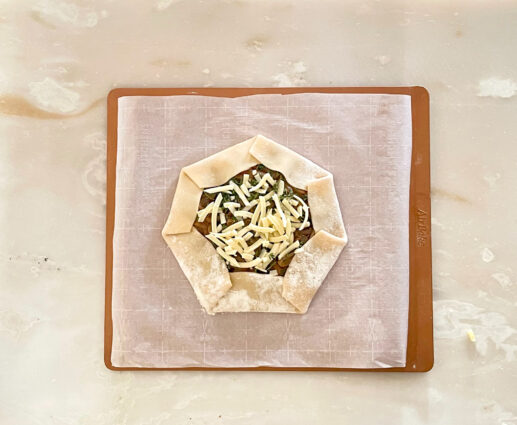
Sprinkle the remaining cheese over the top of the tart.

Place in the oven on the middle rack.

Bake for 10 minutes at 450°F.

Reduce the heat to 350°F and bake for an additional 20-25 minutes, until the crust is golden brown.

Remove from oven and let sit for 10 minutes before serving.

It’s that simple!

signature

[recaptcha]


Unfortunately for me, I was sick this Thanksgiving. Like so many of you, our holiday guest list this year was reduced to only our immediate family, but even still, I wasn’t sure if I would be able to make it downstairs to the kitchen, let alone make some semblance of a Thanksgiving meal for my family.

I am writing to tell you all this, because I made mistakes making the turkey (I’ll blame it on the illness) and I think we all can learn something from it. I usually make two 20 pound turkeys, but this year, I only needed to make one, and boy did I mess it up.

Thankfully, I had a nearby relative come and dress the turkey the night before so it was ready to take out and place in the oven on Thanksgiving. Thursday morning, I slowly (very slowly) made my way downstairs to finish dressing the turkey and put it in the oven. I am going to share with you how I usually make my turkey, and more importantly, where I went wrong.

Usually, I place the turkey in a snug roasting pan. I put it in the oven at 425 degrees F. for 40 minutes uncovered so it browns up beautifully. Then I take it out, cover it very, very tightly with aluminum foil, and turn the oven down to 350 to continue the cooking.  Covering it so snugly lets the turkey steam, and not cook, so you are more likely to have a nice, juicy turkey. 

I followed my instructions, but after I covered the turkey, I forgot to turn the oven down. I placed a meat thermometer in the turkey so I could follow the cooking process and take it out at the temperature I usually do. As I watched the thermometer, the temperature began to accelerate at a very fast rate. Not remembering that I did not turn down the temperature, I was truly baffled as to why this was happening. I took the bird out when it hit 150 degrees. The recommendation is 165 degrees, but remember, the turkey will continue to cook when you remove it from the oven, so you have to take it out, (as you do with any poultry or meat), ten degrees sooner than the recommendation.

I really was bewildered that the turkey cooked so rapidly. After I removed the turkey from the oven, it did not continue to cook as it usually does. The temperature was the same as when I took it out of the oven. When my husband began to carve the turkey, it was slightly raw. I told him to continue to carve it. We then placed all the meat back into the pan with all the juice that it had made when it was cooking. That’s when I realized the oven was still at 425 degrees. I turned it down, and placed the carved turkey back into the oven for 30 more minutes, hoping that it might be fully cooked after that.

To my surprise, the turkey was cooked perfectly. It was the best turkey I think I have ever made. We all make mistakes in the kitchen, and, as I have told you before, it is singularly the best way to learn. It reminds me of learning to ride a bicycle– how many times do we have to fall before we master it? When I learned to ride a bike, I knocked out my two front teeth but I didn’t let it stop me. Soon I was riding with no hands and loving every minute of it. When I fell, I just picked myself up and got back on. Learning takes time, patience and lots of bumps.  

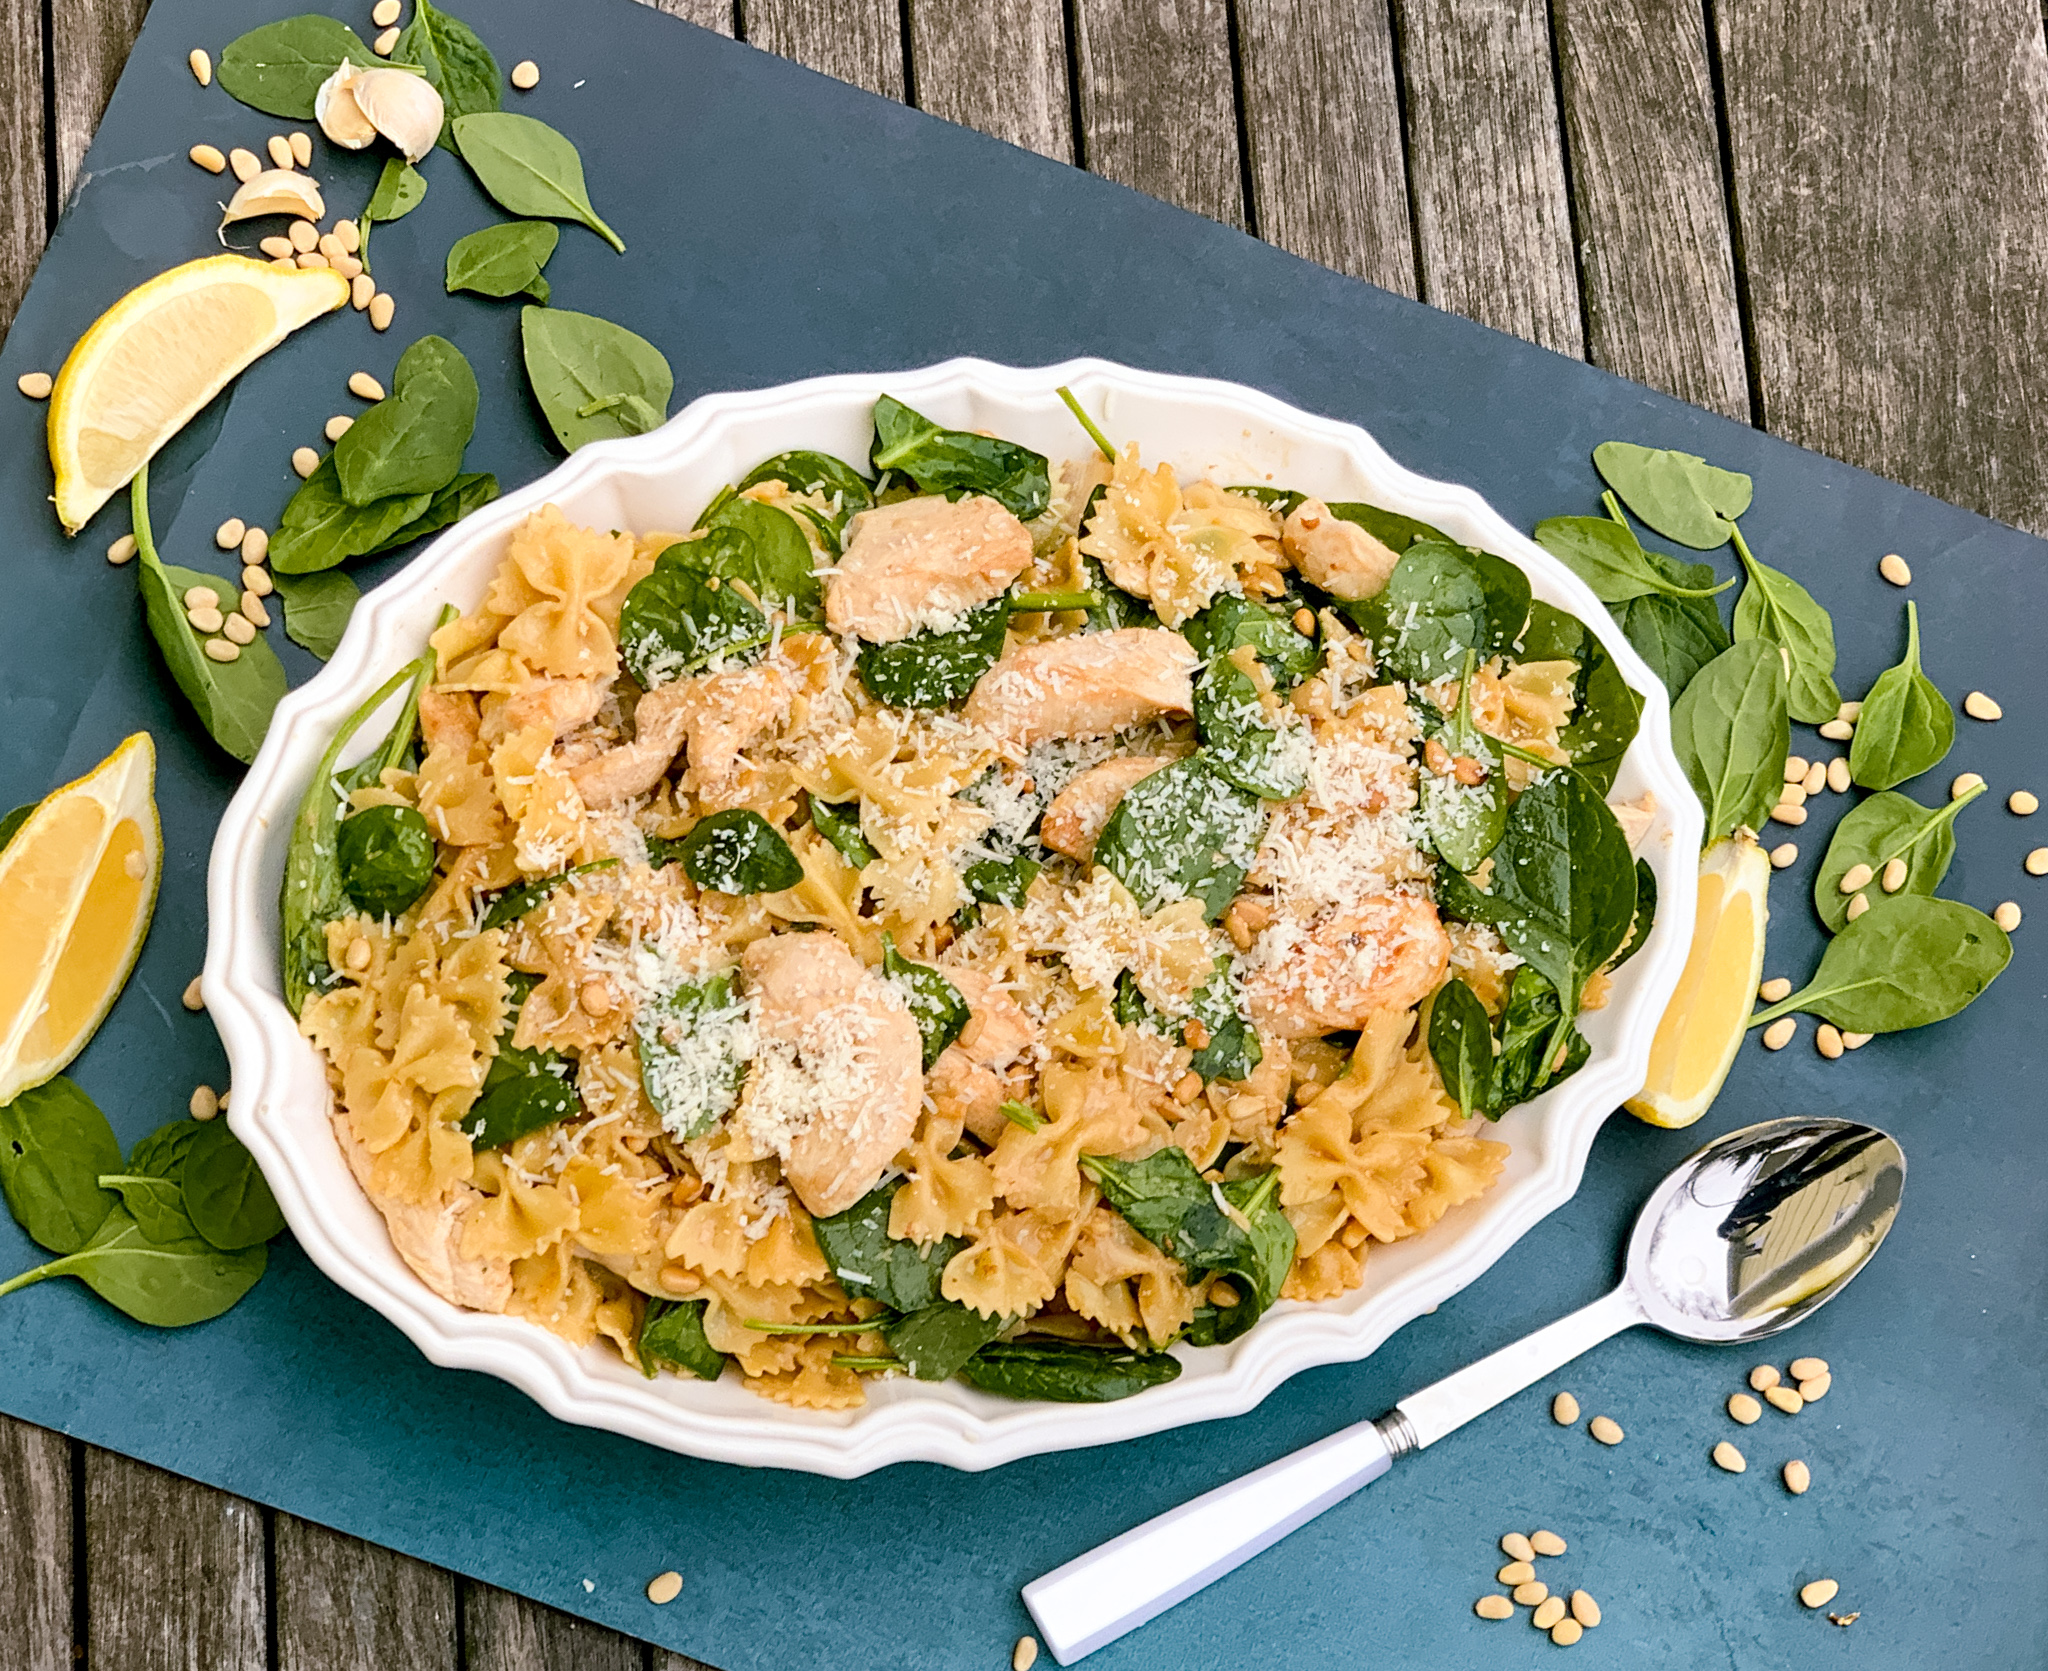
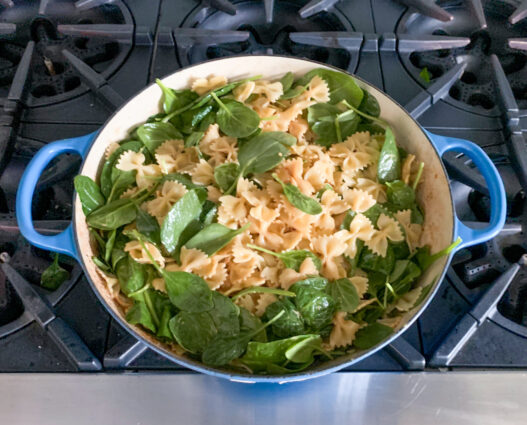
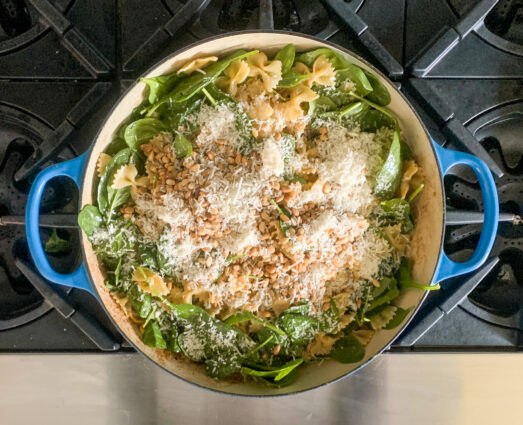
This is one recipe you won’t have to worry about messing up. It is so easy to make, and is packed with delicious, home cooked flavor. The chicken breasts are cooked in butter, giving them a delightful sweet flavor. It is then combined with heavy cream, which adds a creamy, delicate sauce. The sauce is flavored with garlic, pine nuts, and spinach which provide the savory goodness to this dish. The lemon juice and zest delivers a nice tang and the Parmesan cheese makes this dish perfection.

This recipe is courtesy of America’s Test Kitchen and will make a beautiful main dish for 6 to 8 people.

Ingredients for Chicken and Spinach Farfalle:

2 boneless, skinless chicken breasts (about 3/4 lb.), cut crosswise into 1/4″ thick pieces.
Salt and pepper
2 tablespoons unsalted butter
2 garlic cloves, minced
1/2 cup heavy cream 
2 tsp. grated zest and 3 tablespoons juice from 1 lemon
1 lb. farfalle pasta (Bowtie)
1 6oz bag baby spinach
1/2 cup grated Parmesan cheese
1/3 cup pine nuts, toasted

Bring 4 quarts. of water to a boil in a large pot. 

Meanwhile, pat chicken dry with paper towels and season with salt and pepper. 

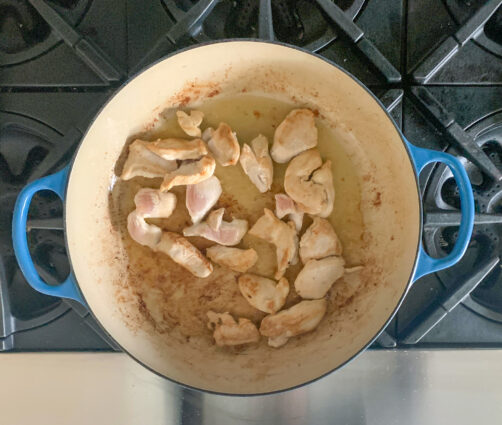
Melt 1 tablespoon butter in large skillet over medium-high heat. 

Cook half of chicken until no longer pink, about 3 minutes, transfer to plate. 

Repeat with remaining butter and chicken. 

Add garlic to empty skillet and cook until fragrant, about 30 seconds. 

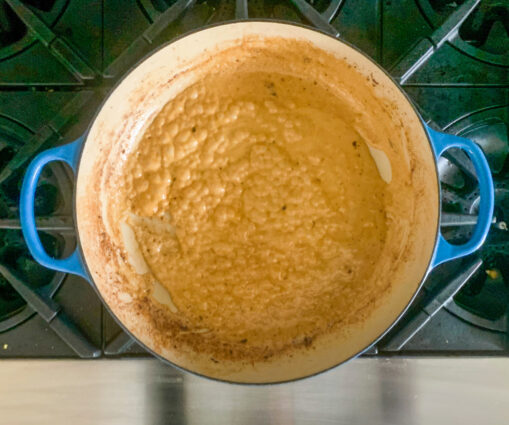
Stir in cream, lemon zest and juice, and simmer until sauce is slightly thickened, about 5 minutes. 

Remove from heat and cover. 

Meanwhile, add 1 tablespoon salt and farfalle to boiling water and cook until al dente. 

Reserve 1/2 cup cooking water, drain pasta, return to pot. 

Toss in spinach.

Add Parmesan, pine nuts, and cooked chicken to pot and toss to combine, adding reserved pasta water as needed.


Season with salt and pepper. 

Serve. 

It’s that Simple!


signature

[recaptcha]


When I was growing up, our holidays were big, bright, and festive. My mother was one of eight, and all of her brothers and sisters, and their many children, would gather at my aunt’s home in Brooklyn. I have 24 first cousins, so you can imagine what a ruckus it was. Some of them have moved away to other states, but most live within the tristate area, and we try to see each other, or at least keep in touch, on a regular basis. With our immediate families growing, having them all for the holidays would be impossible, although our kids would love it if we could.

During the holidays with all of my family, the women would be in the kitchen to help with the cooking. My mother’s family was a loud crowd, and instead of helping, I would slip somewhere quieter, or help to set the table. A loud kitchen was not for me, nor did I have one bit of interest in learning to cook– I was far too much of an independent spirit for that. 

After the meal came the clean-up. My mother taught us how to keep up with the dishes, washing and drying them before the next course was served. This was one chore she insisted that we learned, and to this day, I follow her instructions to the letter. We were not allowed to go to sleep until everything was washed, dried, and put away. The house had to look as if no one had ever been there. This helped tremendously when I first started having dinner parties, because I had the whole night down to a science. I only wish that I had made sure to spend more time in the kitchen, learning the secrets of the women in my family.

Now of course, I have my own repertoire of recipes.  I know my mom would be proud of me for this collection, but I think her greatest joy would come from watching me carry out all the lessons she taught me.  Her efficiency helped me look like I knew what I was doing, even as I struggled through food prep and cleanup for my friends.  The tidiness that she instilled is absolutely crucial (though less so this year) for hosting parties, and I am lucky to have learned from such a graceful hostess.  I am thankful for the lessons my mom taught us, and I like to think she is with us every year smiling proudly at the family she raised.

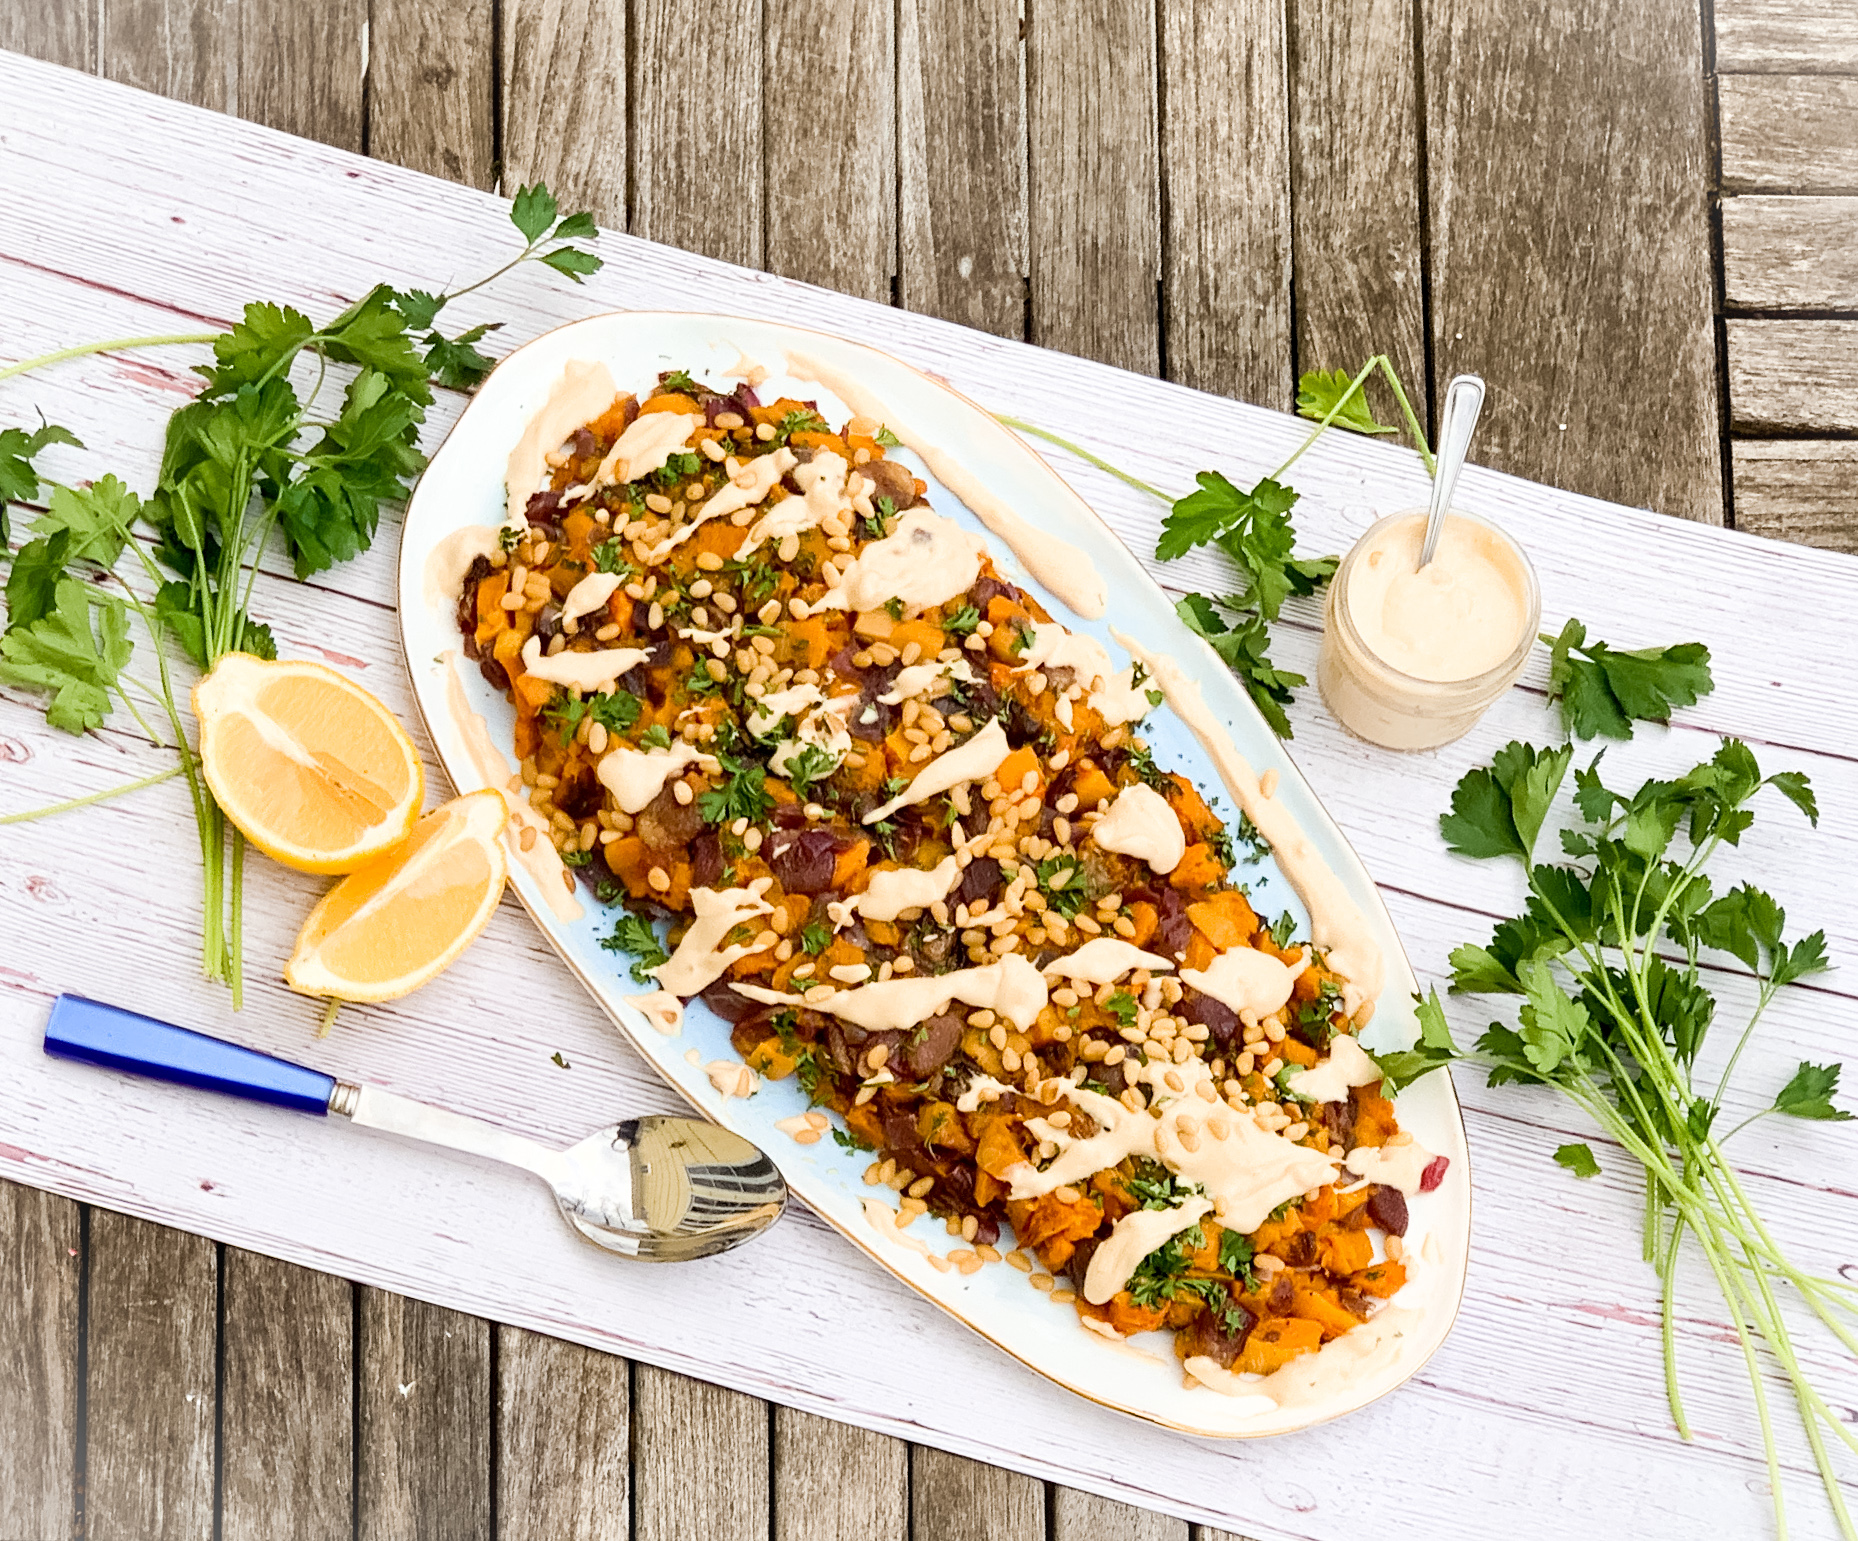
This is one recipe you are going to love. The butternut squash combines perfectly with the red onion, which gives off a little heat and tang at the same time. The grapes add a sweet flavor and texture. The nuts also add delicious crunchy goodness. All of this amazing flavor is topped with a tangy, yet savory tahini sauce that makes this incredible side dish perfection.  The ingredients sound a little strange together, but please give it a try, and I promise you won’t be disappointed.

This recipe is closely adapted from New York Times Cooking and will serve 4 to 6 people who will love this fresh take on a classic fall dish

Ingredients for Roasted Butternut Squash and Red Onions:

About 1/2 cup olive oil, plus extra for pans
3 large red onions, thinly sliced
3/4 cup seedless red grapes
Coarse salt and black pepper
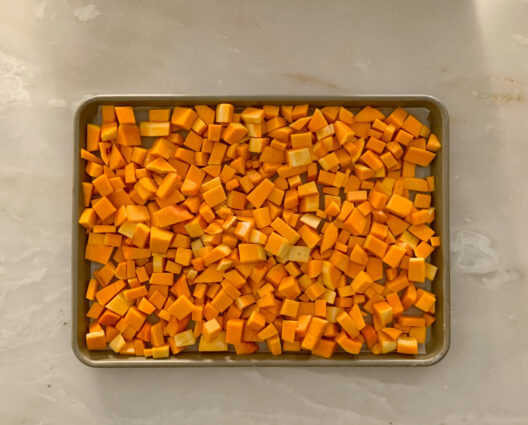
1 large butternut squash cut into 1/2-inch wedges, peeled 
⅓ cup toasted pine nuts or shelled green pistachio nuts (optional)
2 tablespoons coarsely chopped flat-leaf parsley, mint, cilantro or a combination, for garnish

For the Tahini sauce:

¼ cup tahini paste
2 tablespoons lemon juice
1 small clove garlic, crushed

Heat oven to 475 degrees.

Line two sheet pans with parchment paper.

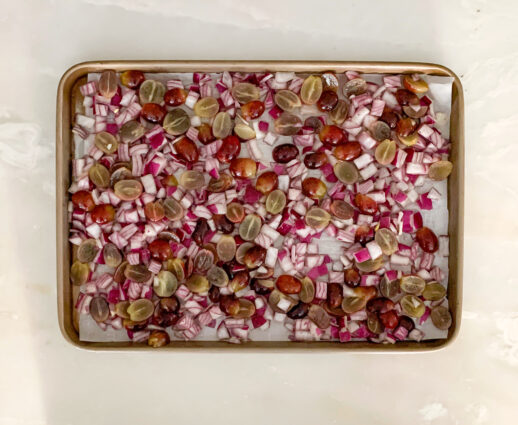
Thinly slice onions.

Cut grapes in half.

Spread on a baking sheet, sprinkle with salt and pepper and drizzle with oil.

Put the squash in a large mixing bowl.

Add 1/4 cup olive oil, 1 teaspoon salt and about 1/4 teaspoon pepper; toss to coat.

Spread on a baking sheet.

Place both pans in oven and roast for 30 to 40 minutes, until the vegetables have taken on some color and are cooked through.

Keep an eye on the onions, as they may cook faster than the squash and need to be removed earlier.

If using nuts, pour 1 tablespoon oil into a small frying pan and place over medium-low heat.

Add nuts and 1/2 teaspoon salt and cook for 2 minutes, stirring often, until the nuts are golden brown and smell toasty.

Immediately remove from the heat and dump onto a cutting board to stop the cooking.

If using pistachios, chop coarsely when cool enough to handle.

To make tahini sauce, place tahini in a bowl.

Add lemon juice, 1/4 cup water, garlic and 1/4 teaspoon salt.

Whisk until sauce is the consistency of honey, adding more water or a tablespoon of olive oil if necessary.

When the vegetables are cooked, set aside until ready to serve. (The vegetables should be served the same day they are made. They can be served at warm room temperature, or reheated just before serving.)

To serve, combine vegetables on a large serving platter.

If using tahini sauce, drizzle on top.

Sprinkle herbs and, if using, nuts on top and serve.

It’s that simple!
 

signature

[recaptcha]


Many girls think about their dream wedding and plan for it long before the day.  But not me. My goal at the time was to become a speech-language pathologist, and I wasn’t going to get derailed by anything. After college, I went straight to graduate school and vowed to work hard, move up in my profession, and make a name for myself. 

After I graduated from graduate school, I went on a well-deserved vacation with a friend of mine. During the time I was away, my cousin, who I was close to growing up, wanted to set me up on a blind date with a classmate of his. My cousin and I hadn’t been in touch for a while, so I was skeptical– he didn’t really know me anymore, right?  Well, apparently, he did.  The man I was set up with was persistent, calling and speaking with my mom several times. My mother insisted I give him a chance, because he sounded so nice on the phone. Ever the rebel I, I was not about to go out with someone because my mother wanted me to.  No way.

My mother was relentless. I finally spoke to him on the phone, and I agreed to go out on a date with him, just to get my mother to stop bothering me. I lived on Long Island, and he lived in New Jersey. I couldn’t understand why he had to come all the way from New Jersey for a date, but whatever, it was his time.  But, to his credit, he was determined, and we went out on a Friday night. To my surprise, I actually liked him (although I wouldn’t admit it to my mother) and agreed to that second date the very next day.

All in the blink of an eye, I was suddenly one of those women who saw marriage in my future, although it would have to work around my profession. My mother used to say “you make plans, and God laughs.” She was right again. This lovely fellow was still a student, so we had a long road ahead of us. As you might have guessed, we ended up getting married, after a beautiful celebration.

After 5 years of marriage, we decided it was time for us to have children. This was also not something I had planned, but I was sure everything would work out with my career. I thought I could have it all. As it turns out, we suffered many hardships during our marriage, and my children became my first priority– anybody who’s had a child will know what I mean. I decided to stop working and raise my kids. The rest is history. Even to this day, I am disappointed that I never achieved my professional goals. My advice to all the young women in my life is to keep working if you can, because when your kids are grown and out of the house, you will continue to have something that makes you feel productive.

Though I am disappointed, I do not regret my choices. I find enough things in my life to keep me busy, which includes this blog. While I never achieved my professional goals, raising my kids was an experience I would never trade for anything. Now, I long to be a grandmother someday. Although with my two boys, there are no girlfriends, much less weddings on the horizon. But I have hope. It may happen in the future, but for now, I am content with my loving family.

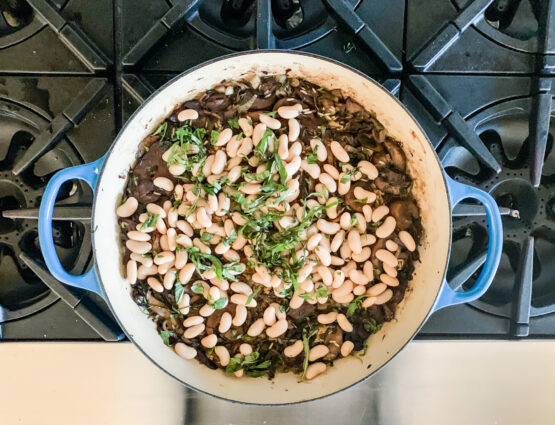
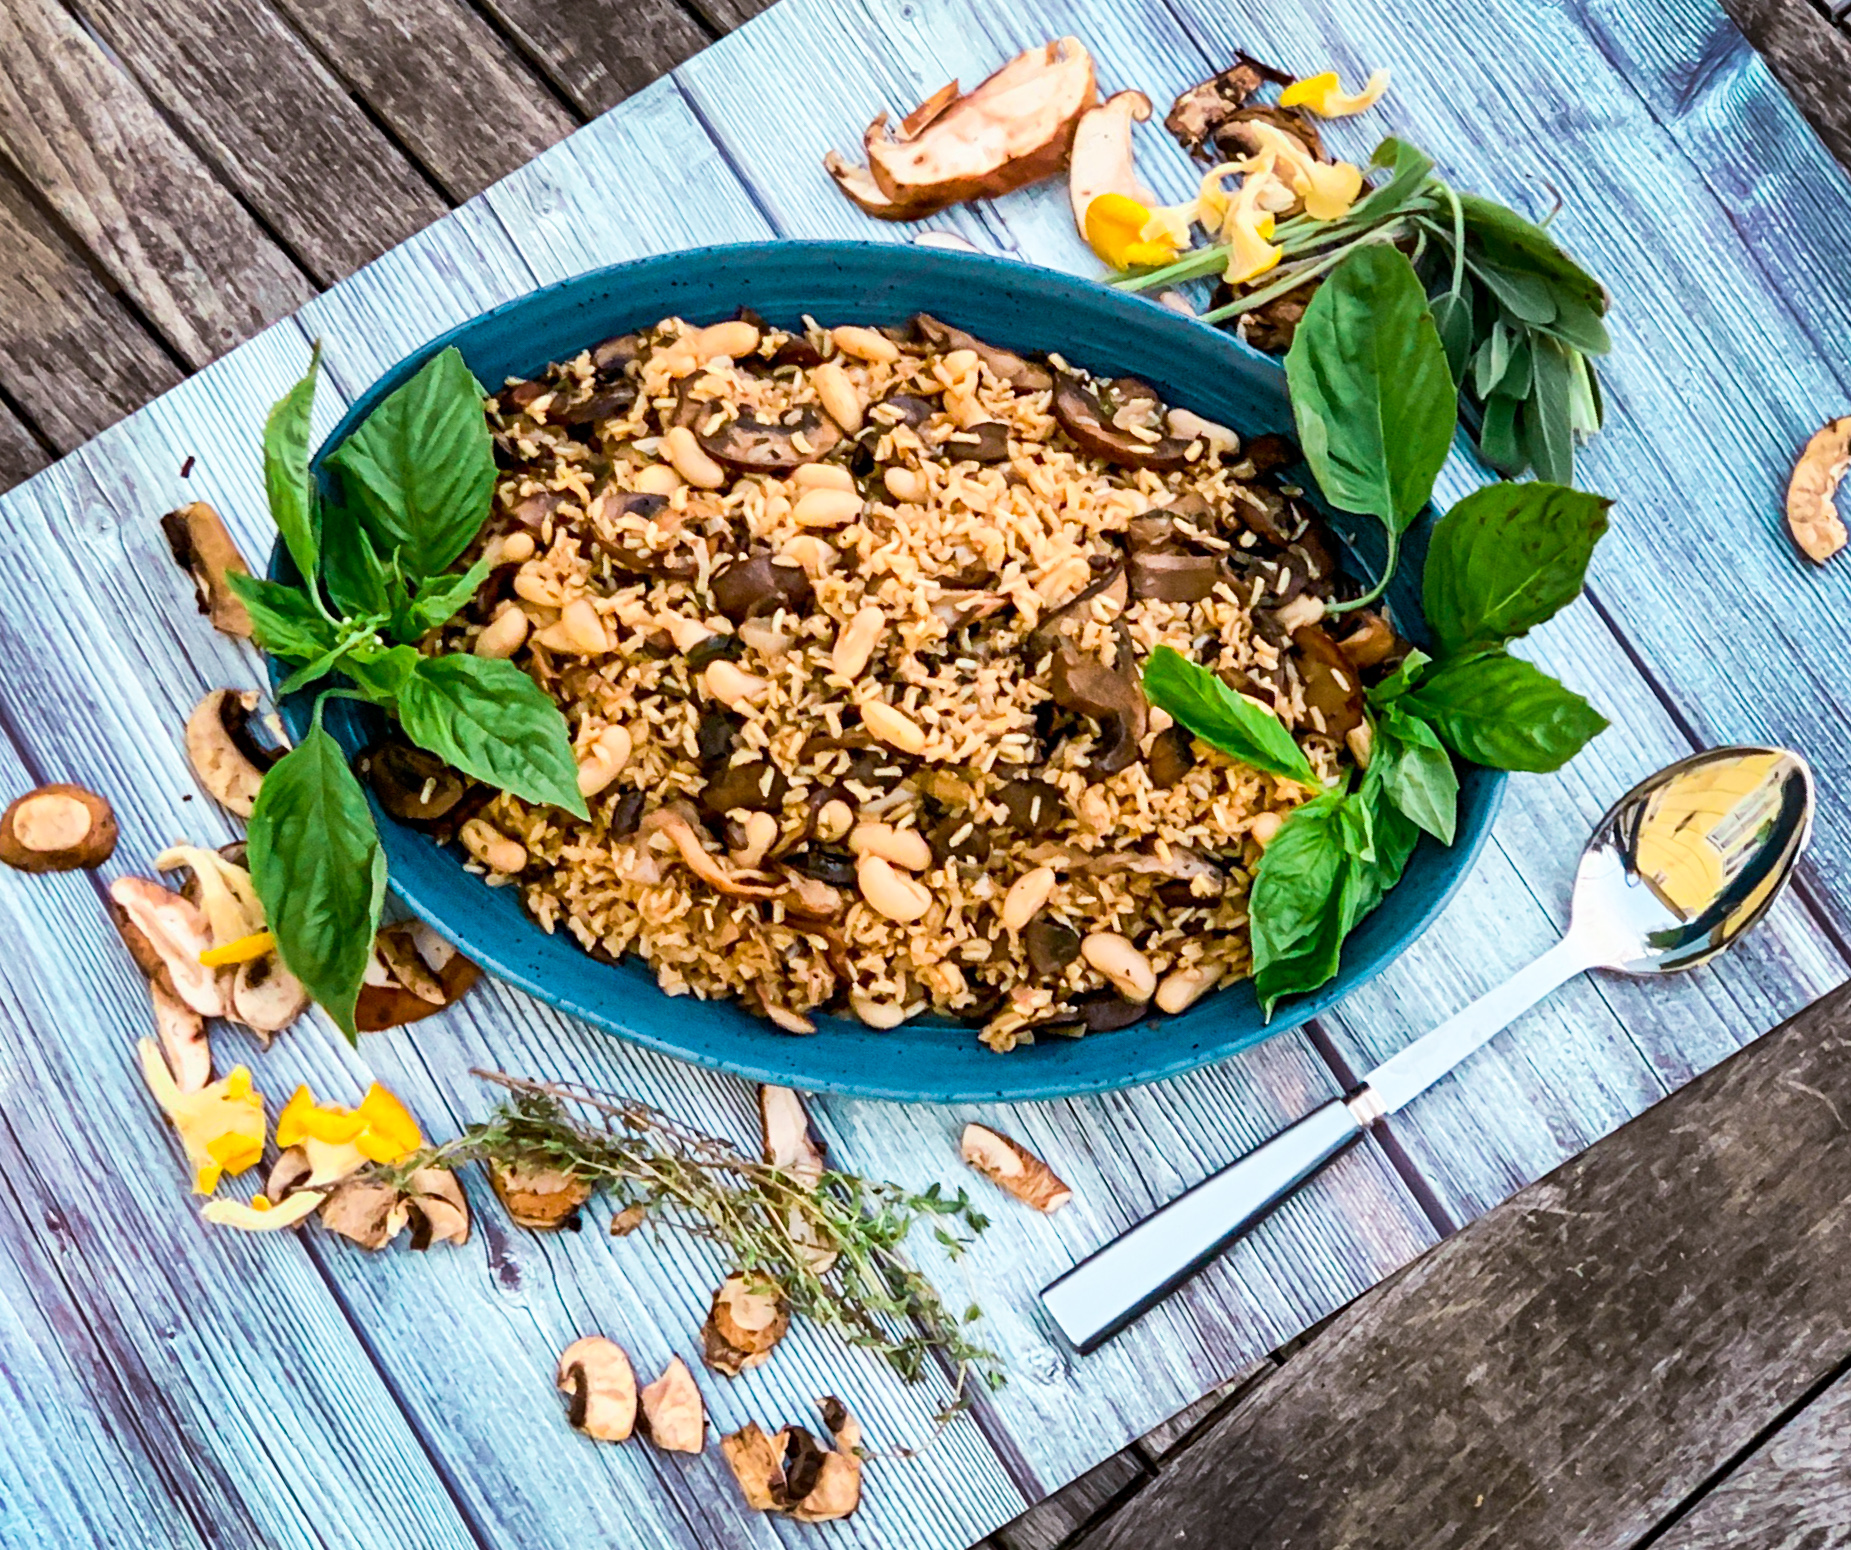
With family in mind, and the holidays ahead,  this is one recipe you need to make. It is a vegetarian dish, and if you like mushrooms, this dish is a “must try” for all of you. The mushrooms are perfectly caramelized, giving this dish a sweet, savory flavor. The butter gives the sauce delicious soft creaminess. The addition of multiple herbs adds a fragrance that will fill your home. The rice and the beans give this dish hearty, healthy full-bodied flavor that is rich enough to make this dish a main course as well. The Manchego cheese topping is wonderful, and compliments this perfectly. If you are a mushroom lover, like me, then this is an ideal dish for you.

This recipe is courtesy of Super Simple, by Tieghan Gerard and will serve 6 people who will love the savory warmth of this filling dish.

Ingredients for Herby Buttered Mushrooms and Wild Rice:

2 tablespoons extra-virgin olive oil
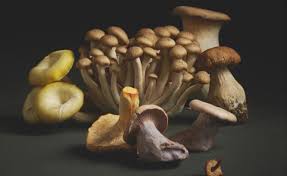
1 pound mixed mushrooms
Kosher salt and freshly ground pepper
6 tablespoons salted butter
2 shallots thinly sliced
1/2 cup fresh basil leaves, roughly chopped
2 tablespoons fresh thyme leaves
1 tablespoon chopped fresh sage leaves
1/2 cup dry white wine, such as Pinot Grigio or Sauvignon Blanc
1 1/2 cups uncooked wild rice blend
1 (14-ounce) can cannellini beans, drained and rinsed
Juice of 1 Lemon
1/4 cup shaved Manchego cheese

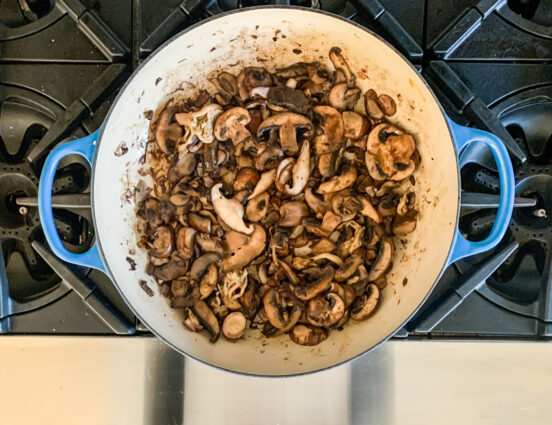
Heat the oil in a large skillet over high heat.

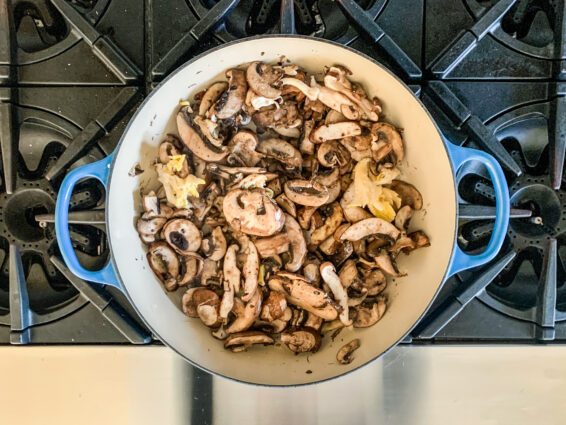
When the oil shimmers, add the mushrooms and season with salt and pepper.

Cook, undisturbed, until softened, about 5 minutes, then stir and continue cooking until the mushrooms are caramelized, 3 to 5 minutes more.

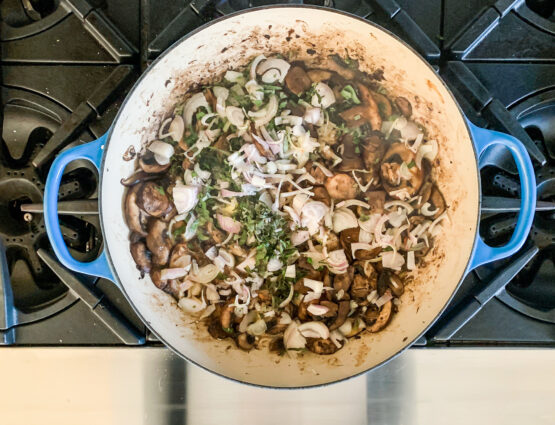
Reduce the heat to medium and add the butter, shallots, half of the basil, plus the thyme and sage.

Cook, stirring occasionally, until the shallots are caramelized and fragrant, about 5 minutes.

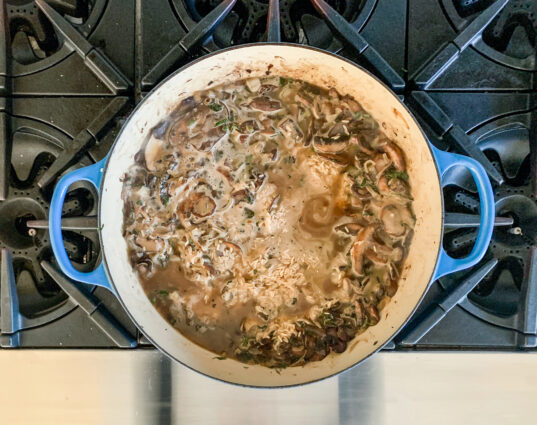
Pour in 2 cups of water and the wine and bring to a boil over high-heat.

Stir in the rice, cover, and reduce the heat to low.

Simmer until the rice is cooked and most of the liquid has evaporated, 40 to 55 minutes.

Add up tp 1/2 cup of water more as needed throughout cooking.

Remove the pan from the heat and stir in the beans, lemon juice and the remaining basil.

Divide among six bowls and top with Manchego to serve.

It’s that simple!
 

signature

[recaptcha]