It seems that every day, we hear about something negative.  News cycles latch onto the collective sorrow and hurt of the past year (or the past week), and spread it far and wide.  In light of this, I would like to highlight one special person who has brought many a smile to my face: my aunt Esther.  Esther, who is my mother’s sister, just turned 90 (congratulations!), is sweet as sugar, and has such a wonderful attitude toward life.

There were eight sisters and brothers in my mother’s family, and all of them had a tough childhood. As a result, they tended to have more severe personalities as adults. I remember going to holidays at my aunt Esther’s home, where we would all gather together. As children (and there were 20 of us cousins), we were not allowed to speak during the holiday service, or when one of the grown-ups were talking. Our Passover seders were very long, and most of us had quite a hard time sitting quietly for so long during the service, which was in Hebrew and Yiddish, which none of us understood. 

My older cousins tried to make the most of it. One year, they brought comic books and put them inside their  prayer books to make it look like they were following along. Oh boy, when they got caught, there were big problems!  Even still, that never stopped them from trying each year to do something that would help them get through the long service. 

Aunt Esther was always the one with a smile on her face and love in her heart. Her laugh rings through the house. You always knew when she entered the room, because she would always say something that made everyone laugh. She still does to this day. Right before the covid lockdown, she had aortic heart valve replacement surgery. Immediately after the surgery, she went to a nursing home for rehab. When they began to lock down the nursing homes, she begged her daughter to come and take her home, because she was stuck in a very small room with a roommate, and she was not getting the therapy she needed. My cousin took her home and she began her long recovery among family. 

Despite these hardships, nothing gets her down. She is always positive and when you visit her, she is pleasant and upbeat. Unfortunately, she suffered a fall a few weeks ago and needed surgery on her elbow. She is recovering from that now, and you never hear a word of complaint out of her. When she sees you, a big smile lights up her face and you just want to hug her. She loves all her nieces and nephews, and shows such deep caring and interest in their lives. 

I only hope that as I begin to get older, I inherit her positive attitude. It would have been easy for her to get into a negative mindframe, but she never did. Her positive attitude gives her the tools she needs to cope with life’s trials, and focus on all the good things instead of the bad. She is the most lovable person and such a joy to be with. If only all of us could face life like that!

Aunt Esther is one of my biggest fans. She loves to read my recipes and learn about the things I cook. She doesn’t cook a lick, but enjoys hearing about the process and professes that one day she will prepare one of my recipes.

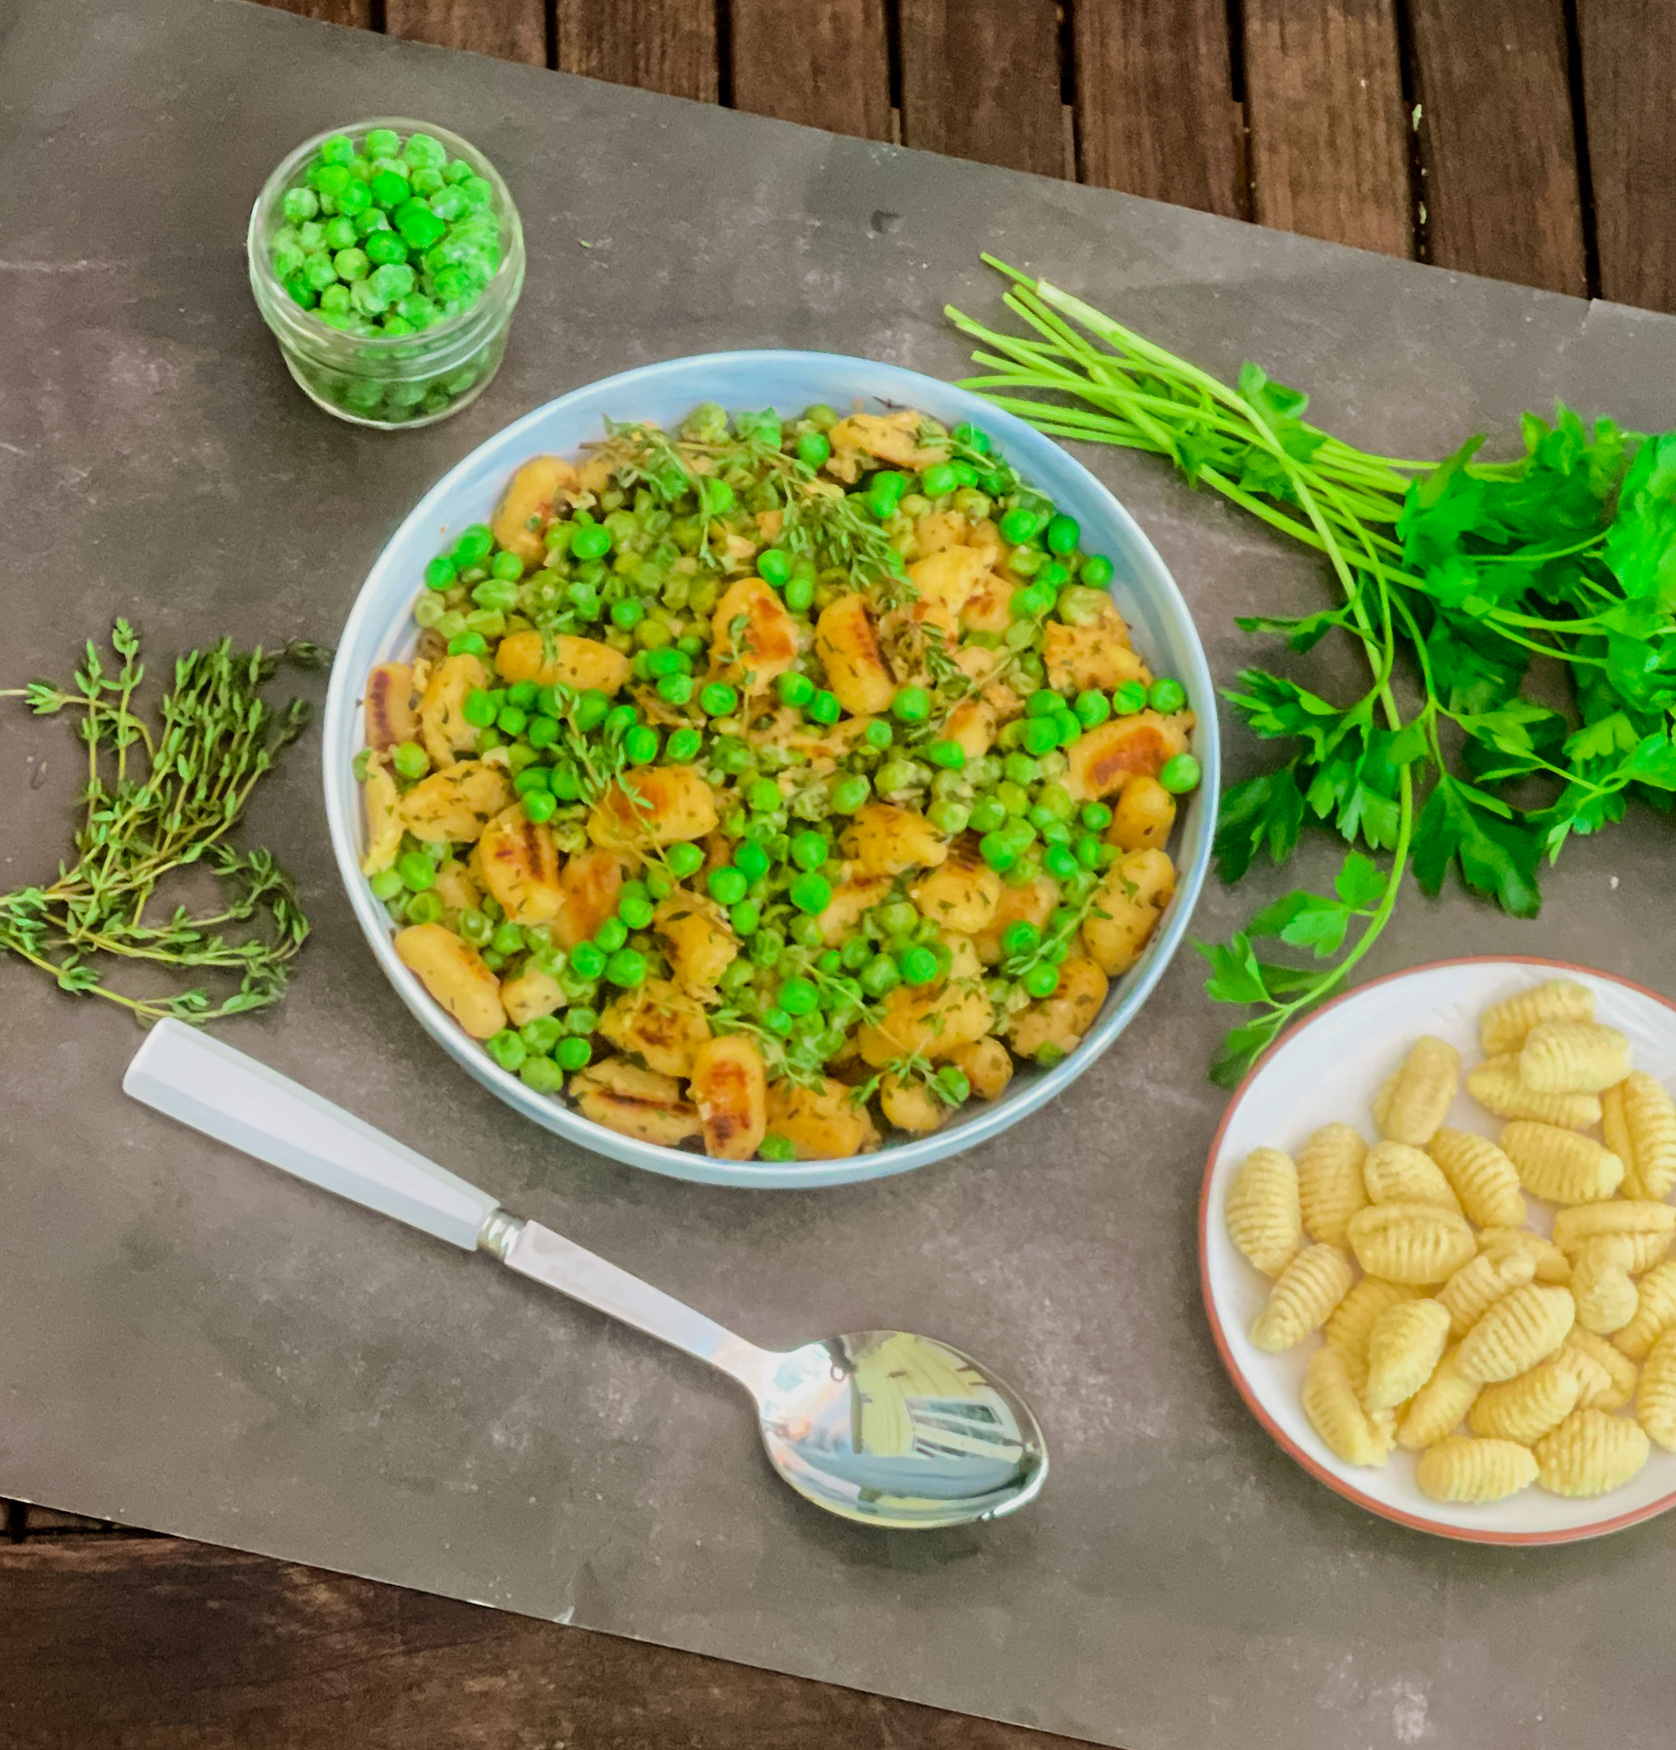
Though she might not prepare it herself, this is one recipe that I know she will love. Potato gnocchi is a great alternative to pasta and even better when you toast it up in a pan. Toasting it is the way to go when you buy it ready made from the store. Boiling it according to the package directions does not add much of anything to the gnocchi, but toasting it gives it a caramelized, nutty flavor that goes with any spice that you choose to use. The garlic, parsley, and thyme add savory goodness, and the lemon gives it just the right amount of tang. Cooking them in chicken broth adds a deep, rich flavor, and a nice color. The peas are the star of this side dish, giving it a springtime finish with bursts of flavor in every bite. Topping it off with Parmesan cheese brings this dish to perfection.

This recipe is courtesy of Southern Living and will serve 6 people who will light up like my aunt Esther.

Ingredients for Skillet-Toasted Gnocchi with Peas:

1/4 cup salted butter, divided
1 (16-oz.) package potato gnocchi
1 tablespoon minced garlic (about 1 large garlic clove)
2 teaspoons chopped fresh thyme
1 1/2 cups reduced-sodium chicken broth
1/2 teaspoon kosher salt
1/2 teaspoon black pepper
1 (10-oz.) package frozen sweet peas, thawed, or 1 1/2 cups shelled fresh sweet peas
2 tablespoons chopped fresh flat-leaf parsley
1 teaspoon lemon zest plus 1 Tbsp. fresh juice (from 1 lemon)
2 ounces Parmesan cheese, grated (about 1/2 cup)

Heat 2 tablespoons of the butter in a large nonstick skillet over medium-high; add gnocchi, and cook, stirring occasionally, until browned all over, about 10 minutes.
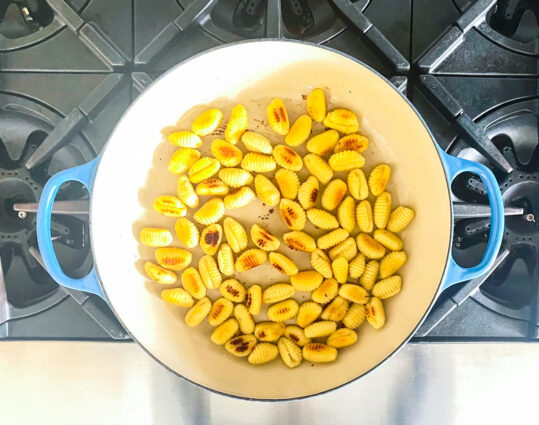
Add garlic and thyme, and cook, stirring often, until fragrant, about 1 minute.

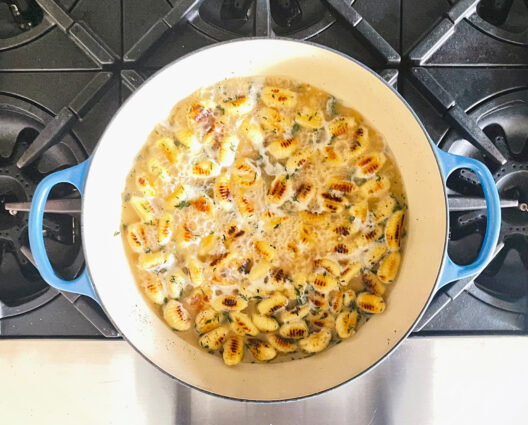
Add broth, salt, and pepper; bring to a simmer, and cook until reduced by about half, 4 to 5 minutes.
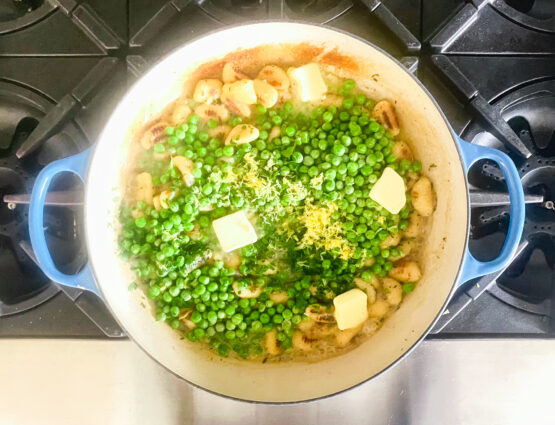
Add peas, parsley, lemon zest, lemon juice, and remaining 2 tablespoons butter; cook, stirring constantly, until butter melts, about 1 minute.
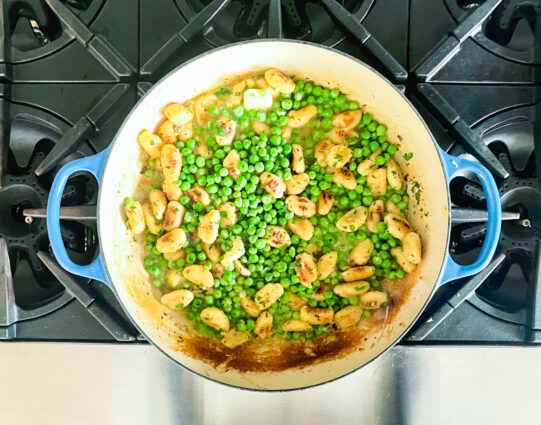
Top with Parmesan, and serve immediately.

It’s that simple!

signature

[recaptcha]


We’ve all heard of “comfort food,” but what is it really? At its most simple, comfort food refers to an emotionally satisfying dish: ice cream, mashed potatoes, french fries, lasagna… The list goes on! Especially in these times, we may look into the fridge at all the healthy food, but when it comes right down to it, what we really want is a hamburger, a big bowl of pasta or a nice big piece of cake.

Comfort foods are usually foods that are high in fat, sugar, and salt, which can make our brains stimulated by these wonderful flavors, but the satiety is often temporary. Put simply, these foods just make us feel good. Let’s face it, sometimes a salad, fruit cup, or glass of water is not our idea of comfort food. With that said, comfort can certainly be healthy too–one of my favorites is chicken soup. It is a great source of vitamins and minerals, and provides a healthy amount of fat. These benefits can help us with the symptoms of colds, flu, and congestion. Hydration is very important in treating these symptoms and chicken soup, as a liquid, helps to hydrate as the broth includes salt and electrolytes that help with retention.

But everybody’s comfort foods are different. Some may enjoy a hot tuna melt, warmed up chocolate chip cookies, or a delicious bucket of chicken wings. Comfort foods can often be associated with members of our family, happy occasions, or our caretakers. Dr. Shira Gabriel found that “there is a strong relationship [between] what you were served as a kid and the food we later on associate with comfort food as adults.”

We are all a little bit stressed and depressed these days. But if you find a healthy comfort food, or at least substitute some healthy ingredients, it can be a nutritious family meal. As Dr. Fernando Gomez-Pinilla states, “Food is like a pharmaceutical compound that affects the brain. The more balanced you make your meals, the more balanced will be your brain functioning.”

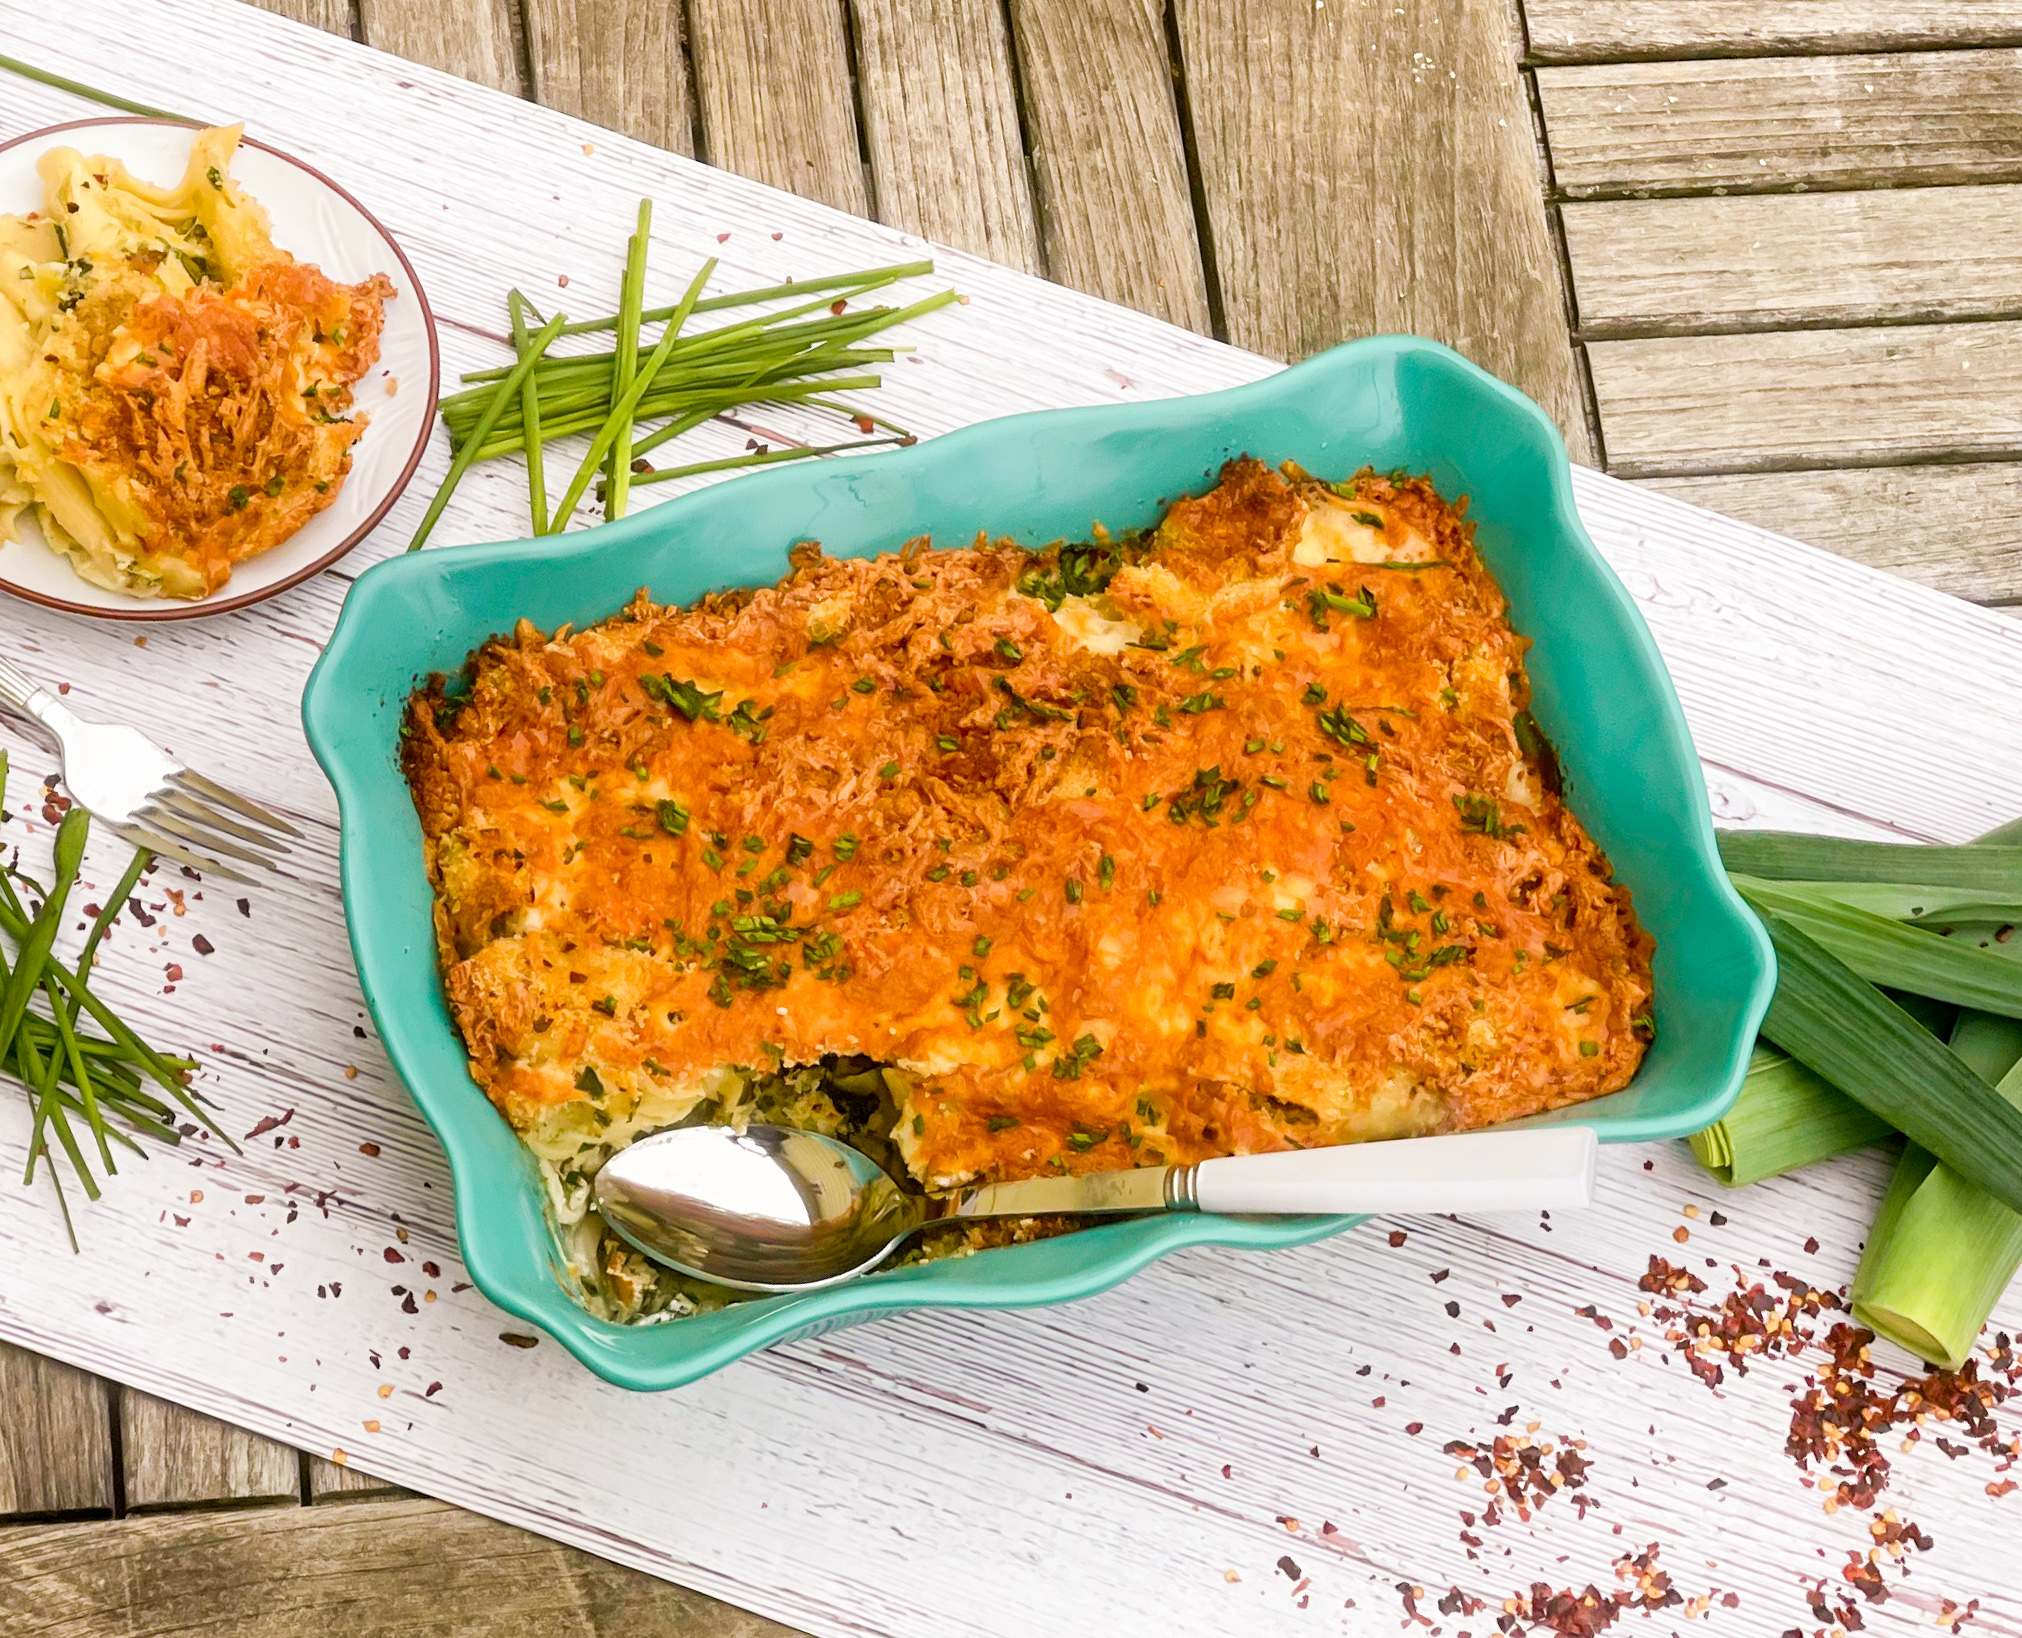
This is one satisfying comfort food that may be a healthy alternative for you. This delicious pasta is enhanced by the flavor of the leeks, broccoli rabe, and yummy cheddar cheese. The heavy cream makes it gratifying, and the crushed red pepper flakes give it a nice little kick. The chives are the perfect savory goodness. It is then topped with delightful breadcrumbs that hit the spot for this satiating dish. Use it as a side or main, you will love it either way.

This recipe comes courtesy of Epicurious, and it will make 6 to 8 servings for people who will want to keep this recipe for a day when they need their own comfort food.

Ingredients for Spicy Baked Pasta with Cheddar and Broccoli Rabe:

Kosher salt
1 lb. rigatoni, ziti, or fusilli
8 Tbsp. extra-virgin olive oil, divided
3 large leeks, white and pale green parts only, halved lengthwise, thinly sliced into half-moons
Freshly ground black pepper
1 tsp. (or more) crushed red pepper flakes
2 bunches broccoli rabe or 3 bunches baby broccolini, trimmed, coarsely chopped
1 cup heavy cream
12 oz. sharp white cheddar, coarsely grated (about 3 cups), divided
1 cup chopped chives, divided
1 cup coarse fresh breadcrumbs or panko (Japanese breadcrumbs)

Preheat oven to 425°F.

Bring a large pot of water to a boil, then add a generous amount of salt.

Cook pasta, stirring occasionally to keep it from sticking together, until just barely al dente, about 2 minutes less than package directions.

Drain pasta, reserving 1 cup pasta cooking liquid.

While you are cooking the pasta, get the broccoli rabe going.

Heat 5 Tbsp. oil in a large Dutch oven or other heavy pot over medium–high.

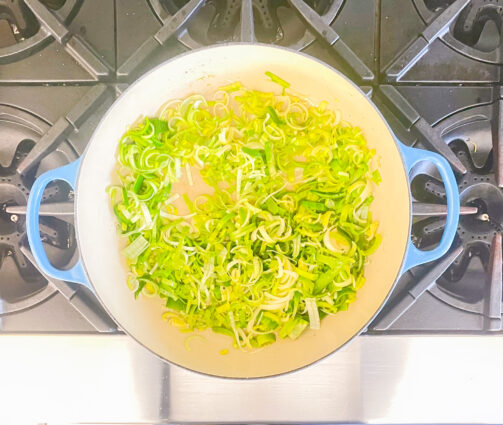
Add leeks and season with salt and black pepper.

Cook, stirring occasionally, until leeks are softened (but not so much that they don’t have any texture left) and starting to brown, 8–10 minutes.

Add red pepper flakes to leeks and stir to incorporate.

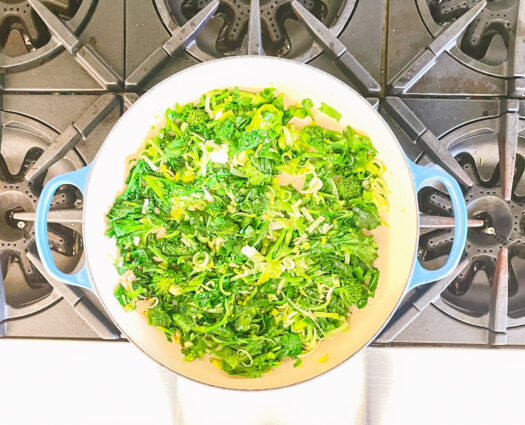
Add broccoli rabe by the handful, stirring to combine and allowing each addition to wilt before adding more.

Season with salt and black pepper.

Once all of the broccoli rabe has been added, cook, stirring occasionally, until bright green and wilted, about 2 minutes.

Remove pot from heat and set aside.

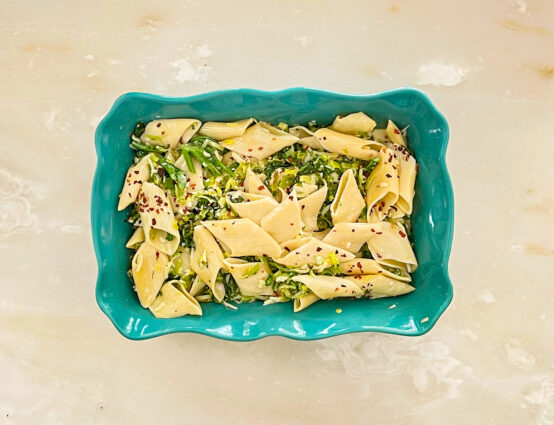
Add pasta to reserved broccoli rabe mixture along with cream, three-quarters of the cheese, ½ cup chives, and reserved pasta cooking liquid; mix well.

Season with salt and black pepper and add more red pepper flakes if you prefer more heat (keep in mind that the saltiness and spiciness will increase as the pasta bakes).

Transfer pasta to a 3-qt. baking dish (or, if your Dutch oven is ovenproof, just leave it in there).

Toss breadcrumbs and remaining 3 Tbsp. oil in a medium bowl until coated; season with salt and black pepper.

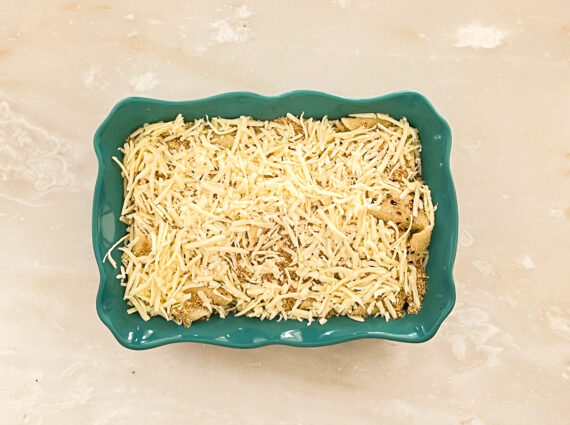
Scatter over pasta, then sprinkle evenly with remaining cheese.

Bake until pasta is bubbling across the entire surface and breadcrumbs are deep golden brown, 30–35 minutes.

Let cool slightly.

Scatter remaining chives over pasta just before serving.

It’s that simple!
signature

[recaptcha]


When I first began cooking, I learned by watching cooking shows (so many, too much to recall them all), and reading cookbooks. I would make many recipes over and over again, trying to get them absolutely perfect. During those years, I learned the importance of owning a very sharp knife, finely tuning my knife skills, and making a beautifully plated dish.

These skills proved to be well-worth the trouble when Thanksgiving rolled around. I was able to present pretty platters of food that my guests not only loved to look at… and to eat. Does a wonderful looking platter make the food taste better? Maybe, maybe not. I think it helps. The simple fact is that we first eat with our eyes. An artful presentation allows us to anticipate the flavors of the dish even before you take the first bite. 

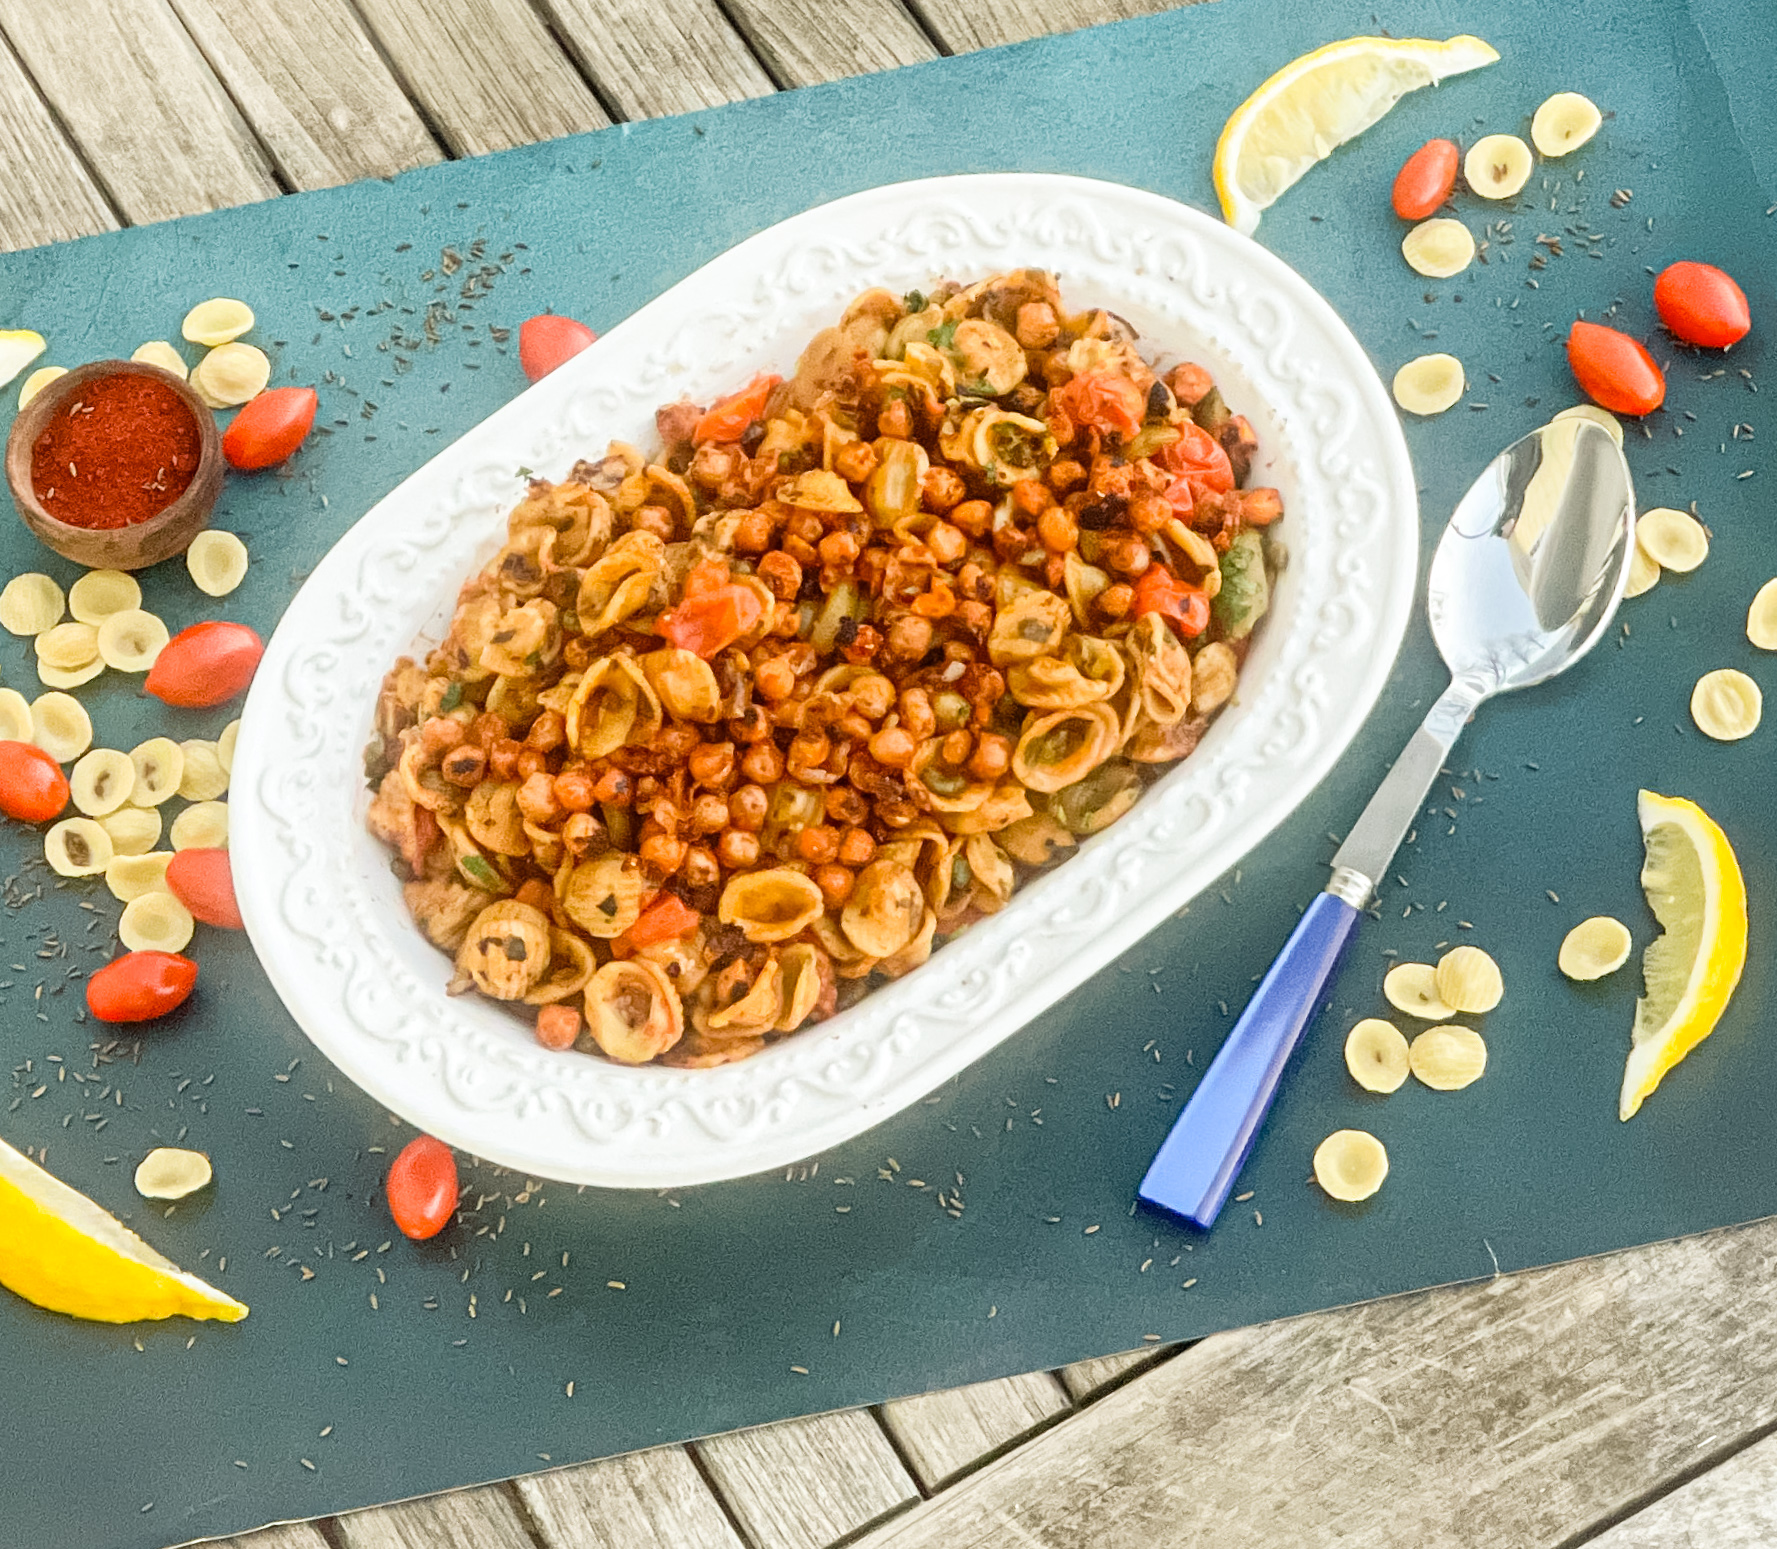
First you must choose a plate or bowl that will make the food look appetizing. It takes practice to arrange the food so it looks better. I try to look for plates that will make the colors of the food pop. I use plates and shallow bowls that have a little bit of color, or a color that will contrast the colors of the food. If all else fails, use a white dish and you won’t go wrong. I usually use white platters and bowls or natural muted colors like pastel or blue or a muted charcoal. Bold, bright colors can compete with the food. 

After spending so much money on expensive dishes, I was always broken-hearted when they chipped or broke. I learned that lesson very early. Now, I purchase mine at Bed Bath and Beyond, Home Goods, or antique stores that have all shapes and sizes that are inexpensive so I don’t mind if they chip or beak. You can even try your local thrift shops!

Once you have your plate, your best bet is to arrange the food on the plate so the platter looks very full and plentiful. Using an overly large bowl for a small amount of food will make your food look skimpy. If the plate is too big, it will look lost. When you are placing the food on the platter, leave some room around the edges. If you are using a bowl, place the food so it is mounded in the center. 

The secrets of beautiful plating aren’t just for top chefs or stylists. The elegant plating of food can be so satisfying and appealing and it is part of your education as a cook. Knowing a few simple techniques can help you put together plates that look as wonderful as they taste. 

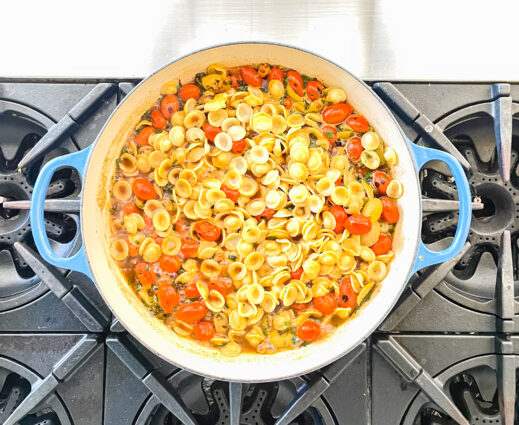
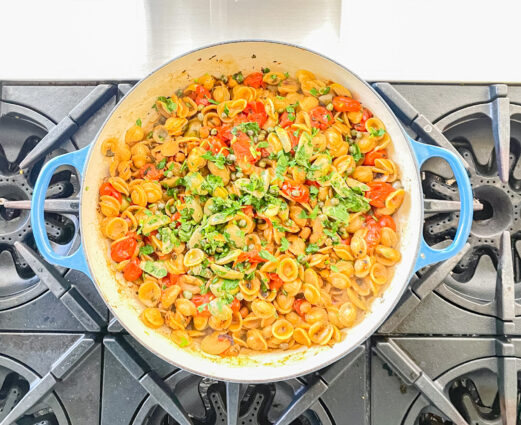
Give your skills a test with this dish! Ottolenghi takes this simple side dish to new levels. He is well known for finding obscure ingredients that make the food have that “mmm, so good’ taste. For this recipe, he just used simple ingredients that you have in your pantry and can easily make any time of the week. Between the smoked paprika, cumin, tomato paste, caraway seeds, and garlic, there is so much savory going on in this recipe. The chickpeas and olives combine beautifully to give this pasta a bold, flavorful taste. The tomatoes are tiny bursts of deliciousness, and the lemon adds lip puckering tang. The result is a bold, delightful side dish that is perfect for a family meal, or holiday dinner.

This recipe is courtesy of Yotam Ottolenghi and will serve 6 to 8 people who will adore this beautifully plated side dish.

Ingredients for Ottolenghi’s One-Pan Orecchiette Puttanesca:

5 tablespoons olive oil
6 garlic cloves, crushed
1 15-ounce can chickpeas, drained well and patted dry
2 teaspoons hot smoked paprika
2 teaspoons ground cumin
2 teaspoons tomato paste
2 cups parsley, roughly chopped
2 teaspoons lemon zest
3 tablespoons baby capers
¾ cup Nocellara olives (or other green olive), pitted and roughly chopped in half
9 ounces small, sweet cherry tomatoes
2 teaspoons superfine sugar
1½ teaspoons caraway seeds, lightly toasted and crushed
9 ounces dried orecchiette pasta
2 cups vegetable or chicken stock
¾ cup plus 2 tablespoons water
Salt and black pepper

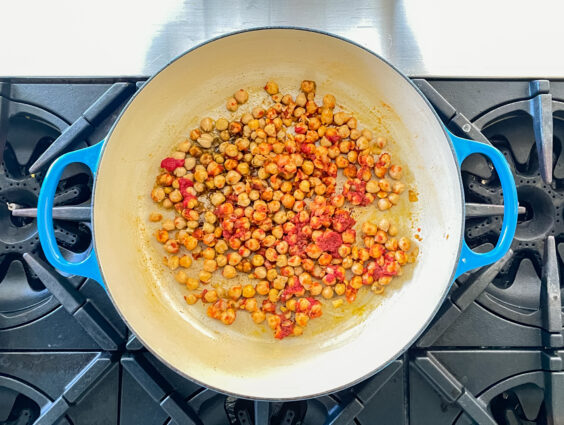
In a large sauté pan, for which you have a lid, combine 3 tablespoons of the olive oil, the garlic, chickpeas, paprika, cumin, tomato paste, and a half teaspoon salt and place on medium-high heat.

Fry for 12 minutes, uncovered, stirring every now and then, until the chickpeas are slightly crisp; you may need to decrease the heat if they start to color too much.

Remove one-third of the chickpeas and set aside.

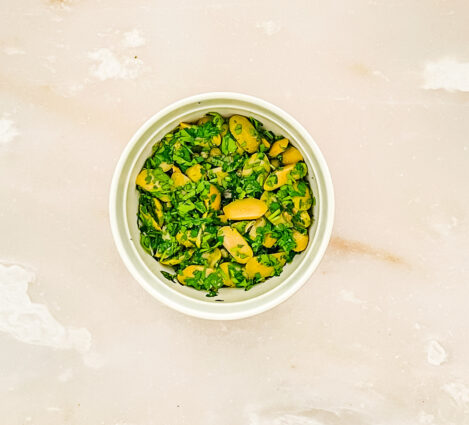
In a small bowl, combine the parsley, lemon zest, capers and olives.

Add two-thirds of the parsley mixture to the sauté pan, along with the cherry tomatoes, sugar and caraway seeds, and cook for 2 minutes on medium-high heat, stirring often.

Add the pasta, stock, water and three-quarter teaspoon salt and bring to a simmer.

Decrease the heat to medium, cover and cook for 12 to 14 minutes or until the pasta is al dente.

Stir the remaining parsley mixture into the pan, drizzle with the remaining 2 tablespoons olive oil and garnish with the reserved fried chickpeas and a good grind of pepper.

Serve at once.

It’s that simple!
 

signature

[recaptcha]


Ramen has become all the rage in recent years. I probably don’t have to tell you this, but ramen is a dish of pulled wheat noodles usually served in broth and flavored with soy sauce or miso. It has gone from pre-packaged staples of college students everywhere to restaurant menus all over the world. My kids lived on ramen noodles when they were in college, as did their roommates. I would buy the packages by the dozen, and they loved them. Thankfully, these noodles are very versatile. They are easy to make and can easily be changed to your tastes with spices of your choice. If you can’t find ramen noodles, you can easily substitute angel hair pasta or thin spaghetti in the recipe below.

Ramen has become a new favorite in global market trends. Japan is the birthplace of instant noodles, and China is the biggest consumer of ramen noodles in the world. In the United States, there has been a huge increase in competition of global market brands who are competing to win the hearts and minds of consumers, so you’ll find many different brands on the shelves these days.

These noodles have become immensely popular during the long cold days of winter. The warm, satisfying broth offers that blissful wintery feeling while it’s cold outside.  This is a one bowl meal that can be garnished with meat or vegetables that simmer in a delicious flavorful broth. All across the US, people are learning to love this flavorful dish and many restaurants have adopted ramen, or ramen-like offerings into their menus.

Although ramen alone is not necessarily the healthiest food, it does contain iron which is necessary for moving oxygen throughout the body and preventing fatigue and anemia (iron deficiency).  You can make your dish healthier by adding meats, poultry, or vegetables.  They also add volume to the meal and can increase feelings of fullness.

Even if you just use the noodles and not the seasoning, you can make these delightful noodles into something comforting and healthy. Are you a ramen lover? I would love to hear from you. Please send me an email and don’t forget to like or follow me on Facebook. Of course, do not forget to subscribe to my newsletter so you never miss a thing!

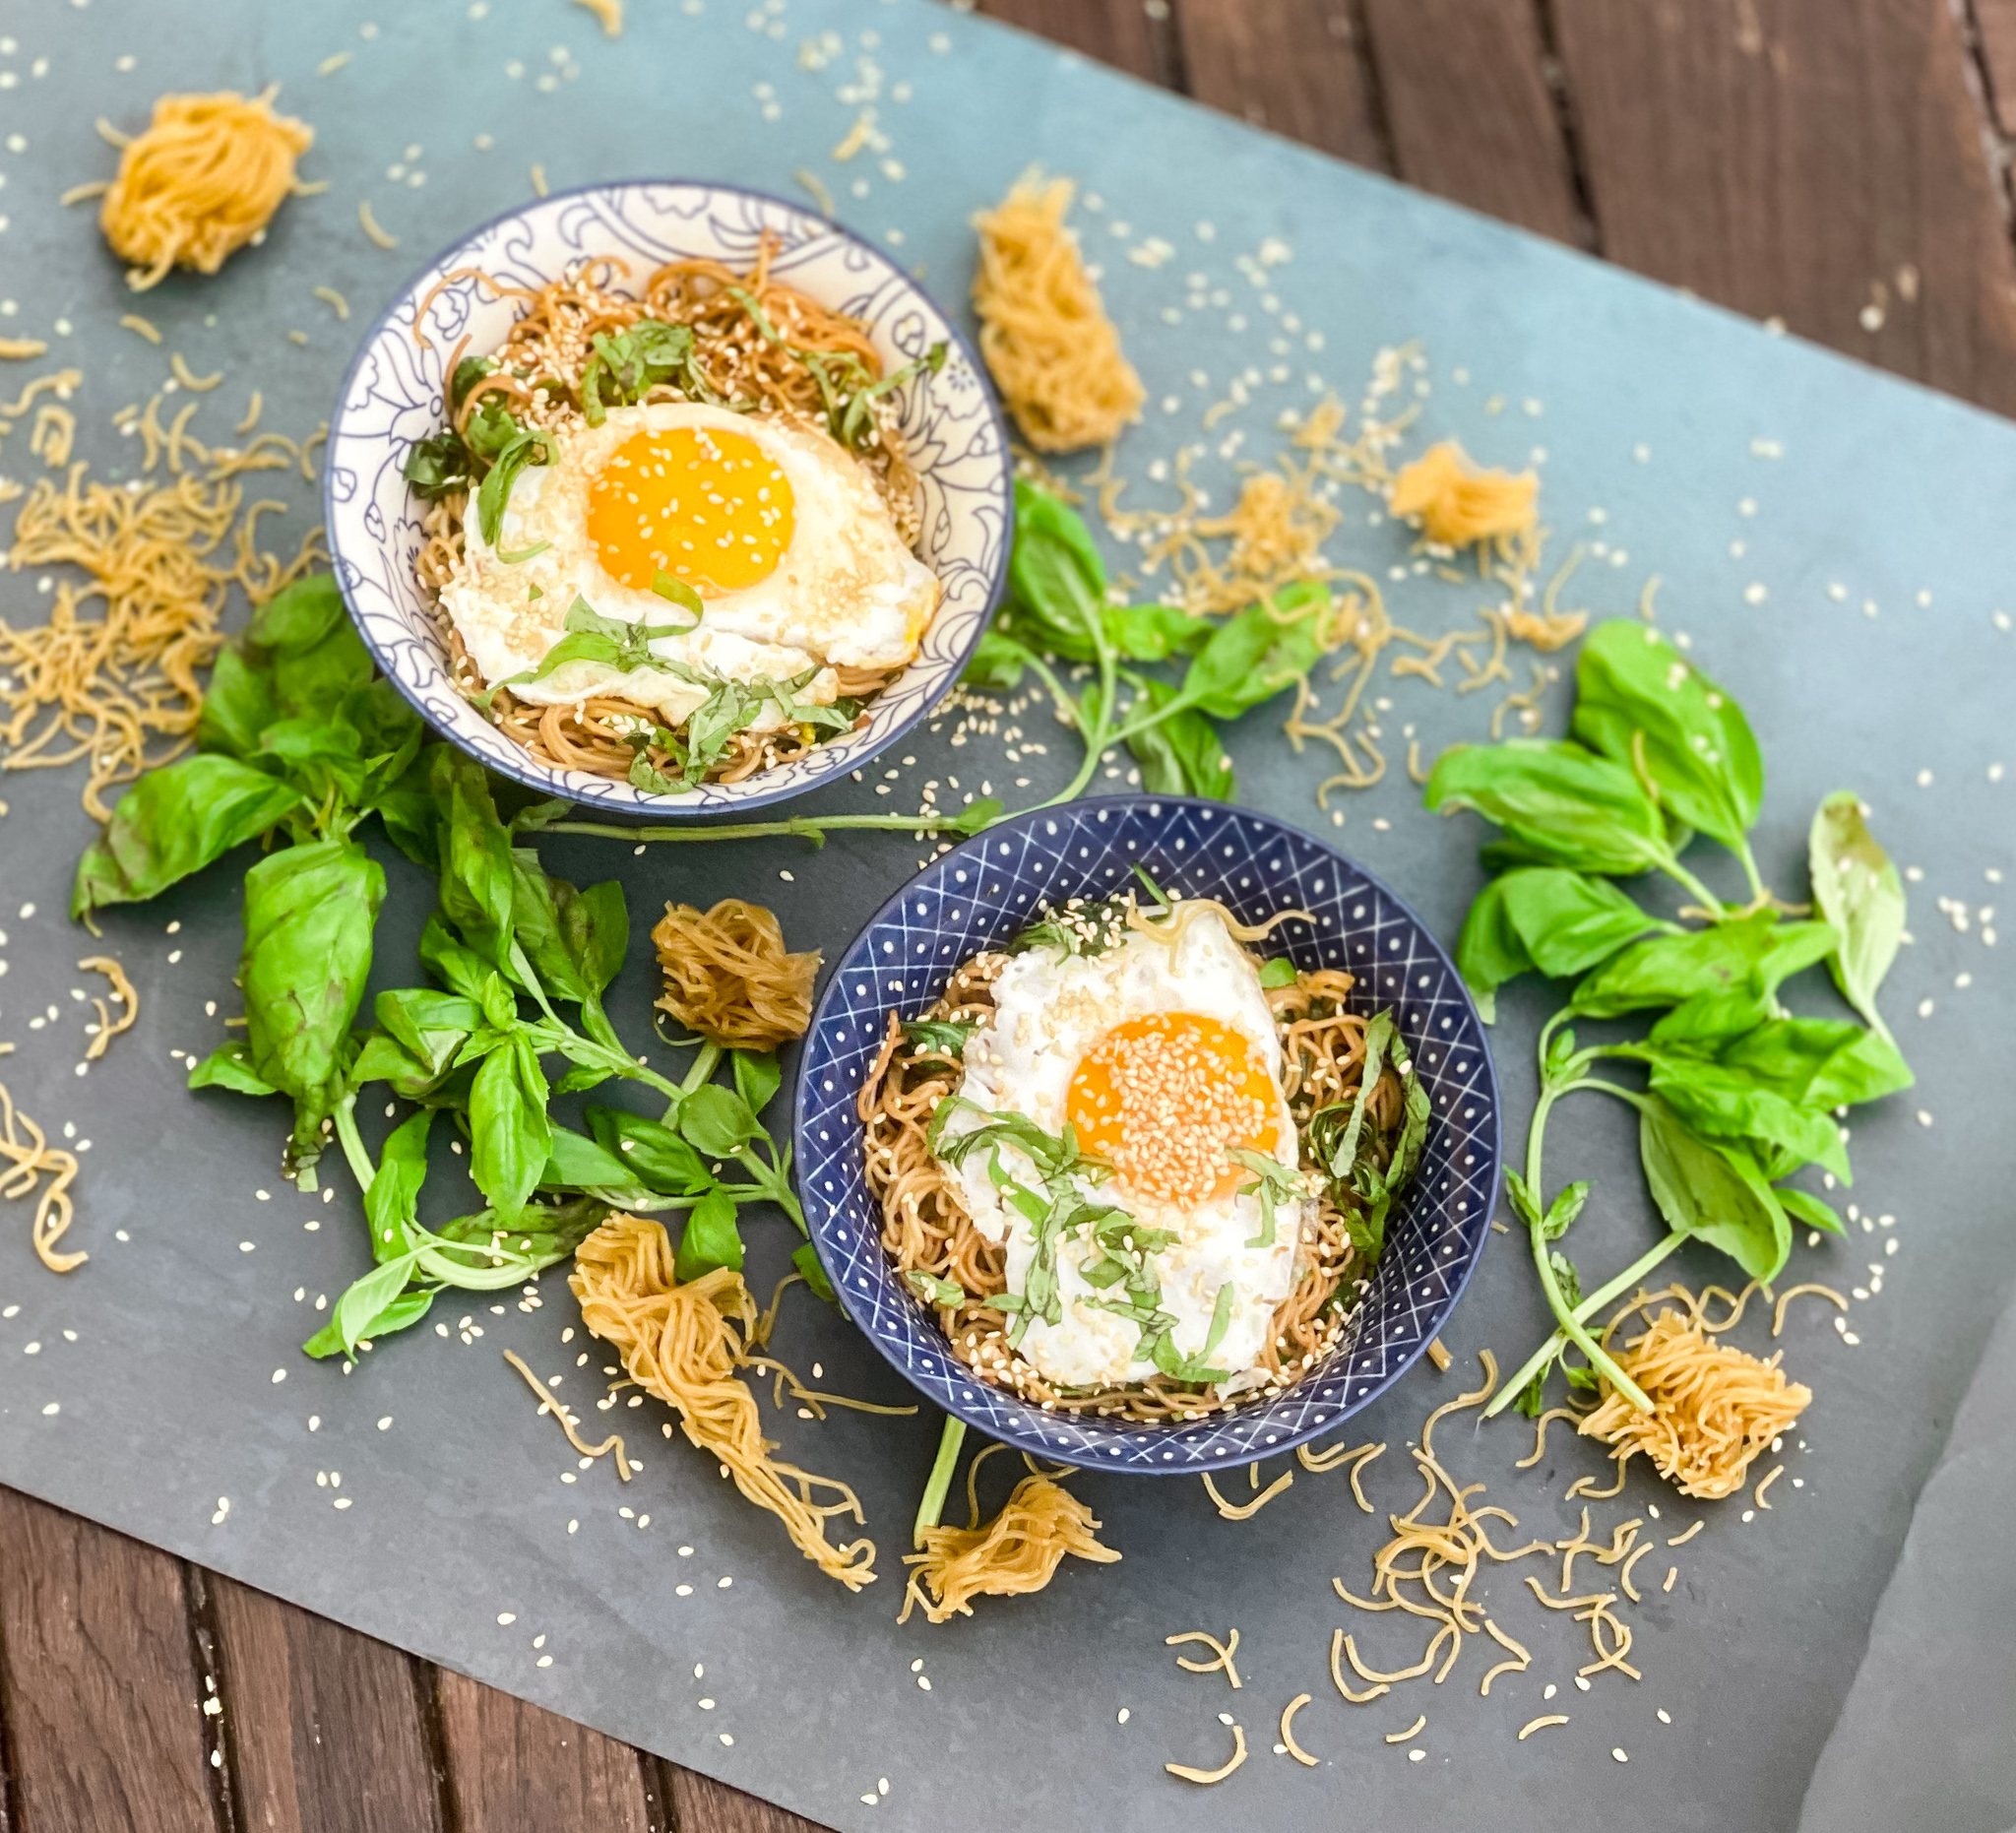
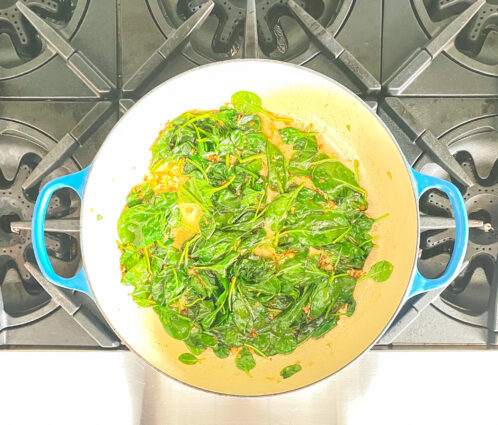
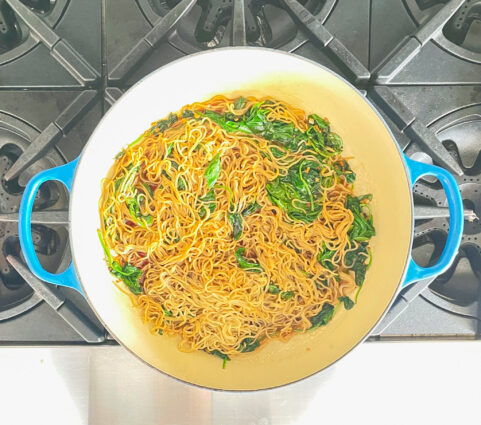
I just love this dish. It takes very little time and effort to make. The butter gives it a smooth creamy taste. The garlic and ginger are the savory here, and cooking them before adding the noodles is sure to make your house smell amazing. The greens add additional flavor and texture, so don’t leave them out. The soy sauce gives it a little tang and the basil gives it a smooth piquant flavor. Please add the egg! They are the perfect topping for this delightful, cozy dish.

This recipe is courtesy of Super Simple by Tieghan Gerard and will serve 2 people who will absolutely love to cozy up with this savory winter meal.

Ingredients for Garlic Butter Ramen:

2 packs brown rice ramen noodles, seasonings discarded
6 tablespoons salted butter
4 cloves garlic, minced or grated
2 teaspoons fresh grated ginger
2 to 3 cups chopped leafy greens, such as spinach or kale
3 tablespoons low-sodium soy sauce
1/4 cup fresh basil, roughly chopped 
2 soft boiled or fried eggs (optional) 
Toasted sesame seeds for serving

In a large skillet over medium heat, melt the butter, then add the garlic and ginger, stirring constantly.

Cook until the garlic is fragrant and beginning to caramelize, 3 to 4 minutes.

Add the greens and cook until wilted, 2 to 3 minutes more.

Meanwhile, cook the noodles according to the packet instructions.

Drain.

Add the noodles and soy sauce to the skillet, tossing with the garlic and butter.

Remove from the heat and add the basil, tossing to combine.

Divide the noodles between two bowls and top each with a fried egg, sesame seed, and more basil if desired.

Season with pepper.

It’s that simple!

signature

[recaptcha]


Unfortunately for me, I was sick this Thanksgiving. Like so many of you, our holiday guest list this year was reduced to only our immediate family, but even still, I wasn’t sure if I would be able to make it downstairs to the kitchen, let alone make some semblance of a Thanksgiving meal for my family.

I am writing to tell you all this, because I made mistakes making the turkey (I’ll blame it on the illness) and I think we all can learn something from it. I usually make two 20 pound turkeys, but this year, I only needed to make one, and boy did I mess it up.

Thankfully, I had a nearby relative come and dress the turkey the night before so it was ready to take out and place in the oven on Thanksgiving. Thursday morning, I slowly (very slowly) made my way downstairs to finish dressing the turkey and put it in the oven. I am going to share with you how I usually make my turkey, and more importantly, where I went wrong.

Usually, I place the turkey in a snug roasting pan. I put it in the oven at 425 degrees F. for 40 minutes uncovered so it browns up beautifully. Then I take it out, cover it very, very tightly with aluminum foil, and turn the oven down to 350 to continue the cooking.  Covering it so snugly lets the turkey steam, and not cook, so you are more likely to have a nice, juicy turkey. 

I followed my instructions, but after I covered the turkey, I forgot to turn the oven down. I placed a meat thermometer in the turkey so I could follow the cooking process and take it out at the temperature I usually do. As I watched the thermometer, the temperature began to accelerate at a very fast rate. Not remembering that I did not turn down the temperature, I was truly baffled as to why this was happening. I took the bird out when it hit 150 degrees. The recommendation is 165 degrees, but remember, the turkey will continue to cook when you remove it from the oven, so you have to take it out, (as you do with any poultry or meat), ten degrees sooner than the recommendation.

I really was bewildered that the turkey cooked so rapidly. After I removed the turkey from the oven, it did not continue to cook as it usually does. The temperature was the same as when I took it out of the oven. When my husband began to carve the turkey, it was slightly raw. I told him to continue to carve it. We then placed all the meat back into the pan with all the juice that it had made when it was cooking. That’s when I realized the oven was still at 425 degrees. I turned it down, and placed the carved turkey back into the oven for 30 more minutes, hoping that it might be fully cooked after that.

To my surprise, the turkey was cooked perfectly. It was the best turkey I think I have ever made. We all make mistakes in the kitchen, and, as I have told you before, it is singularly the best way to learn. It reminds me of learning to ride a bicycle– how many times do we have to fall before we master it? When I learned to ride a bike, I knocked out my two front teeth but I didn’t let it stop me. Soon I was riding with no hands and loving every minute of it. When I fell, I just picked myself up and got back on. Learning takes time, patience and lots of bumps.  

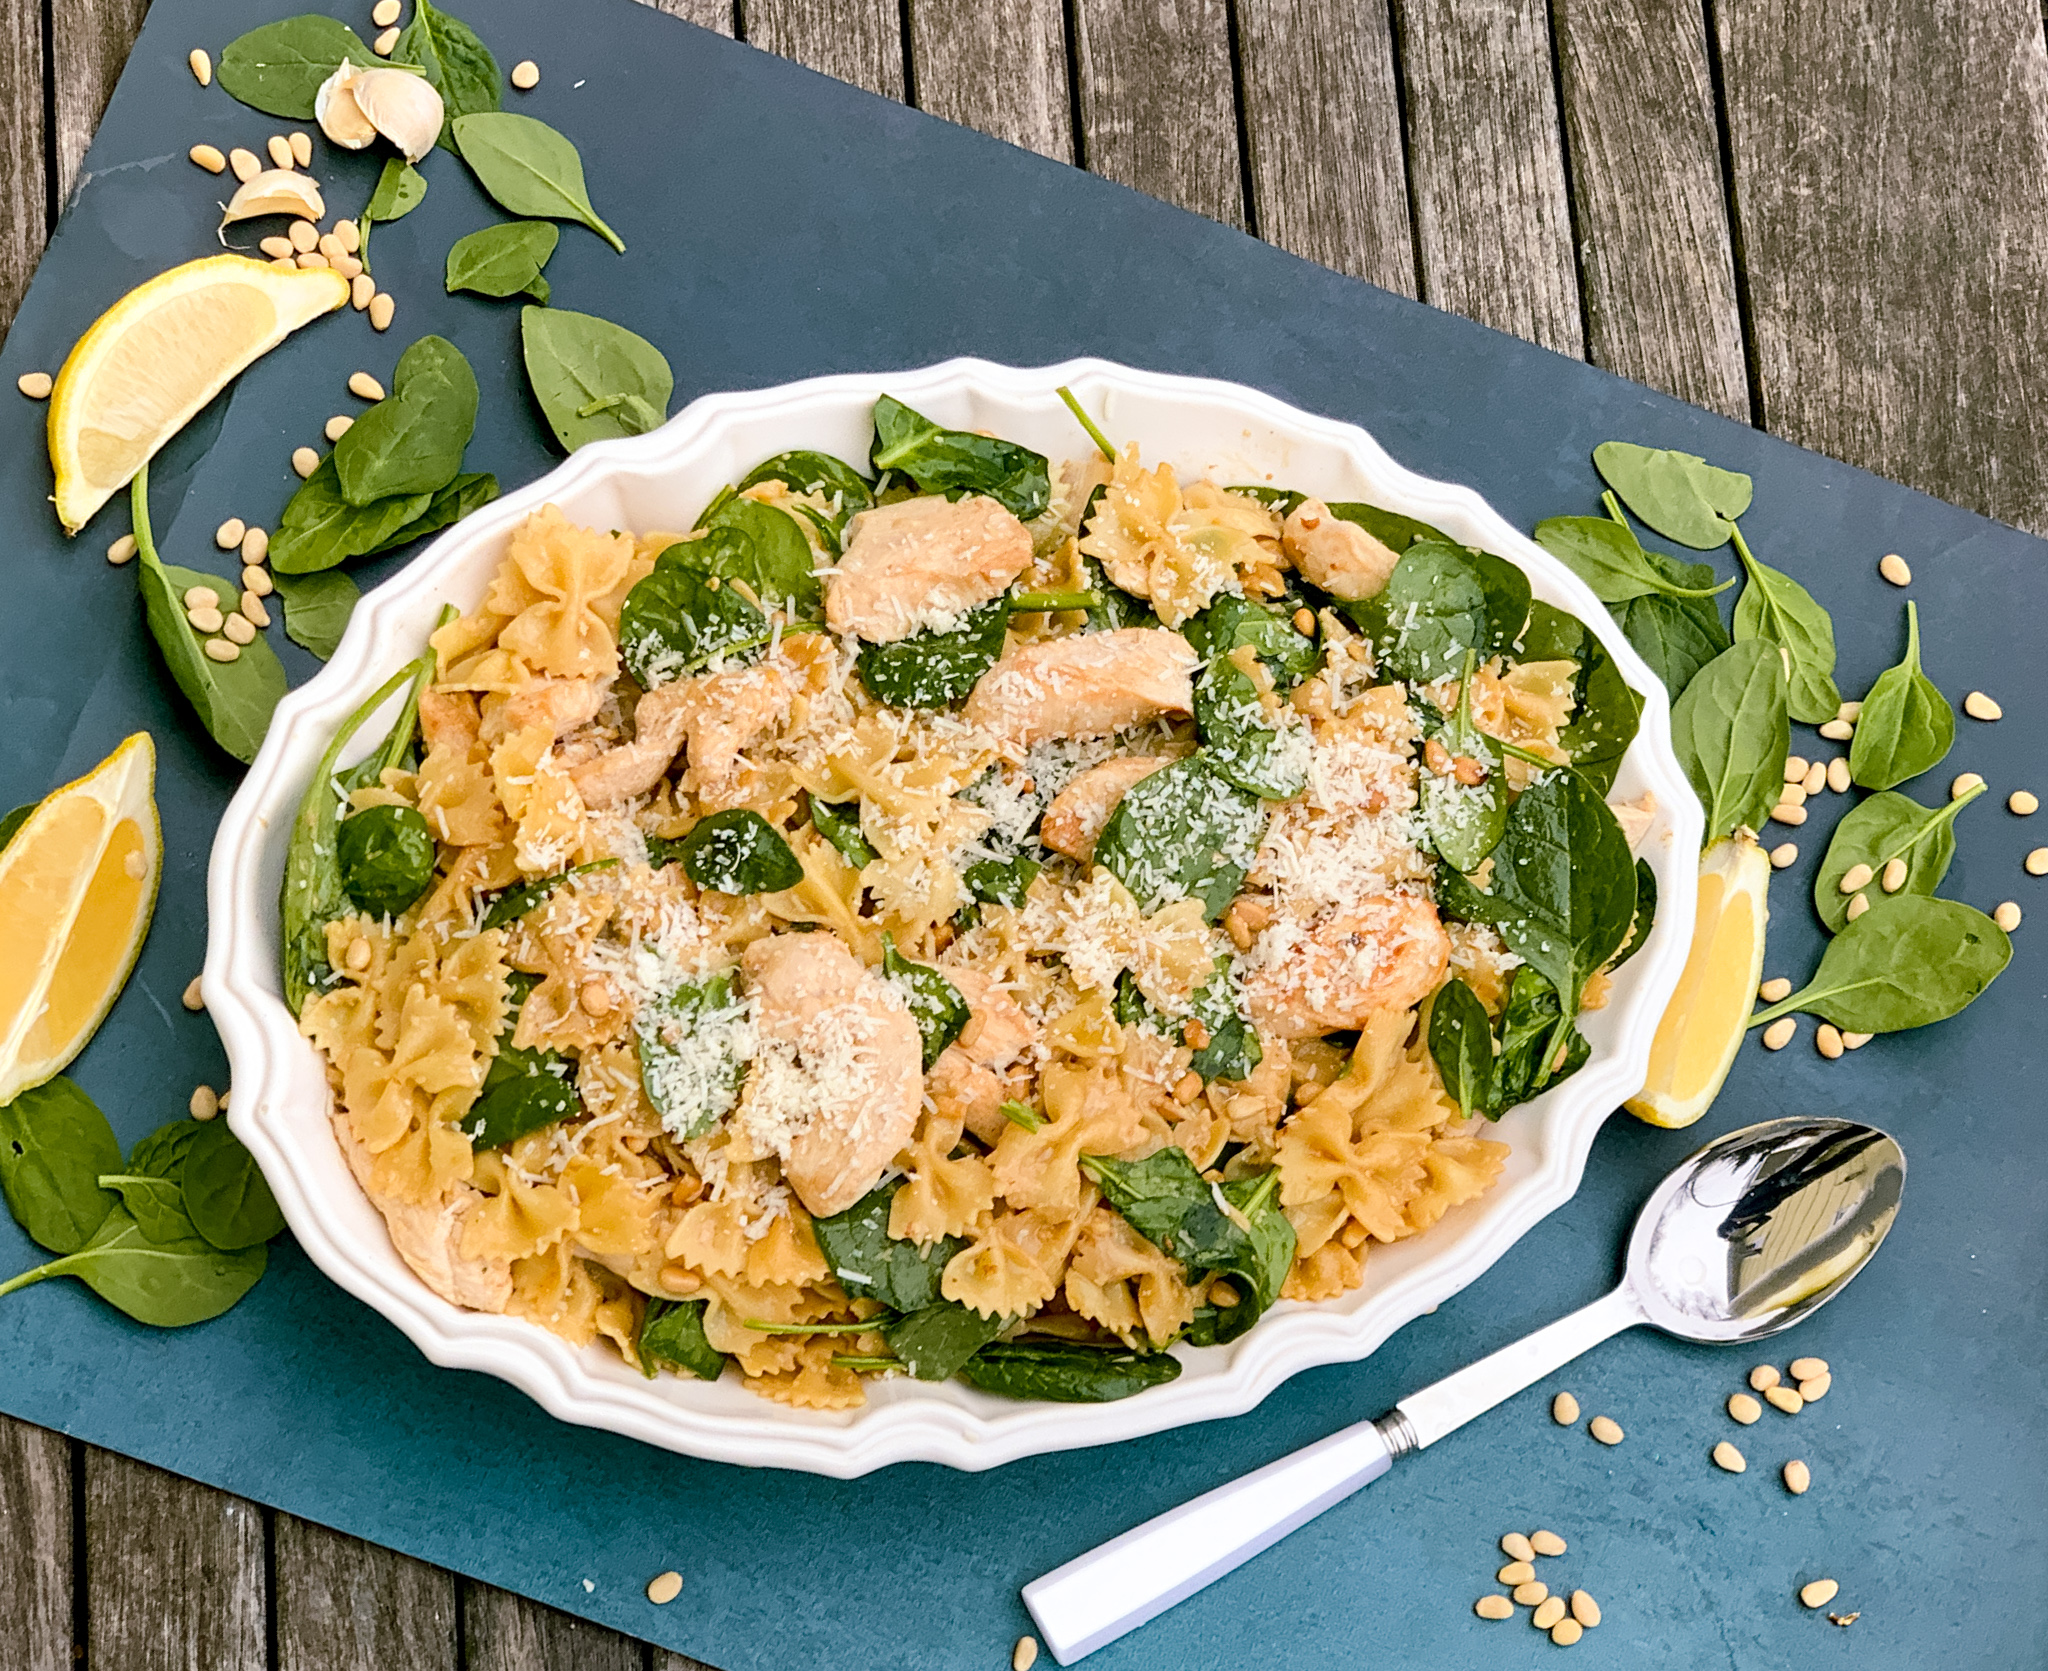
This is one recipe you won’t have to worry about messing up. It is so easy to make, and is packed with delicious, home cooked flavor. The chicken breasts are cooked in butter, giving them a delightful sweet flavor. It is then combined with heavy cream, which adds a creamy, delicate sauce. The sauce is flavored with garlic, pine nuts, and spinach which provide the savory goodness to this dish. The lemon juice and zest delivers a nice tang and the Parmesan cheese makes this dish perfection.

This recipe is courtesy of America’s Test Kitchen and will make a beautiful main dish for 6 to 8 people.

Ingredients for Chicken and Spinach Farfalle:

2 boneless, skinless chicken breasts (about 3/4 lb.), cut crosswise into 1/4″ thick pieces.
Salt and pepper
2 tablespoons unsalted butter
2 garlic cloves, minced
1/2 cup heavy cream 
2 tsp. grated zest and 3 tablespoons juice from 1 lemon
1 lb. farfalle pasta (Bowtie)
1 6oz bag baby spinach
1/2 cup grated Parmesan cheese
1/3 cup pine nuts, toasted

Bring 4 quarts. of water to a boil in a large pot. 

Meanwhile, pat chicken dry with paper towels and season with salt and pepper. 

Melt 1 tablespoon butter in large skillet over medium-high heat. 

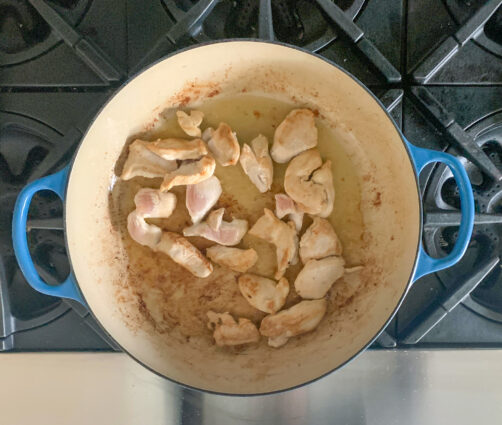
Cook half of chicken until no longer pink, about 3 minutes, transfer to plate. 

Repeat with remaining butter and chicken. 

Add garlic to empty skillet and cook until fragrant, about 30 seconds. 

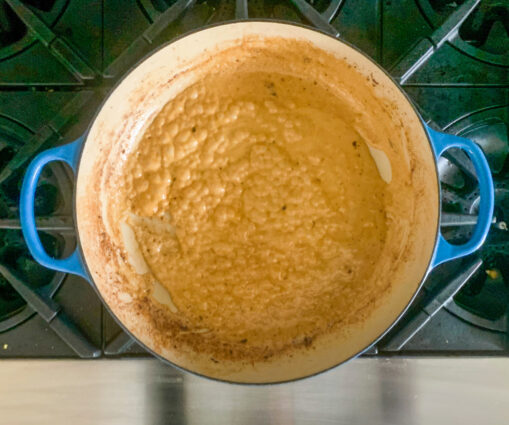
Stir in cream, lemon zest and juice, and simmer until sauce is slightly thickened, about 5 minutes. 

Remove from heat and cover. 

Meanwhile, add 1 tablespoon salt and farfalle to boiling water and cook until al dente. 

Reserve 1/2 cup cooking water, drain pasta, return to pot. 

Toss in spinach.

Add Parmesan, pine nuts, and cooked chicken to pot and toss to combine, adding reserved pasta water as needed.


Season with salt and pepper. 

Serve. 

It’s that Simple!


signature

[recaptcha]