Writing my blog has been an entirely new and wonderful food journey for me. I had so many recipes that I wanted to share, and that was enough to begin writing. As I began to run out of my own, I learned how to find new recipes to share with you.

It was a learning process, but my intuition as a cook grew as I tried more recipes. Many, many of them ended up in the garbage. Now I have become pretty darn good at picking recipes that I know will be good, and it has saved me a whole lot of time.

During my food journey, I have learned some great things. Reading ingredients is very important.  As I did my research, I learned about which foods are healthy, and I began to use only fresh ingredients. I have also become quite experienced in choosing a restaurant as well. I read the menus carefully, and look for freshly made food that does not have very many ingredients in them. In fact, some of the best restaurants use farm to table produce (I will explain that in my next blog). It tastes so much better because the freshness of the produce offers a more true and intense flavor. 

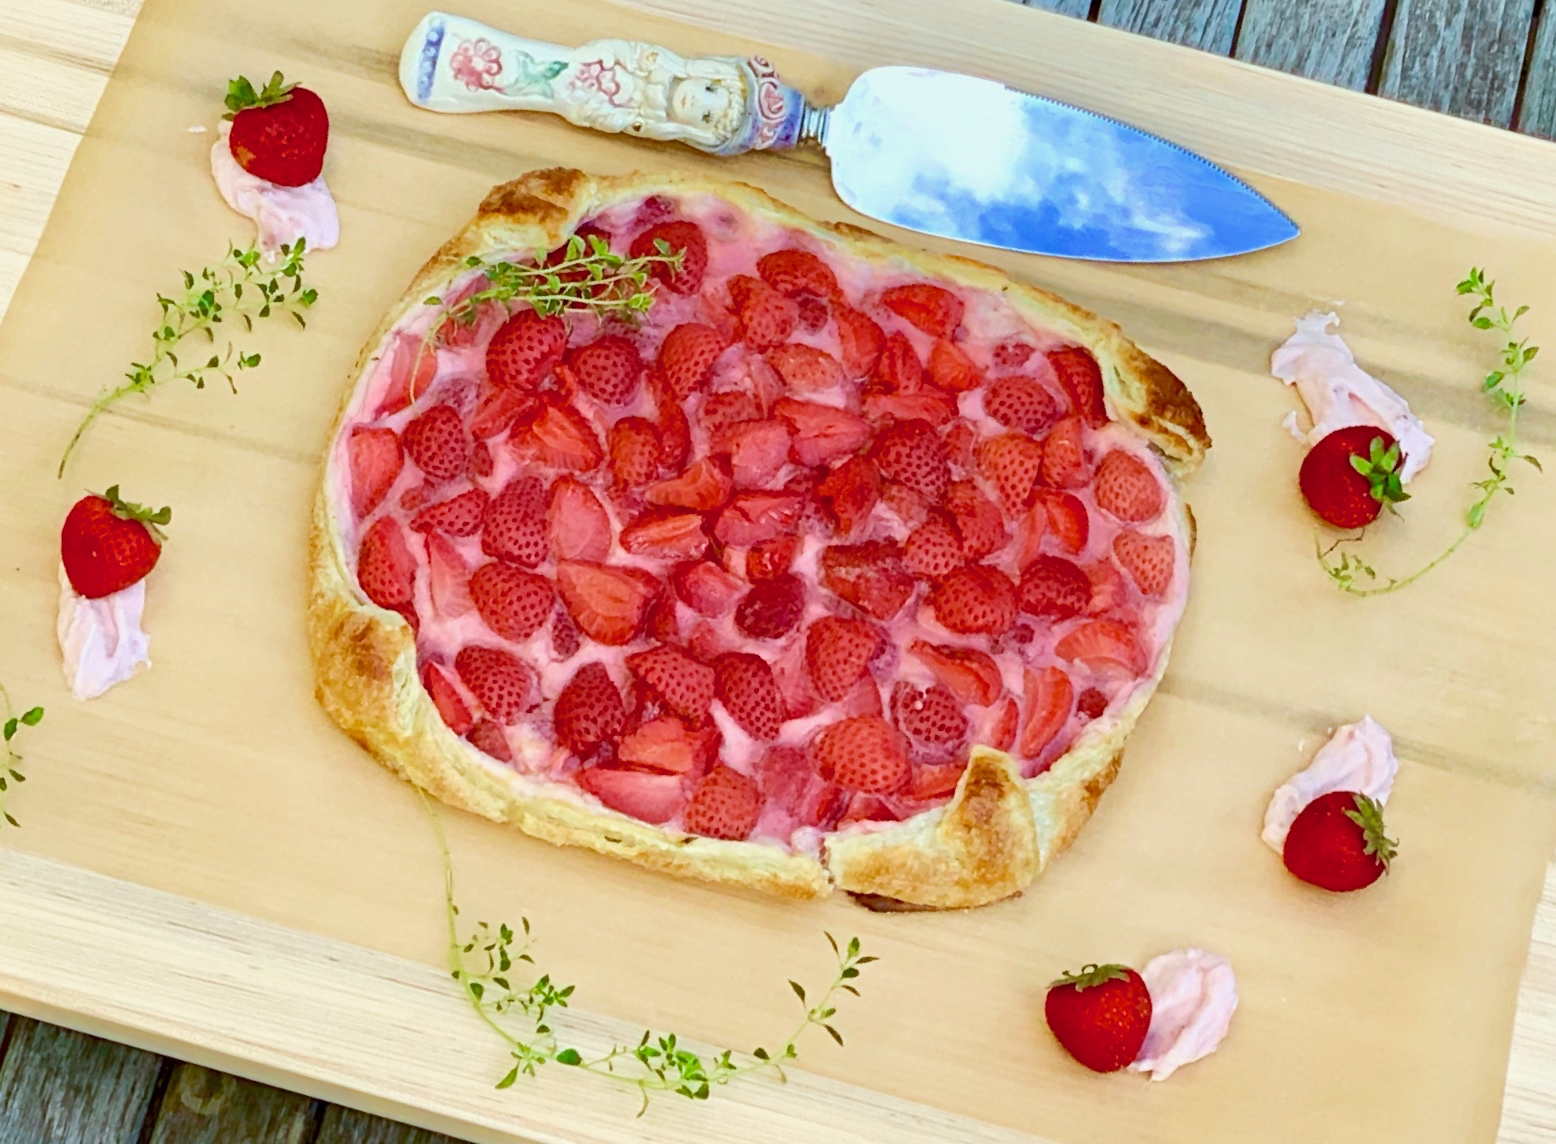
So we live and we learn. Hopefully, we never stop learning. Now onto the recipe, and it’s a good one. This dessert is packed with flavor. It takes sweet and tart to a whole new level. The strawberry mash offers a summery sweetness, and the cream cheese filling is soft and silky– perfect for this rustic tart.

This recipe will serve 6 to 8 people who will come running to the table to try this summer treat.

Ingredients for Strawberry Tart:

For the Strawberry Mash:

1 cup fresh strawberries
3/4 cup sugar
1/2 cup water
3 tablespoons cornstarch
2 tablespoons lemon juice

For the cream cheese filling:

1 package (8 ounces) cream cheese, at room temperature
1/2 cup sugar
1 cup strawberry mash
1 cup whole milk
2 teaspoons vanilla
2 tablespoons butter (at room tempurature)

For the topping:

2 cups fresh strawberries, quarted or halved

For the crust:

1 sheet puff pastry
1 egg, beaten
1 tablespoon water
2 tablespoons sugar

Preheat oven to 450.

Make the Mash:

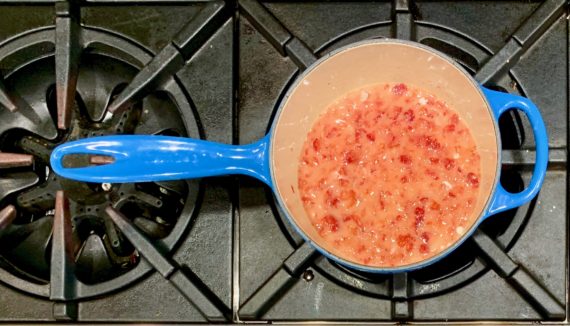
Mash the strawberries until you have 1 cup.

Place into medium saucepan over medium-high heat.

Stir in the sugar, cornstarch, water and lemon juice.

Bring it to a boil.

Cook one more minute until it has thickened.
Make the cream cheese filling:

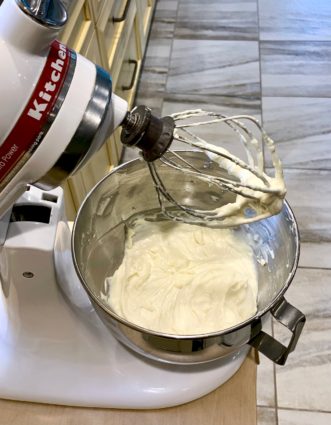
Using a mixer, beat the cream cheese, butter  and sugar.

Pour in milk and vanilla.
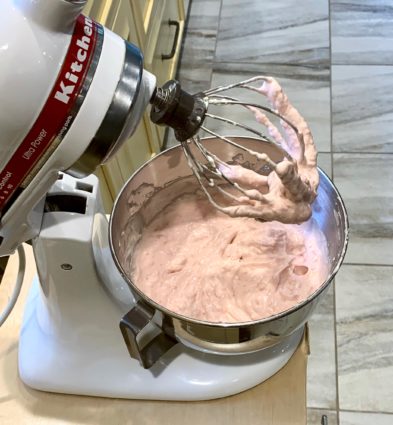
Mix in strawberry mash.
Beat the egg and water in a small dish.

Set aside.

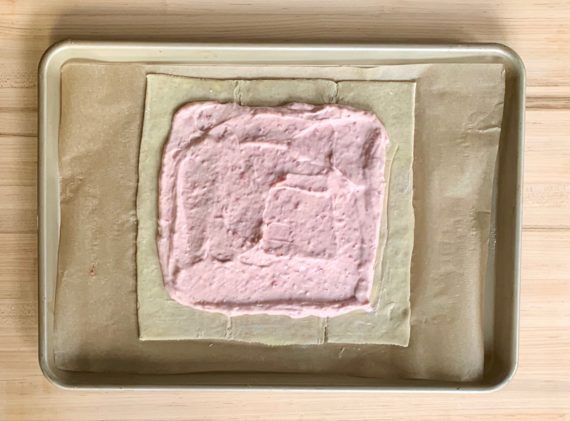
Leaving 1 1/2 inches on all sides, spread the cream cheese filling over the puff pastry.
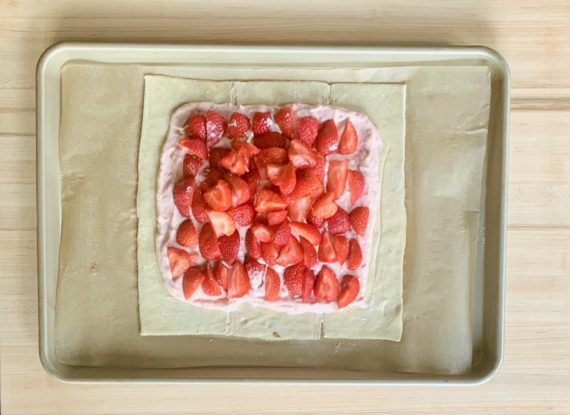
Place the quarted strawberries on top of the cream cheese mixture.
Fold the 1 1/2-inch crust over filling, pleating as you need too.
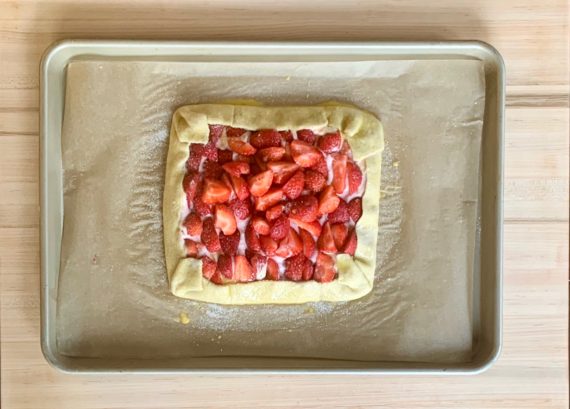
Spread the egg mixture on the sides of the puff pastry that are folded up.

Sprinkle with sugar.

Place in oven and bake for 15 to 20 minutes or until crust is golden brown.
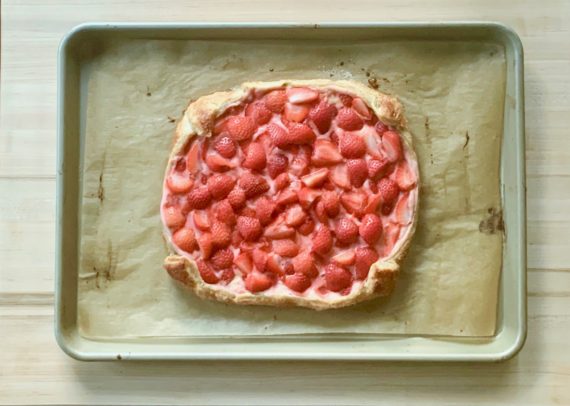
It’s that simple!

signature

[recaptcha]


It’s summertime, and you are probably thinking about skipping dessert. For the sake of both your mental and physical health, you probably shouldn’t do that. In the past, if you were dieting, you were told that you shouldn’t have any sweets at all.  Actually, a few bites of dark chocolate can reduce your risk of cardiovascular disease. Chocolate rich in dark cocoa packs a high concentration of flavonoids, an antioxidant with huge anti-inflammatory and immune system benefits. In a study of Swedish men aged 45 to 79, those who ate 10 grams of dark chocolate per day (or about one square) were 17 percent less likely to suffer from a stroke than those who did not eat it regularly.  Look for the kind containing 65 to 70 percent cocoa or more.

Science has shown that when you enforce rules and restrictions on a specific food, you naturally crave it more.  This can make you binge when you start eating sweets. Focus more on portion control; avoid the entire pie or devouring four or five cookies in one sitting. Small amounts of any dessert will be enough to satisfy your cravings, and it has been proven that just a small amount will do the trick. Try to put the box of cookies or ice cream back in the pantry or freezer, so you are not tempted to eat everything at once.

If you do feel like indulging, try to make your own sweet delicacies at home, when you can use substitutes like coconut milk, nut butter, avocado or applesauce. By doing this, you will be just as happy, I promise you, and the desserts will be healthier than the store-bought variety. Practice makes perfect, so do not be intimidated by the baking process. Sure, there will be a few disasters, but the process will teach you to be an excellent baker.

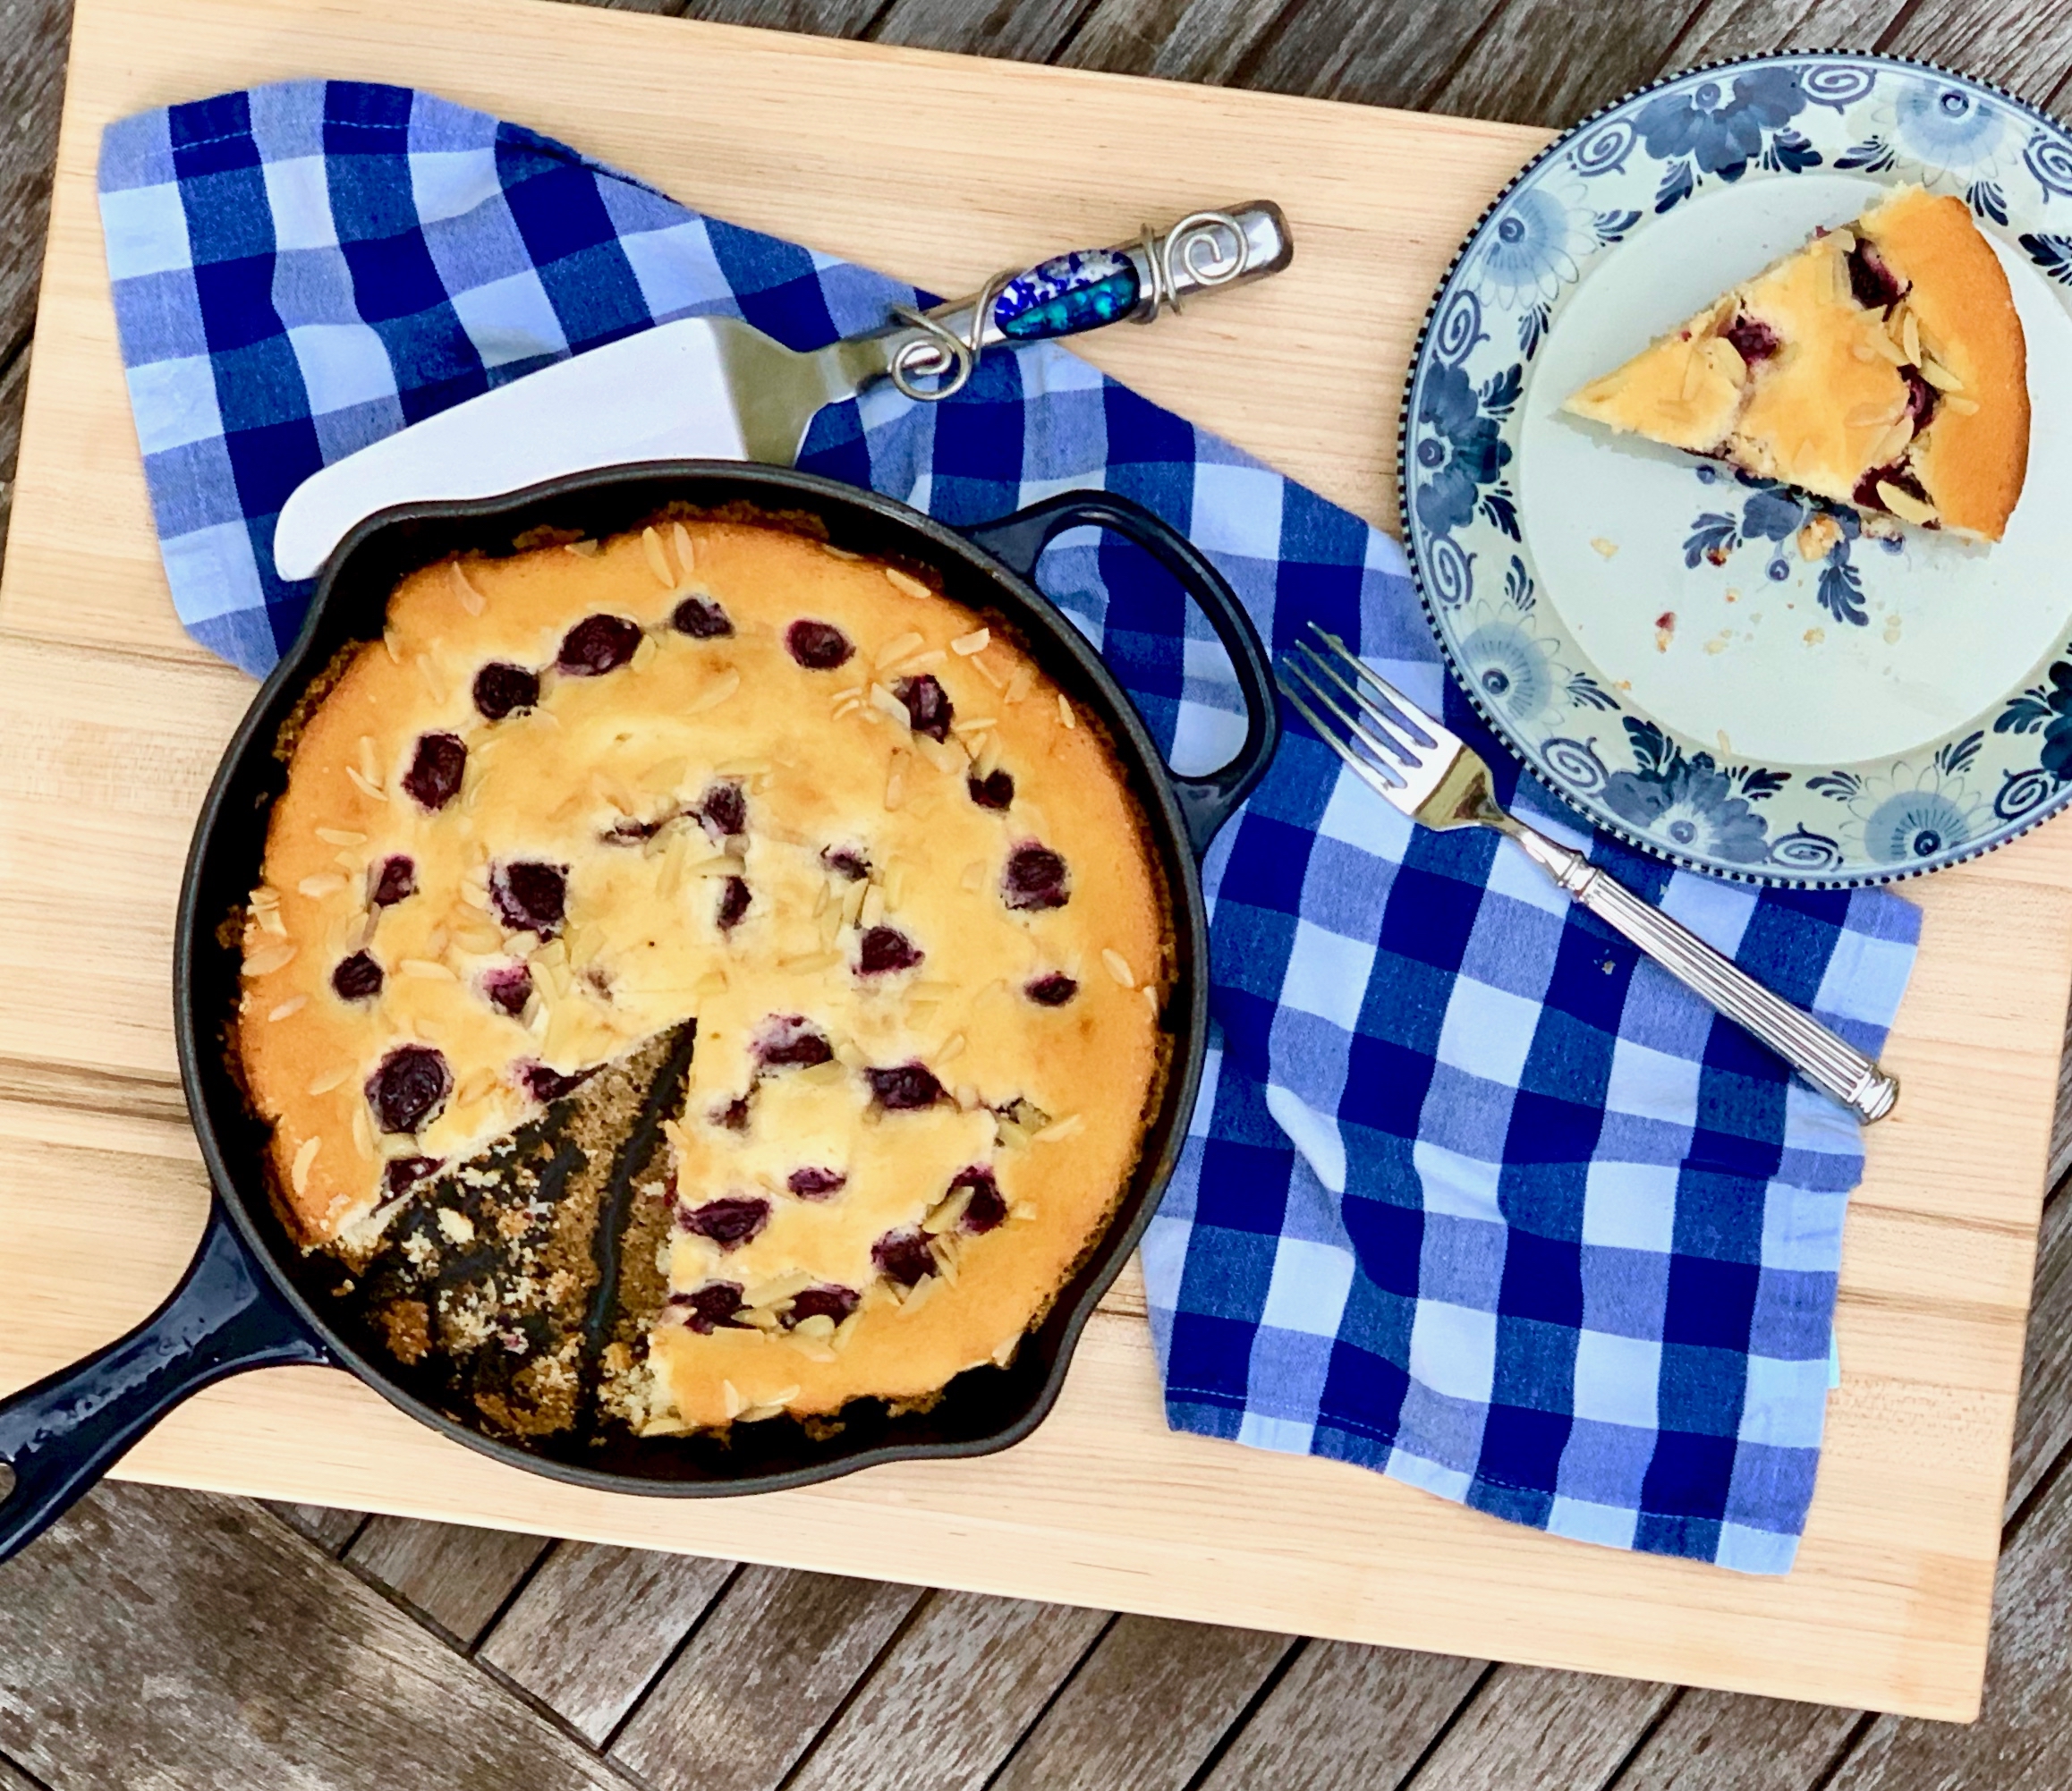
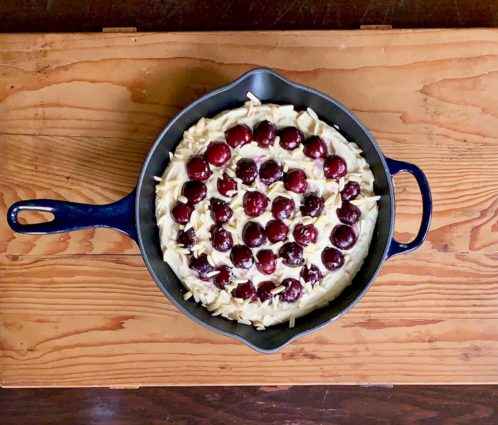
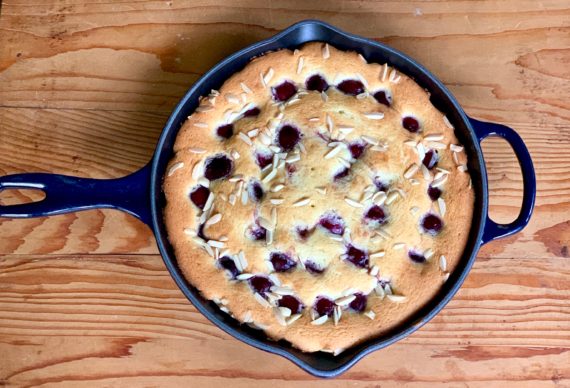
This dessert is so simple, yet the final product will make you look like a sophisticated baker. The delicious batter is the perfect crust for the delicately sweet cherries. The almonds add another depth of flavor and crunch. This one should be on your “must try” list, or you will be missing one delicious savory and sweet treat. 

This recipe is adapted from Southerncastiron and will serve 6 to 8 people who will swoon over this delicious treat.

Ingredients for Cherry-Almond Skillet Cake:

½ cup butter, softened
¾ cup sugar
1 large egg
1 ½ cups all-purpose flour
1 teaspoon baking powder
¼ teaspoon baking soda
¼ teaspoon salt
⅔ cup whole buttermilk
1 cup frozen dark cherries (I used fresh ones and pitted them)
¼ cup chopped almonds

Preheat oven to 350°.

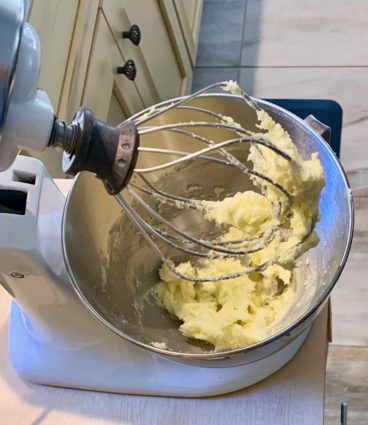
In a large bowl, beat butter and sugar with a mixer at medium speed until creamy, 2 to 3 minutes, stopping occasionally to scrape sides of bowl.

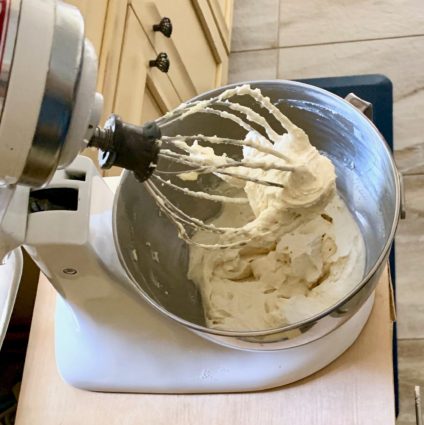
Add egg, beating until combined.

In a small bowl, whisk together flour, baking powder, baking soda, and salt.

Gradually add flour mixture to butter mixture alternately with buttermilk, beginning and ending with flour mixture, beating just until combined after each addition.

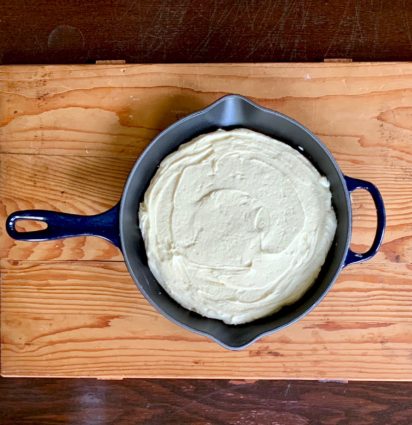
Pour batter into a 10-inch cast-iron skillet.

Sprinkle cherries and almonds onto batter.

Bake until a wooden pick inserted in center comes out clean, 30 to 35 minutes.

Let cool for minutes; serve warm.

It’s that simple!
Ahhhh! My favorite place!

signature

[recaptcha]


Hosting a dinner party for my friends is one of my favorite things.  Even when there are only four of us, it takes time, effort, and love to prepare a cohesive dinner menu. The main course is easy for me to choose; it’s always the sides–I tend to whip up two or three–that take the most time to pick. More than anything else, I try hard not to make the same recipes all the time. I enjoy the hunt for new side dishes, and since I’m always looking, this blog has become a sort of repository for my recipes. 

On the other hand, the preparation of the main course used to take up so much of my time that I wasn’t able to make a dessert, and I would ask guests to bring something. I also didn’t bake very often, so I felt my talent was better used on the main course.

To my benefit, I have discovered that there are many desserts that can be made well in advance. One such dessert was a cake I prepared the day before I was to host.  No worries, right? The dinner was a success… until I brought out the cake. My husband cut into it and we all found a mushy mess! I thought the toothpick had come out clean, but I was so wrong. Luckily, he had brought home some pastries that morning and they ended up being my saving grace. Now I always try to bake a dessert, but I make sure I have a backup, just in case. 

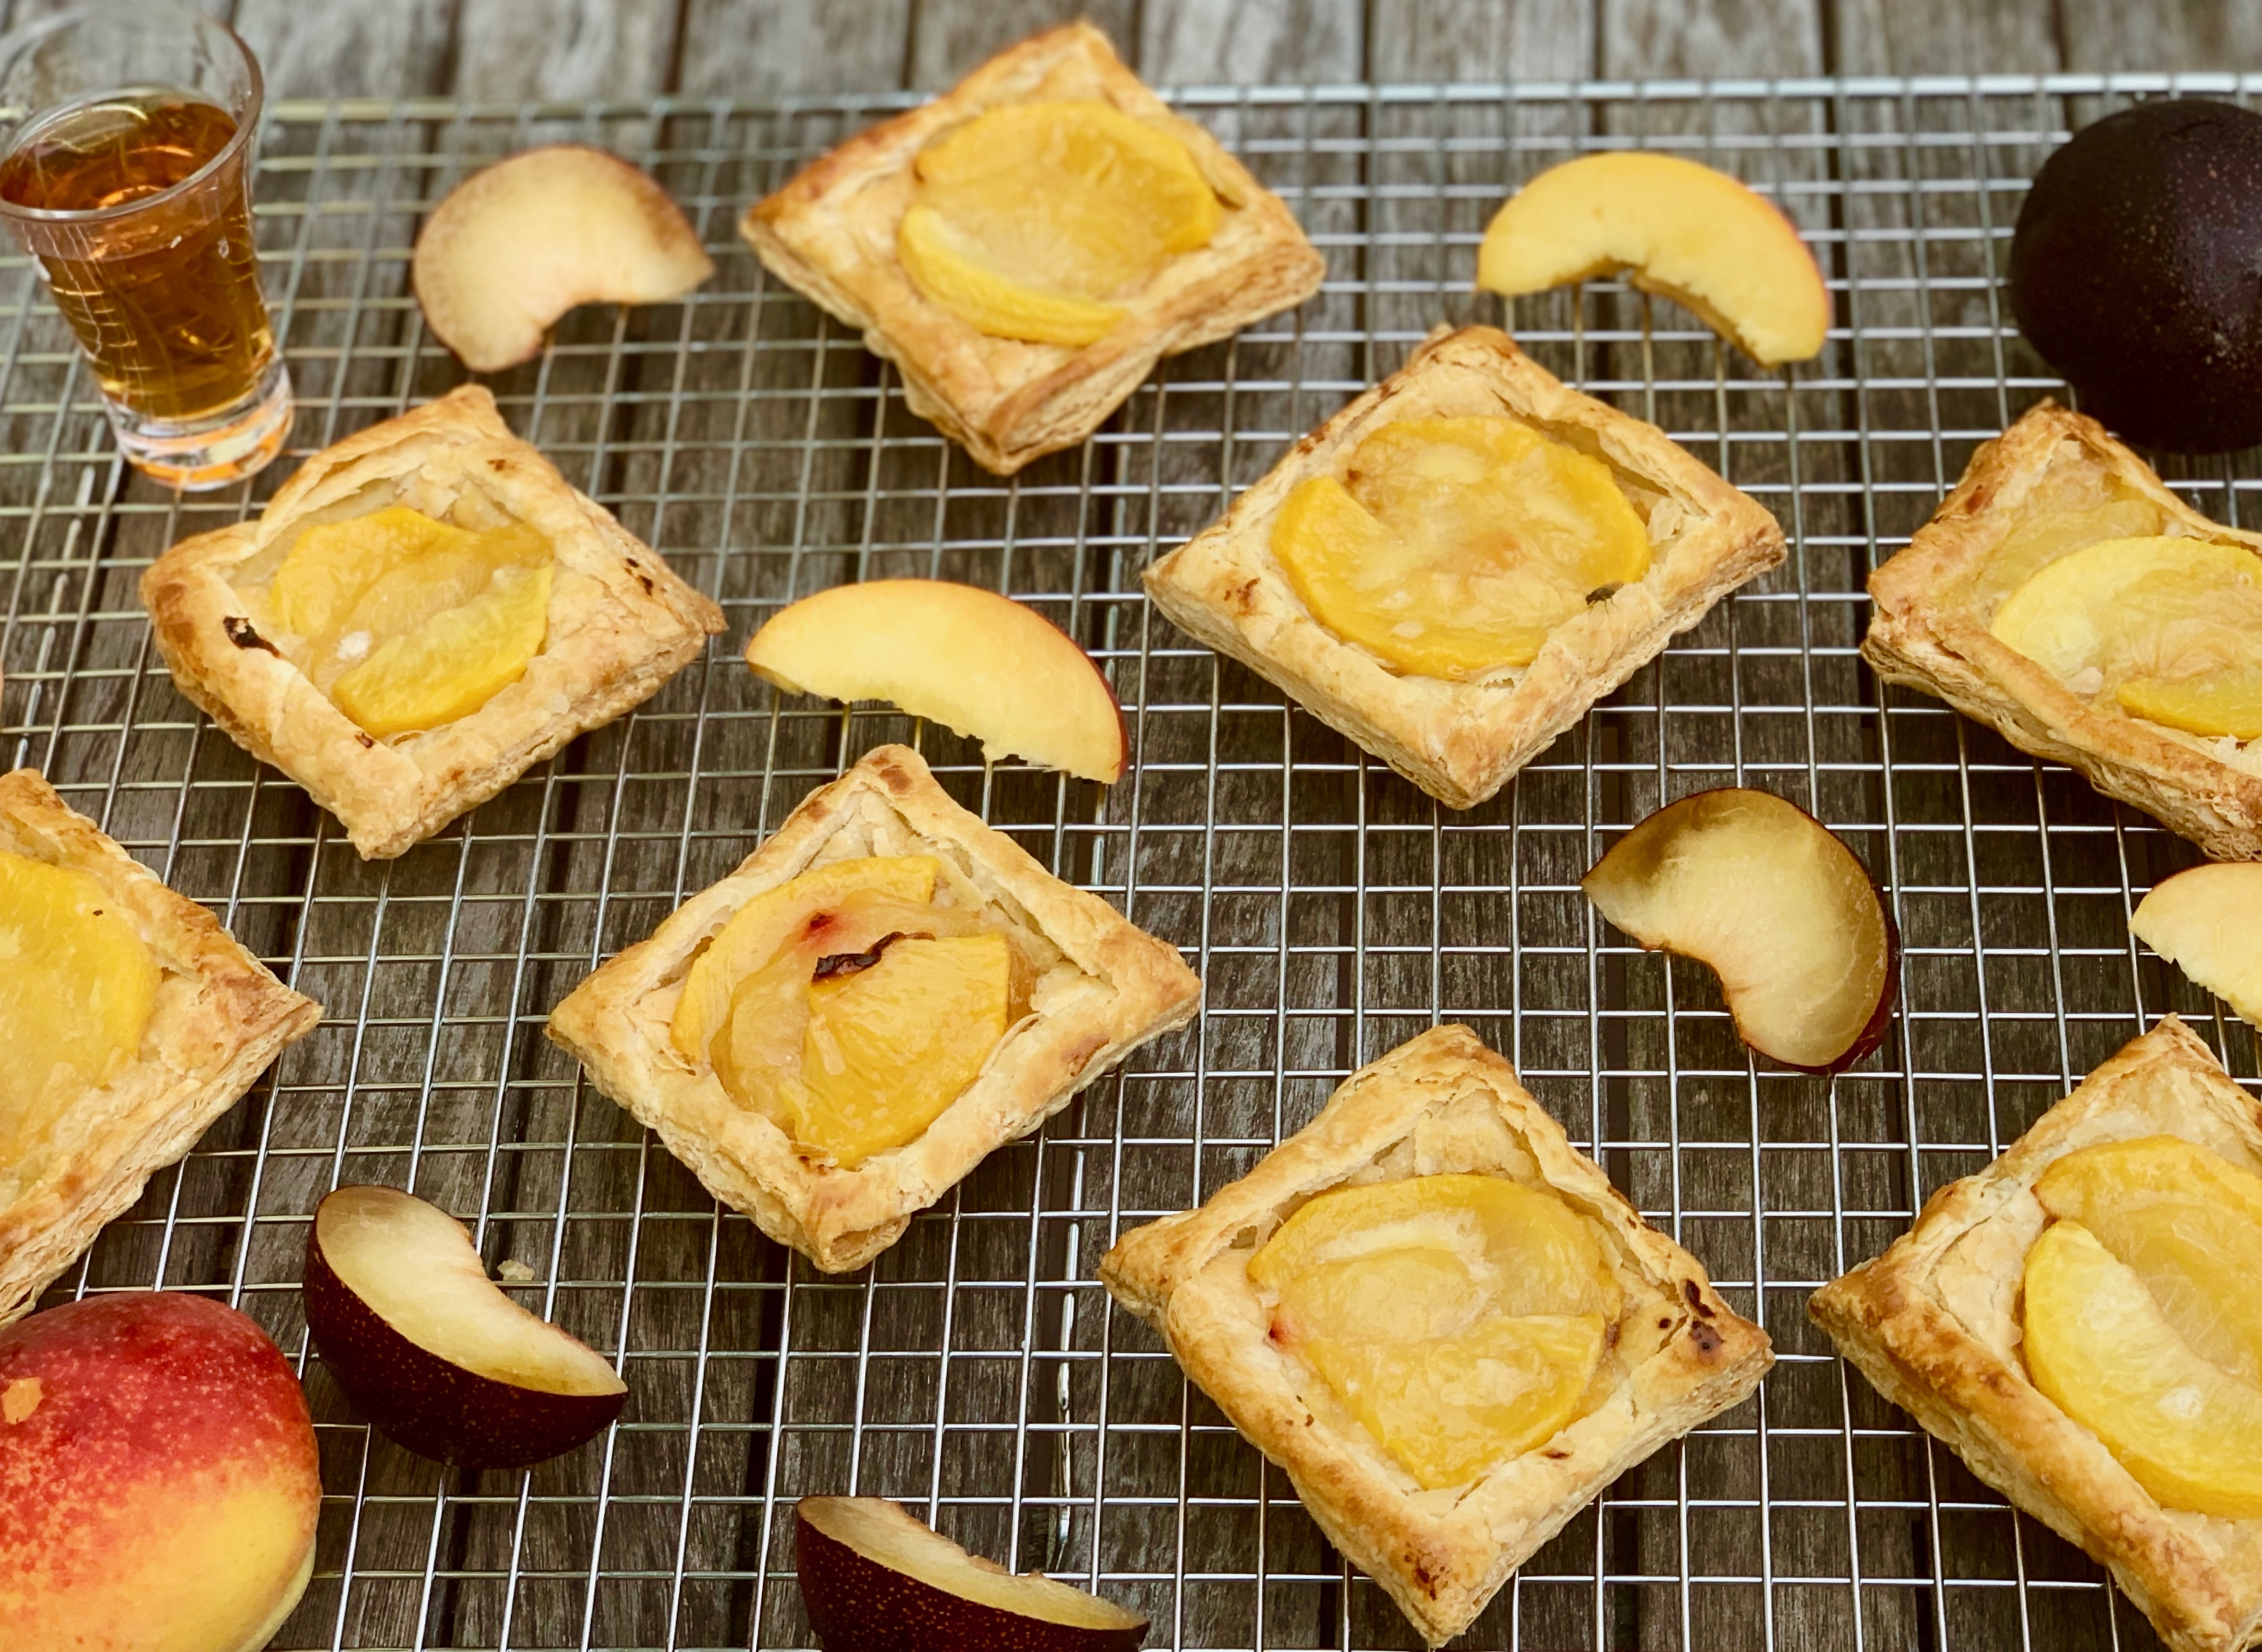
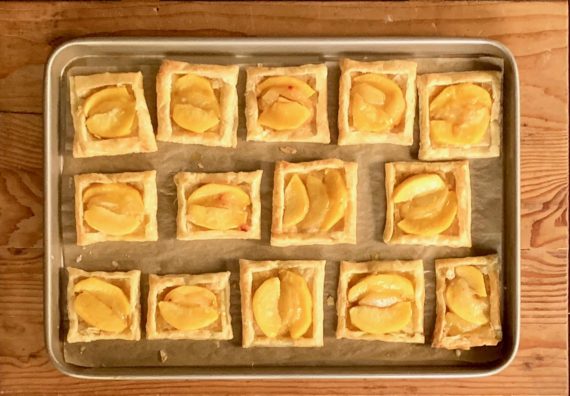
Now, this is a reliable dessert you can make ahead of time, and it is so easy to boot! A little fruit and some puff pastry and you’re good to go. You may even have all the ingredients in your pantry already. It is a perfect way to use up all those peaches and plums that might be starting to edge past their prime.

The fruits are roasted to perfection, then topped with a sugar-bourbon mixture that compliments the fruit and brings out a beautiful summer sweetness. The puff pastry is the splendid home for the fruit, giving it a rustic, yet dainty deliciousness. It is a crowd-pleaser for sure, and everyone is going to ask for seconds.

This recipe will serve 9 to 12 people who will love and appreciate the forethought you put into this gorgeous dessert.

Ingredients for Roasted Peach and Plum Tarts:

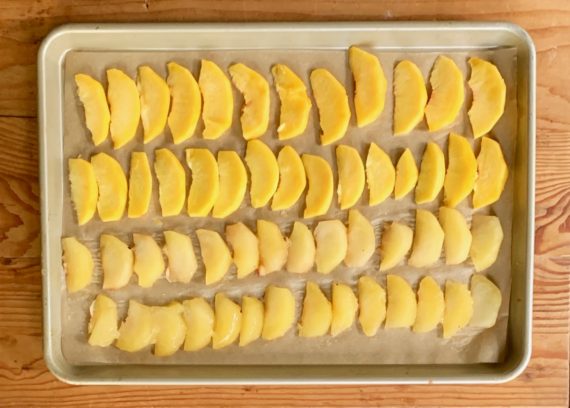
2 peaches, peeled sliced and roasted
3 plums, peeled sliced and roasted
2 sheets frozen puff pastry sheets, thawed
1/4 cup granulated sugar
1/4 cup butter, melted
1 tablespoon Bourbon (or more if you would like)
1 egg, beaten
1 teaspoon water
Sea salt flakes (such as Maldon)

Preheat oven to 425°F.

In a small bowl combine brown sugar, melted butter, and bourbon.

Line a baking pan with parchment paper.

Spread the sliced fruit on the parchment paper.

Roast 15 minutes.

Remove fruit. 

Set aside.

Line another baking sheet with parchment paper.

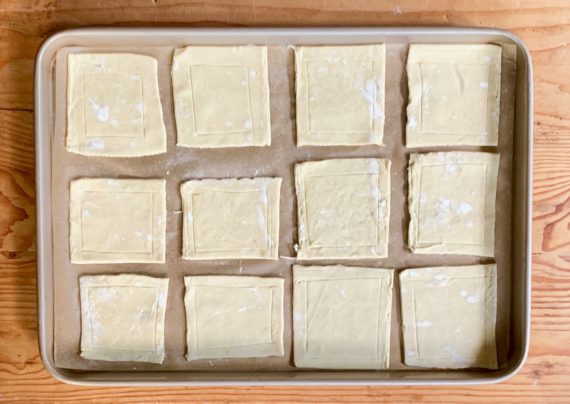
On a lightly floured surface, unfold puff pastry and cut into eighteen 3-inch squares.

Using a small knife, make a shallow cut around each square 1/4 to 1/2-inch from the edges.

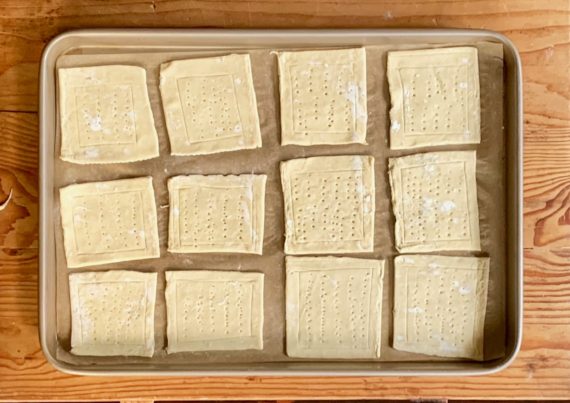
Generously prick centers with a fork.

Place 1-inch apart on prepared baking sheet.

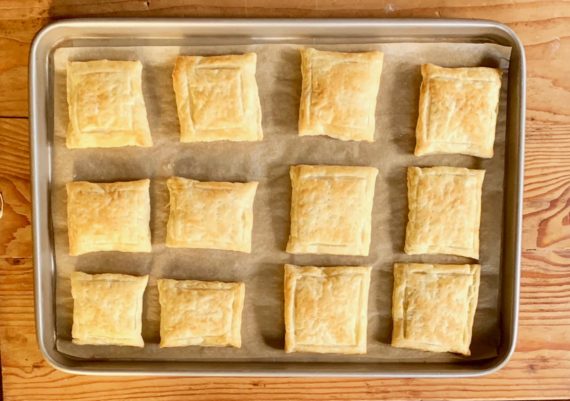
Bake 10 minutes.

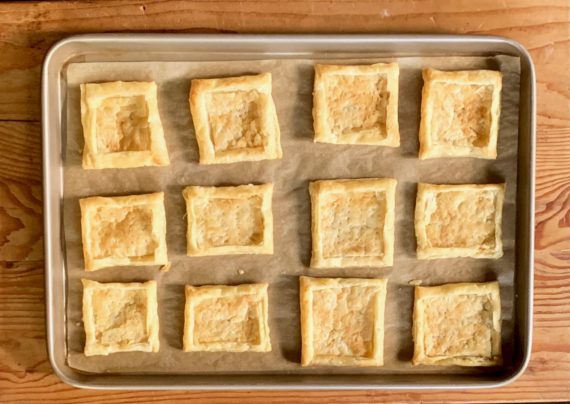
Using the back of a spoon, lightly press down the center of each square.  You might have to run your knife along the scores you have already made to loosen it up.

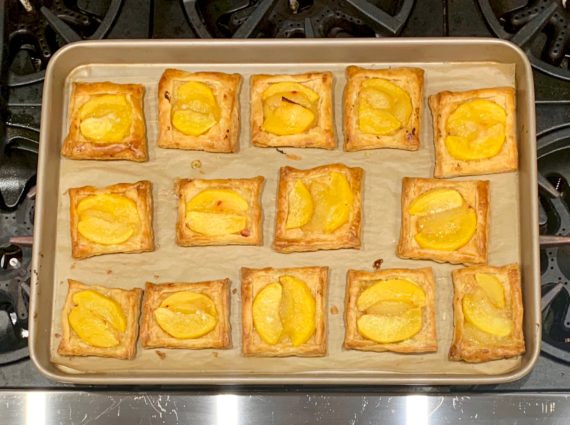
Place peaches and pears into centers of tarts. You may have to cut some of them to fit it. I was able to get 2 slices of peach and 1 slice of plum onto each square.

Drizzle fruit in each tart with 2 tsp. of the sugar mixture.

In a small bowl, combine beaten egg and water.

Brush the edges of the tarts with egg mixture.

Bake 7 to 10 minutes more or until pastry is light brown.

Drizzle tarts with remaining sugar mixture

Sprinkle with salt.

It’s that simple!
signature

[recaptcha]


Every year my husband and I take a week on the beach (I am a New Yorker, so I will never get used to saying “the Shore”). We really love it there, since there is so much to do. I love walking through all the different towns; there are antique stores and dreamy little coffee shops mixed in with upscale boutiques and Mom and Pop bookstores. There are beautiful wineries, vineyards, and food festivals to attend, and tucked amid the mansions are sleepy little cottages and historic homes.

My favorite part, of course, is all the locally grown produce and freshly baked treats that can be found at farm stands. These stands are usually run by the owners of the farms, who, in addition to growing their produce, also make pies and jams. They are so talented, and you can taste the love and care that goes into making these delicious creations.

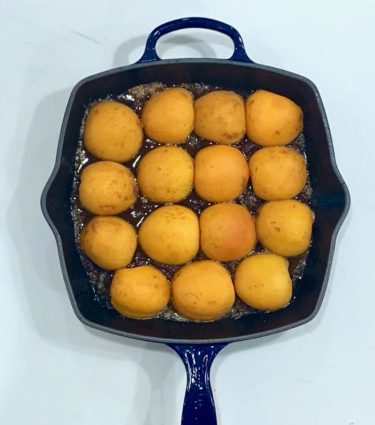
This year, I couldn’t resist picking up some apricots. While I am not a big fan of apricots in general, they looked so beautiful that I knew I would like them if they were cooked up correctly. I looked up some recipes and found this little gem that turned me into an apricot lover pronto. The original called for 10 to 11 small apricots, but I used 8 since mine seemed bigger than usual. The rule here is to use as many as you can tuck into the pan.

The apricots are the true stars of this delicious cake. They add a tangy delight to an otherwise sweet cake. The buttermilk makes it moist and almost creamy, and the vanilla and almond combine happily to create perfect savory goodness. You are going to love this cake, and I betcha can’t eat just one piece. Nope, this is definitely a second-helping treat.

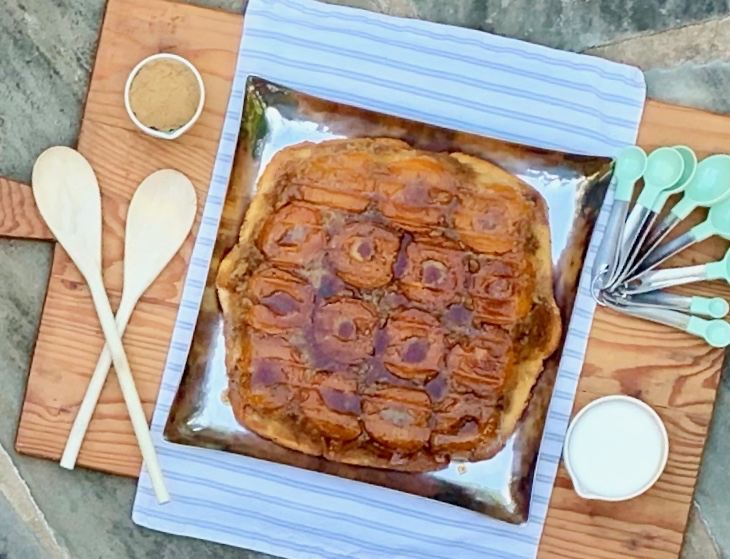
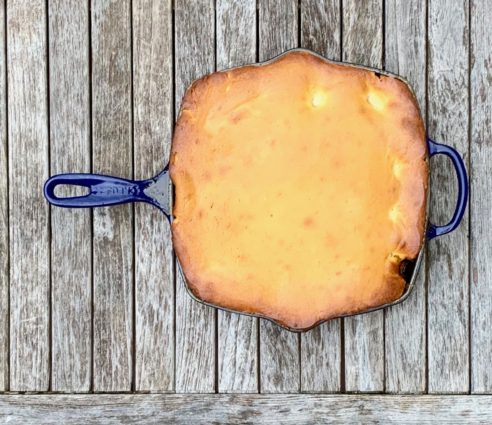
*I didn’t realize I was using a grill pan and not a skillet until I turned over the cake and saw those lines. UGH! Don’t make the same mistake I did. It kind of made the cake look wierd in the picture, but it still tasted awesome.

This recipe is courtesy of Epicurious and will serve 8 people who will want to dive in for a third slice.

For the Topping:

1 stick (1/2 cup) unsalted butter
3/4 cup packed light brown sugar
10 or 11 small (2- to 2 1/4-inch) fresh apricots (1 1/4 lb), halved lengthwise and pitted

For the Cake:

1 3/4 cups all-purpose flour
1 1/2 teaspoons baking powder
1/2 teaspoon baking soda
1/2 teaspoon salt
1 stick (1/2 cup) unsalted butter, softened
3/4 cup granulated sugar
1 1/2 teaspoons vanilla extract
1/4 teaspoon almond extract
2 large eggs at room temperature for 30 minutes
3/4 cup well-shaken buttermilk

Special equipment: a 10-inch well-seasoned cast-iron or heavy nonstick skillet (at least 2 inches deep)

Preheat oven to 375°F.

Make Topping:

Heat butter in skillet over moderate heat until foam subsides.

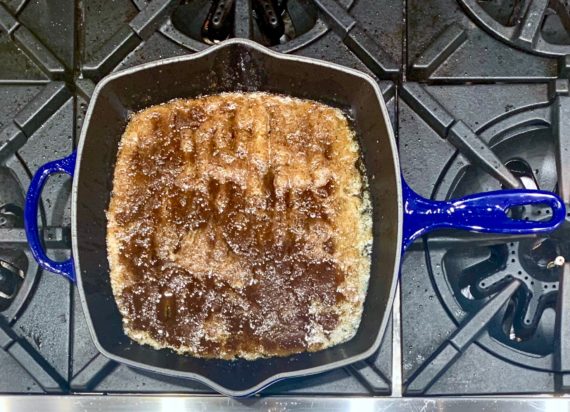
Reduce heat to low and sprinkle brown sugar evenly over butter, then cook, undisturbed, 3 minutes (not all of the sugar will melt).

Remove skillet from heat and arrange apricot halves, cut sides down, close together on top of brown sugar.

Make cake batter:

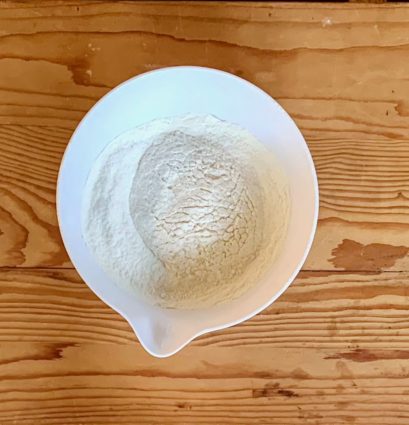
Sift together flour, baking powder and soda, and salt into a small bowl.

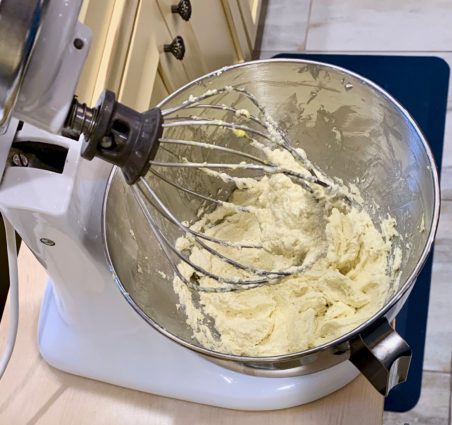
Beat together butter, sugar, and extracts in a large bowl with an electric mixer at medium speed until pale and fluffy, 2 to 3 minutes in a standing mixer or 3 to 4 minutes with a handheld mixer.

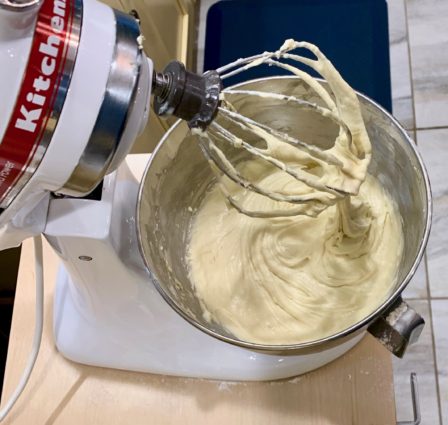
Beat in eggs 1 at a time, then beat until mixture is creamy and doubled in volume, 2 to 3 minutes.

Reduce speed to low and add flour mixture in 3 batches alternating with buttermilk, beginning and ending with flour mixture, and beat just until combined.

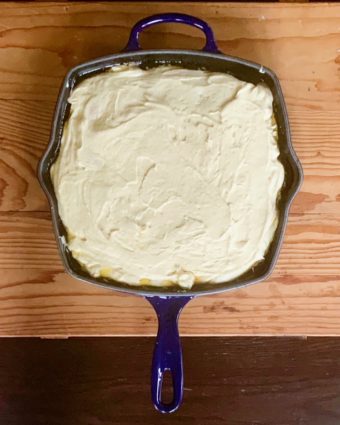
Gently spoon batter over apricots and spread evenly.

Bake cake:

If your skillet isn’t ovenproof, wrap handle with heavy-duty foil (or a double layer of regular foil) before baking.

Bake cake in middle of oven until golden brown and a wooden pick inserted in center comes out clean, 40 to 45 minutes.

Wearing oven mitts, immediately invert a large plate over skillet and, keeping plate and skillet firmly pressed together, invert cake onto plate.

Carefully lift skillet off cake and, if necessary, replace any fruit that is stuck to bottom of skillet.

Cool to warm or room temperature.

It’s that simple!
signature

[recaptcha]


It is the 4 year anniversary of my blog!

Thanks to all of you who follow me! I always love hearing from you!

Ahh! Summer is finally here and so are delicious plums, peaches, nectarines, and all the yummy summer fruits. One of our favorite ways to enjoy non-citrus fruits is to eat them wrapped in a buttery envelope of warm dough. As you may have noticed, there are a number of names for a combination of fruit and baked pastry.  Cobblers, crumbles, and crostatas are all desserts baked with a crust or pastry and fruit. I couldn’t help thinking about what the difference is between these summer treats. Is there really a distinction between the three? 

There is, but it’s subtle. A cobbler is a baked fruit mixture with a biscuit-like top crust. A crumble is a baked fruit mixture with toasted cornmeal or oats-based topping. A crostata is an open-faced fruit tart where the fruit (plus a little sugar) is spooned into a buttery pastry dough. The edges of the dough are folded in about an inch or two to create a crust, and are usually finished with an egg wash and some coarse sugar. Crostatas are made free form and cooked on a flat sheet, so no two will look the same. This rustic look makes them so effortless and charming.

But wait!  There’s more!  There are galettes and tarts, which are most similar to a crostata. The only difference between the galette and the crostata is the name. Crostata is Italian and galette is French. The tart is a little different. The tart is baked in a pan that is known as, well, a tart pan. It can vary in size and shape, and the bottom is removable for a cleaner presentation. Tart crusts are more shortbread-like, as opposed to the flakey pastry dough used for crostatas and galettes. Whichever you decide to make, your tummy is not going to know the difference, and you will love them all.

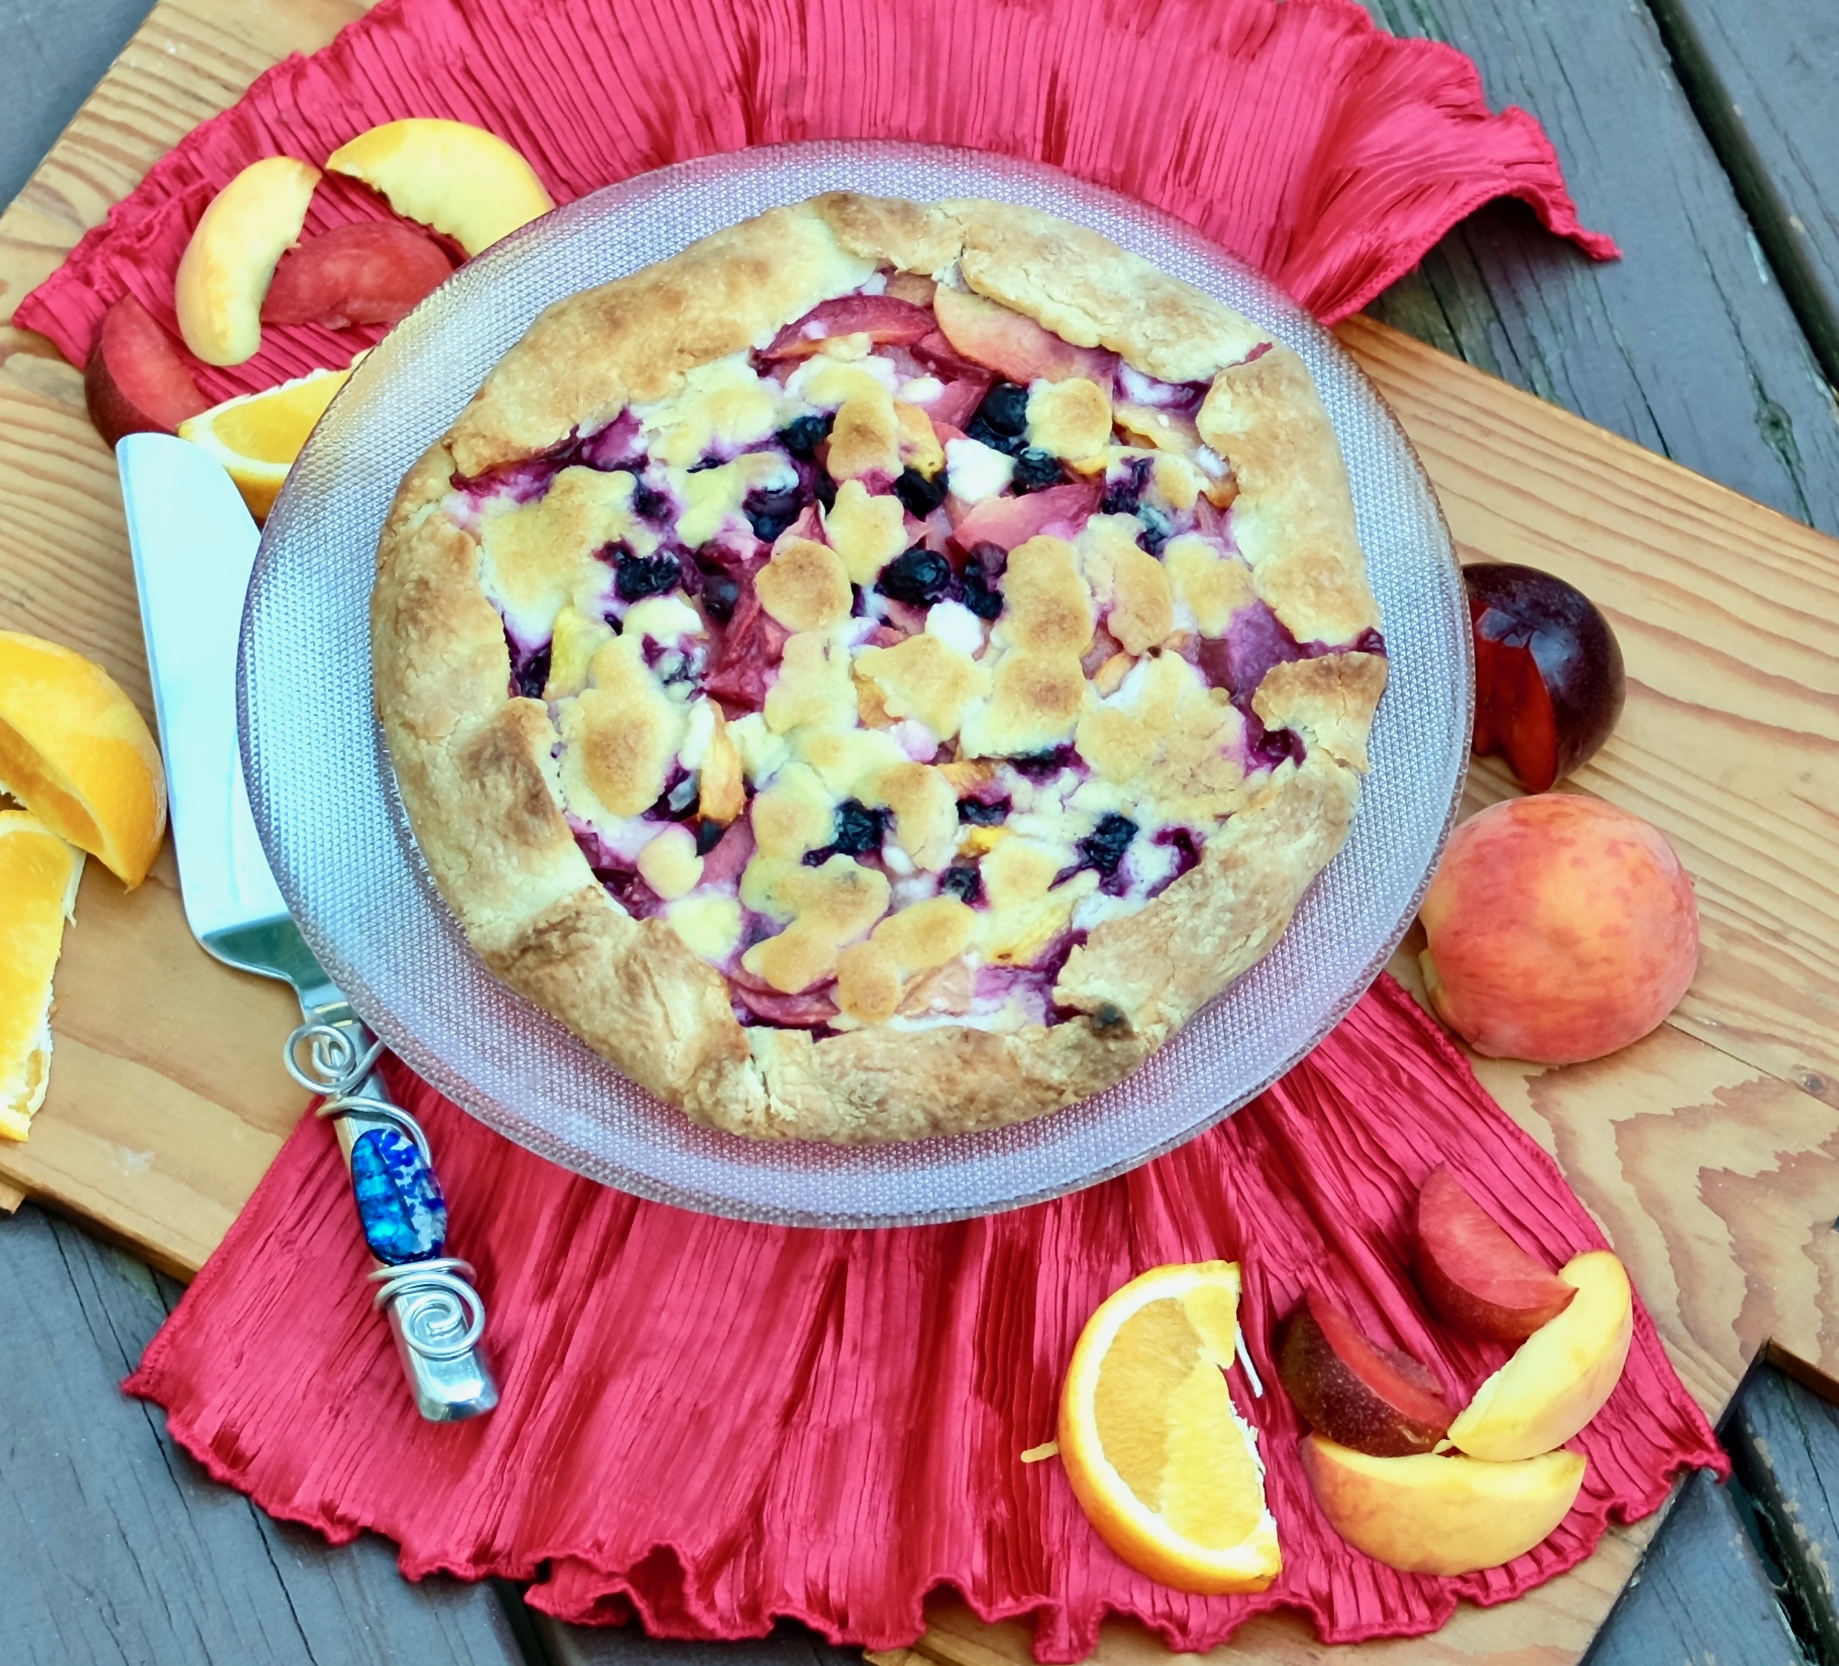
This crostata is perfection. The peach, plum, and blueberries combine to make a delicious filling for this treat. The hint of orange blends beautifully with them. The fruits are surrounded with a yummy, buttery pastry dough that gives dessert wonderful texture and flavor. This is a “keeper”. I will definitely be making it again this summer.

This recipe is courtesy of Ina Garten and will serve 6 people who will be deliriously happy when eating it.

Ingredients for Summer Fruit Crostata:

For the pastry:

2 cups all-purpose flour
1/4 cup granulated or superfine sugar
1/2 teaspoon kosher salt
½-pound (2 sticks) cold unsalted butter, diced
6 tablespoons (3 ounces) ice water

For the filling:

1 pound firm ripe peaches, peeled
½-pound firm ripe black plums, unpeeled
1/2 pint fresh blueberries
1 tablespoon plus 1/4 cup all-purpose flour, divided
1 tablespoon plus 1/4 cup granulated sugar, divided
1/4 teaspoon grated orange zest
2 tablespoons freshly squeezed orange juice
1/4 teaspoon kosher salt
4 tablespoons (1/2 stick) cold unsalted butter, diced

Make the Pastry:

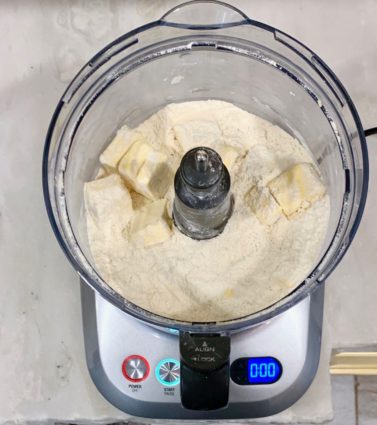
Place the flour, sugar, and salt in the bowl of a food processor fitted with a steel blade.

Pulse a few times to combine.

Add the butter and toss quickly (and carefully!) with your fingers to coat each cube of butter with the flour.

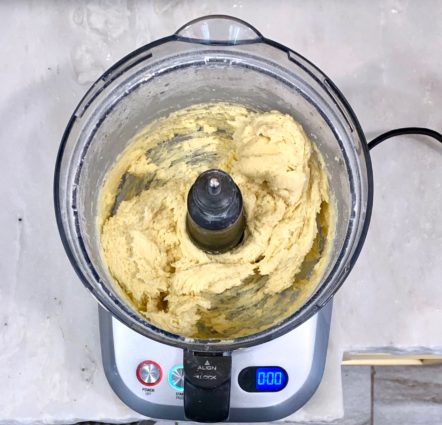
Pulse 12 to 15 times, or until the butter is the size of peas.

With the motor running, add the ice water all at once through the feed tube.

Keep hitting the pulse button to combine, but stop just before the dough comes together.

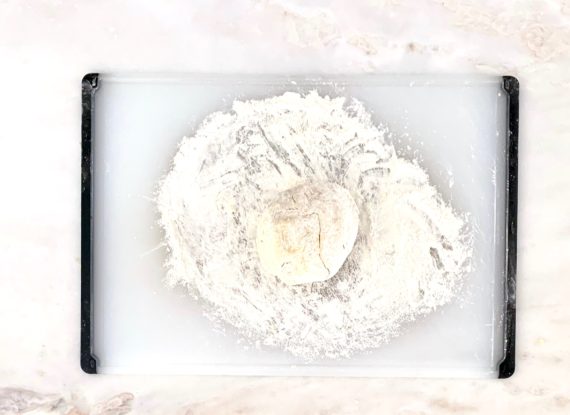
Turn the dough out onto a well-floured board, roll it into a ball.

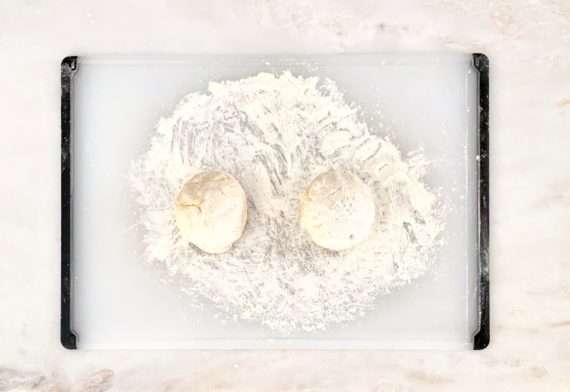
Cut in half, and form into 2 flat disks.Wrap the disks in plastic and refrigerate for at least 1 hour.

If you only need 1 disk of dough, the other can be frozen.

Preheat oven to 450 degrees F.

Line a baking sheet with parchment paper.

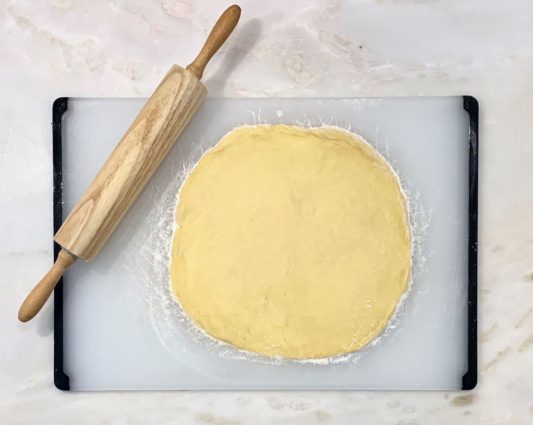
Roll the pastry into an 11-inch circle on a lightly floured surface.

Transfer it to the baking sheet.

Make the filling:

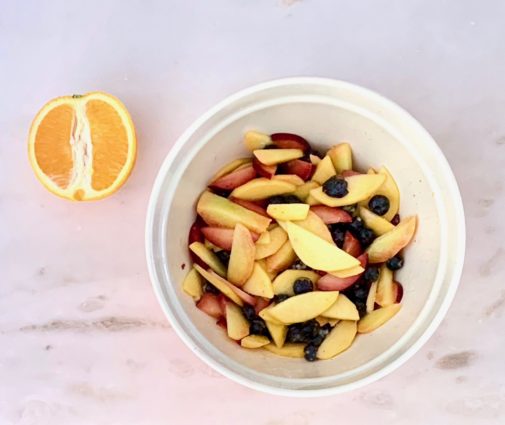
Cut the peaches and plums in wedges and place them in a bowl with the blueberries.

Toss them with 1 tablespoon of the flour, 1 tablespoon of the sugar, the orange zest, and the orange juice.


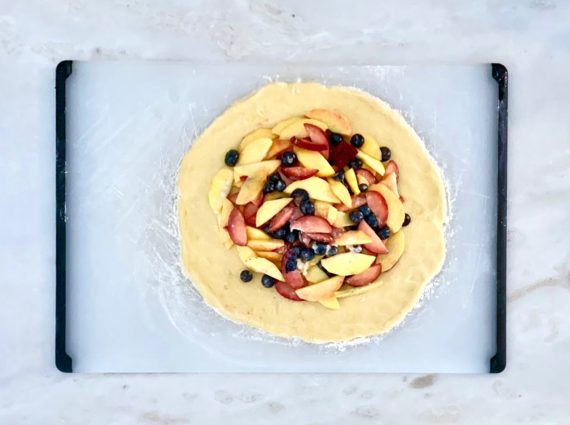
Place the mixed fruit on the dough circle, leaving a 1 1/2-inch border.

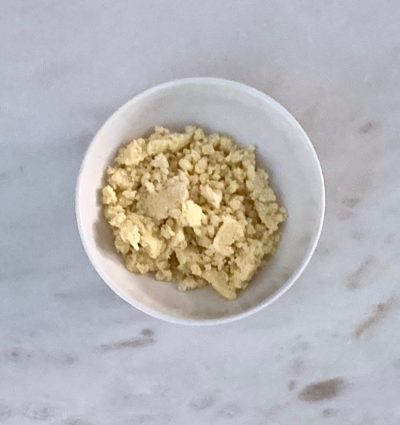
Combine the 1/4 cup flour, the 1/4 cup sugar, and the salt in the bowl of a food processor fitted with a steel blade.

Add the butter and pulse until the mixture is crumbly.

Pour into a bowl and rub it with your fingers until it starts to hold together.

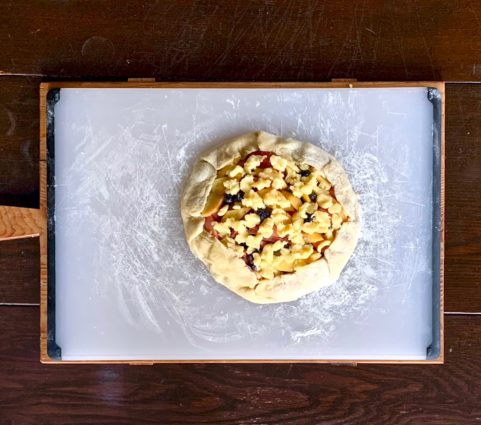
Sprinkle evenly over the fruit.

Gently fold the border of the pastry over the fruit, pleating it to make an edge.

Bake the crostata for 20 to 25 minutes, until the crust is golden and the fruit is tender.

Let the crostata cool for 5 minutes, then use 2 large spatulas to transfer it to a wire rack.

Serve warm or at room temperature.

It’s that simple!
 

signature

[recaptcha]