When I first began cooking, I learned by watching cooking shows (so many, too much to recall them all), and reading cookbooks. I would make many recipes over and over again, trying to get them absolutely perfect. During those years, I learned the importance of owning a very sharp knife, finely tuning my knife skills, and making a beautifully plated dish.

These skills proved to be well-worth the trouble when Thanksgiving rolled around. I was able to present pretty platters of food that my guests not only loved to look at… and to eat. Does a wonderful looking platter make the food taste better? Maybe, maybe not. I think it helps. The simple fact is that we first eat with our eyes. An artful presentation allows us to anticipate the flavors of the dish even before you take the first bite. 

First you must choose a plate or bowl that will make the food look appetizing. It takes practice to arrange the food so it looks better. I try to look for plates that will make the colors of the food pop. I use plates and shallow bowls that have a little bit of color, or a color that will contrast the colors of the food. If all else fails, use a white dish and you won’t go wrong. I usually use white platters and bowls or natural muted colors like pastel or blue or a muted charcoal. Bold, bright colors can compete with the food. 

After spending so much money on expensive dishes, I was always broken-hearted when they chipped or broke. I learned that lesson very early. Now, I purchase mine at Bed Bath and Beyond, Home Goods, or antique stores that have all shapes and sizes that are inexpensive so I don’t mind if they chip or beak. You can even try your local thrift shops!

Once you have your plate, your best bet is to arrange the food on the plate so the platter looks very full and plentiful. Using an overly large bowl for a small amount of food will make your food look skimpy. If the plate is too big, it will look lost. When you are placing the food on the platter, leave some room around the edges. If you are using a bowl, place the food so it is mounded in the center. 

The secrets of beautiful plating aren’t just for top chefs or stylists. The elegant plating of food can be so satisfying and appealing and it is part of your education as a cook. Knowing a few simple techniques can help you put together plates that look as wonderful as they taste. 

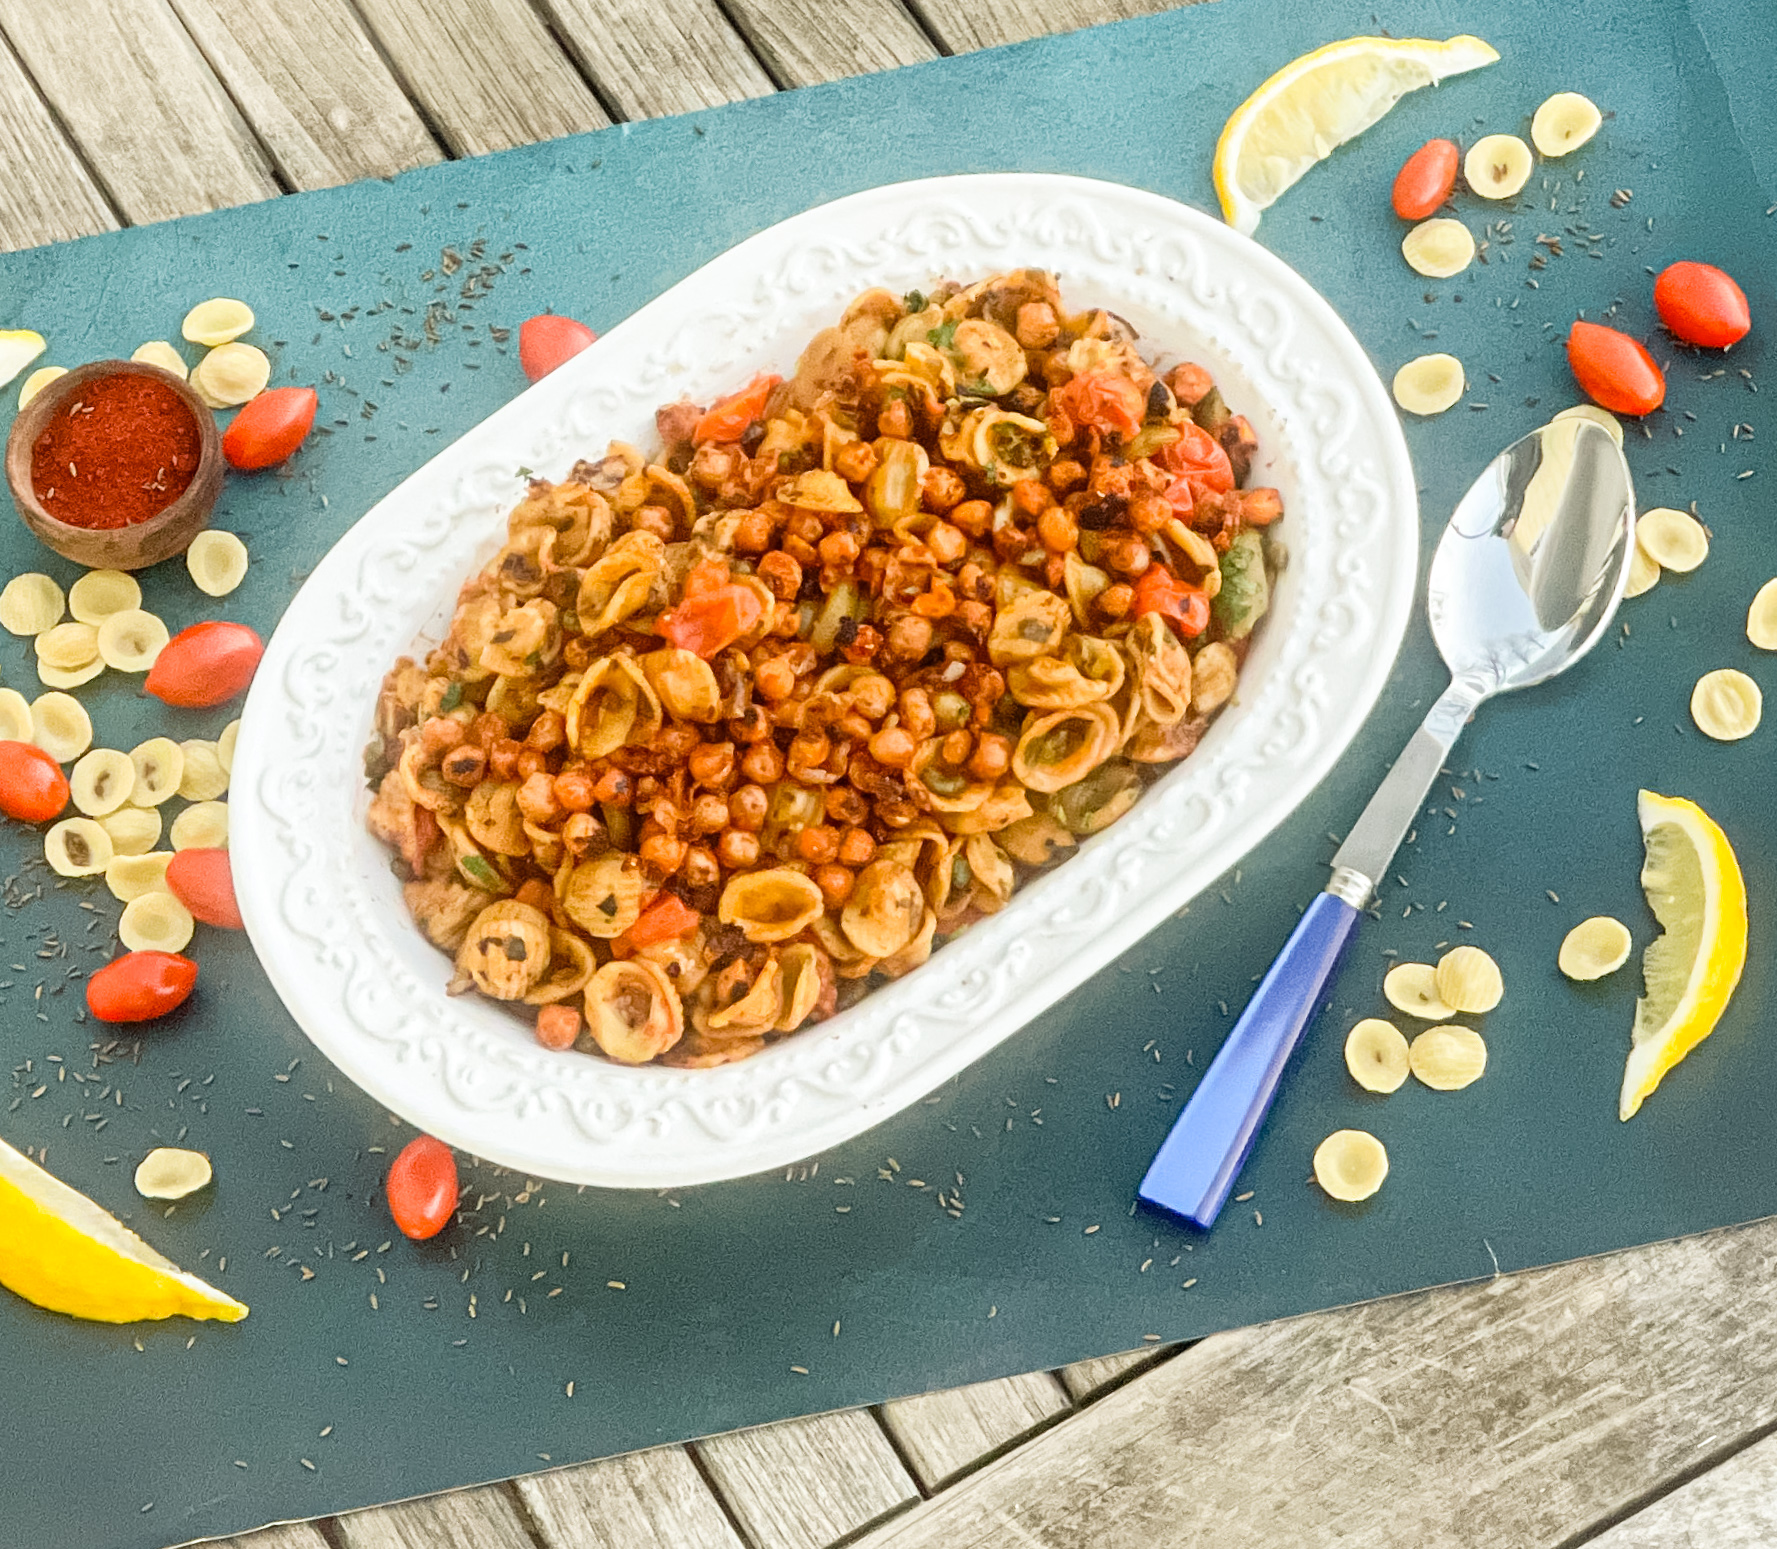
Give your skills a test with this dish! Ottolenghi takes this simple side dish to new levels. He is well known for finding obscure ingredients that make the food have that “mmm, so good’ taste. For this recipe, he just used simple ingredients that you have in your pantry and can easily make any time of the week. Between the smoked paprika, cumin, tomato paste, caraway seeds, and garlic, there is so much savory going on in this recipe. The chickpeas and olives combine beautifully to give this pasta a bold, flavorful taste. The tomatoes are tiny bursts of deliciousness, and the lemon adds lip puckering tang. The result is a bold, delightful side dish that is perfect for a family meal, or holiday dinner.

This recipe is courtesy of Yotam Ottolenghi and will serve 6 to 8 people who will adore this beautifully plated side dish.

Ingredients for Ottolenghi’s One-Pan Orecchiette Puttanesca:

5 tablespoons olive oil
6 garlic cloves, crushed
1 15-ounce can chickpeas, drained well and patted dry
2 teaspoons hot smoked paprika
2 teaspoons ground cumin
2 teaspoons tomato paste
2 cups parsley, roughly chopped
2 teaspoons lemon zest
3 tablespoons baby capers
¾ cup Nocellara olives (or other green olive), pitted and roughly chopped in half
9 ounces small, sweet cherry tomatoes
2 teaspoons superfine sugar
1½ teaspoons caraway seeds, lightly toasted and crushed
9 ounces dried orecchiette pasta
2 cups vegetable or chicken stock
¾ cup plus 2 tablespoons water
Salt and black pepper

In a large sauté pan, for which you have a lid, combine 3 tablespoons of the olive oil, the garlic, chickpeas, paprika, cumin, tomato paste, and a half teaspoon salt and place on medium-high heat.
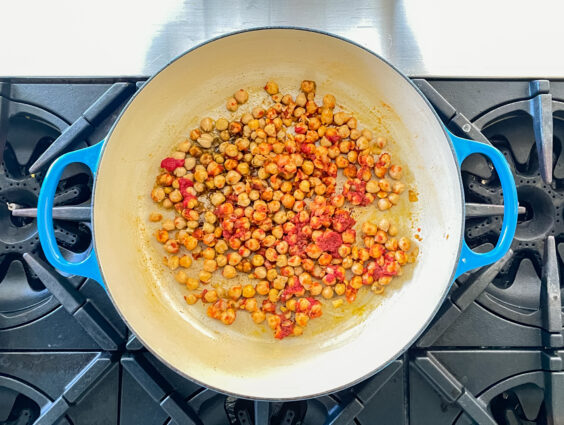
Fry for 12 minutes, uncovered, stirring every now and then, until the chickpeas are slightly crisp; you may need to decrease the heat if they start to color too much.

Remove one-third of the chickpeas and set aside.

In a small bowl, combine the parsley, lemon zest, capers and olives.
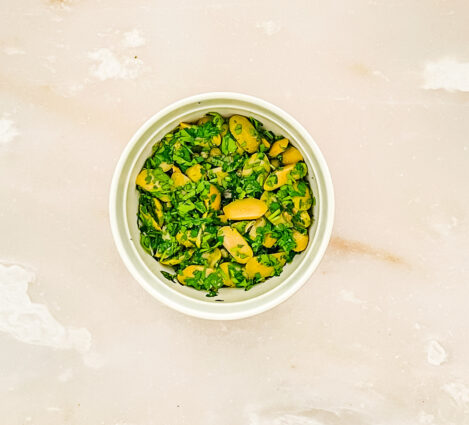
Add two-thirds of the parsley mixture to the sauté pan, along with the cherry tomatoes, sugar and caraway seeds, and cook for 2 minutes on medium-high heat, stirring often.

Add the pasta, stock, water and three-quarter teaspoon salt and bring to a simmer.
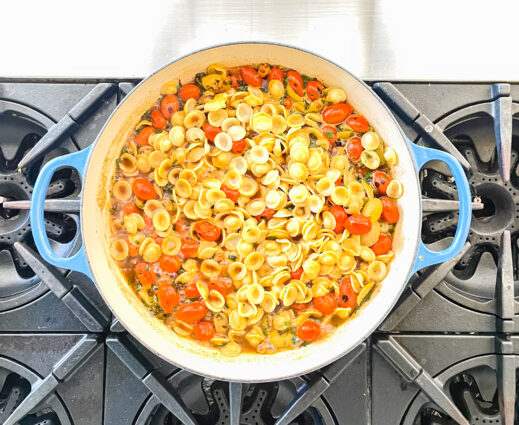
Decrease the heat to medium, cover and cook for 12 to 14 minutes or until the pasta is al dente.

Stir the remaining parsley mixture into the pan, drizzle with the remaining 2 tablespoons olive oil and garnish with the reserved fried chickpeas and a good grind of pepper.
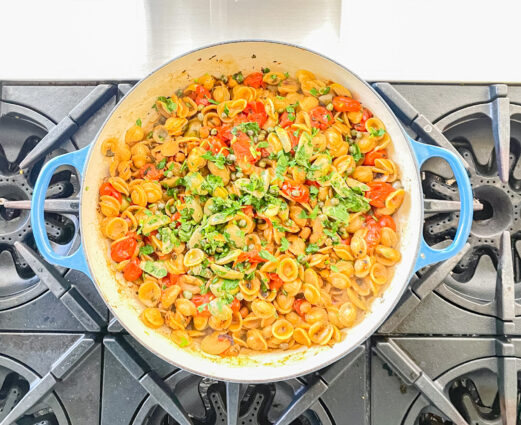
Serve at once.

It’s that simple!
 

signature

[recaptcha]


Many of us have been cooking a lot during this past year. Back in 2017, Harvard Business Review reported that about 10 percent of Americans actually enjoyed cooking.  Now, during this pandemic, it is hard to avoid cooking. Many restaurants are closed, and cooking has become a necessity as well as a challenge. For those with chronic diseases such as diabetes, crohn’s, or celiac, it’s been an added challenge to find appropriate recipes. Let’s think about ways we can enjoy cooking without it seeming like a huge chore.

Make things simple. Buy your meat fresh and freeze it so that you can simply defrost it the night before. This can be a whole chicken that you roast, a couple of steaks, veal chops, or chicken parts. You can leave them on the counter overnight, just put them back into the refrigerator when you wake up. Remove them at least an hour before you cook them to bring them to room temperature. Yes, even chicken can stay out of the fridge safely for an hour or so.

Choose easy side dishes. Bake some whole potatoes, or cut up some fingerlings and roast them for about 40 minutes. Take out a package of frozen corn, place it on the stove with some butter, basil, red pepper flakes, and lemon, and pan roast until it turns brown and has caramelized. Roast some broccoli or cauliflower with olive oil. It really doesn’t have to be complicated. 

Put on your favorite music while you cook. Studies have shown that listening to music can alter your mood and make you happy. Music can also slow down your heart rate, and reduce blood pressure and anxiety.

Use your favorite foods to prepare recipes that you enjoy. Nobody likes cooking a dish they hate. Try to get other members of your family to help, and make it a family event.  Bonus– you can teach the little ones healthy eating habits.

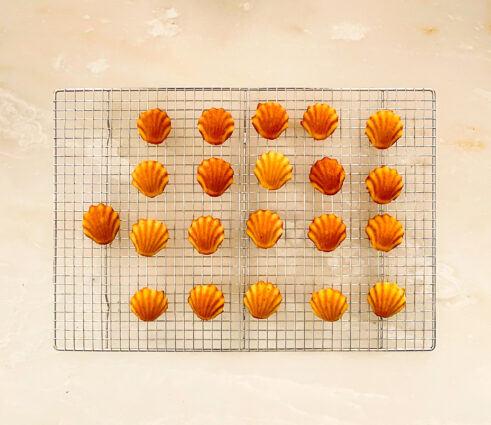
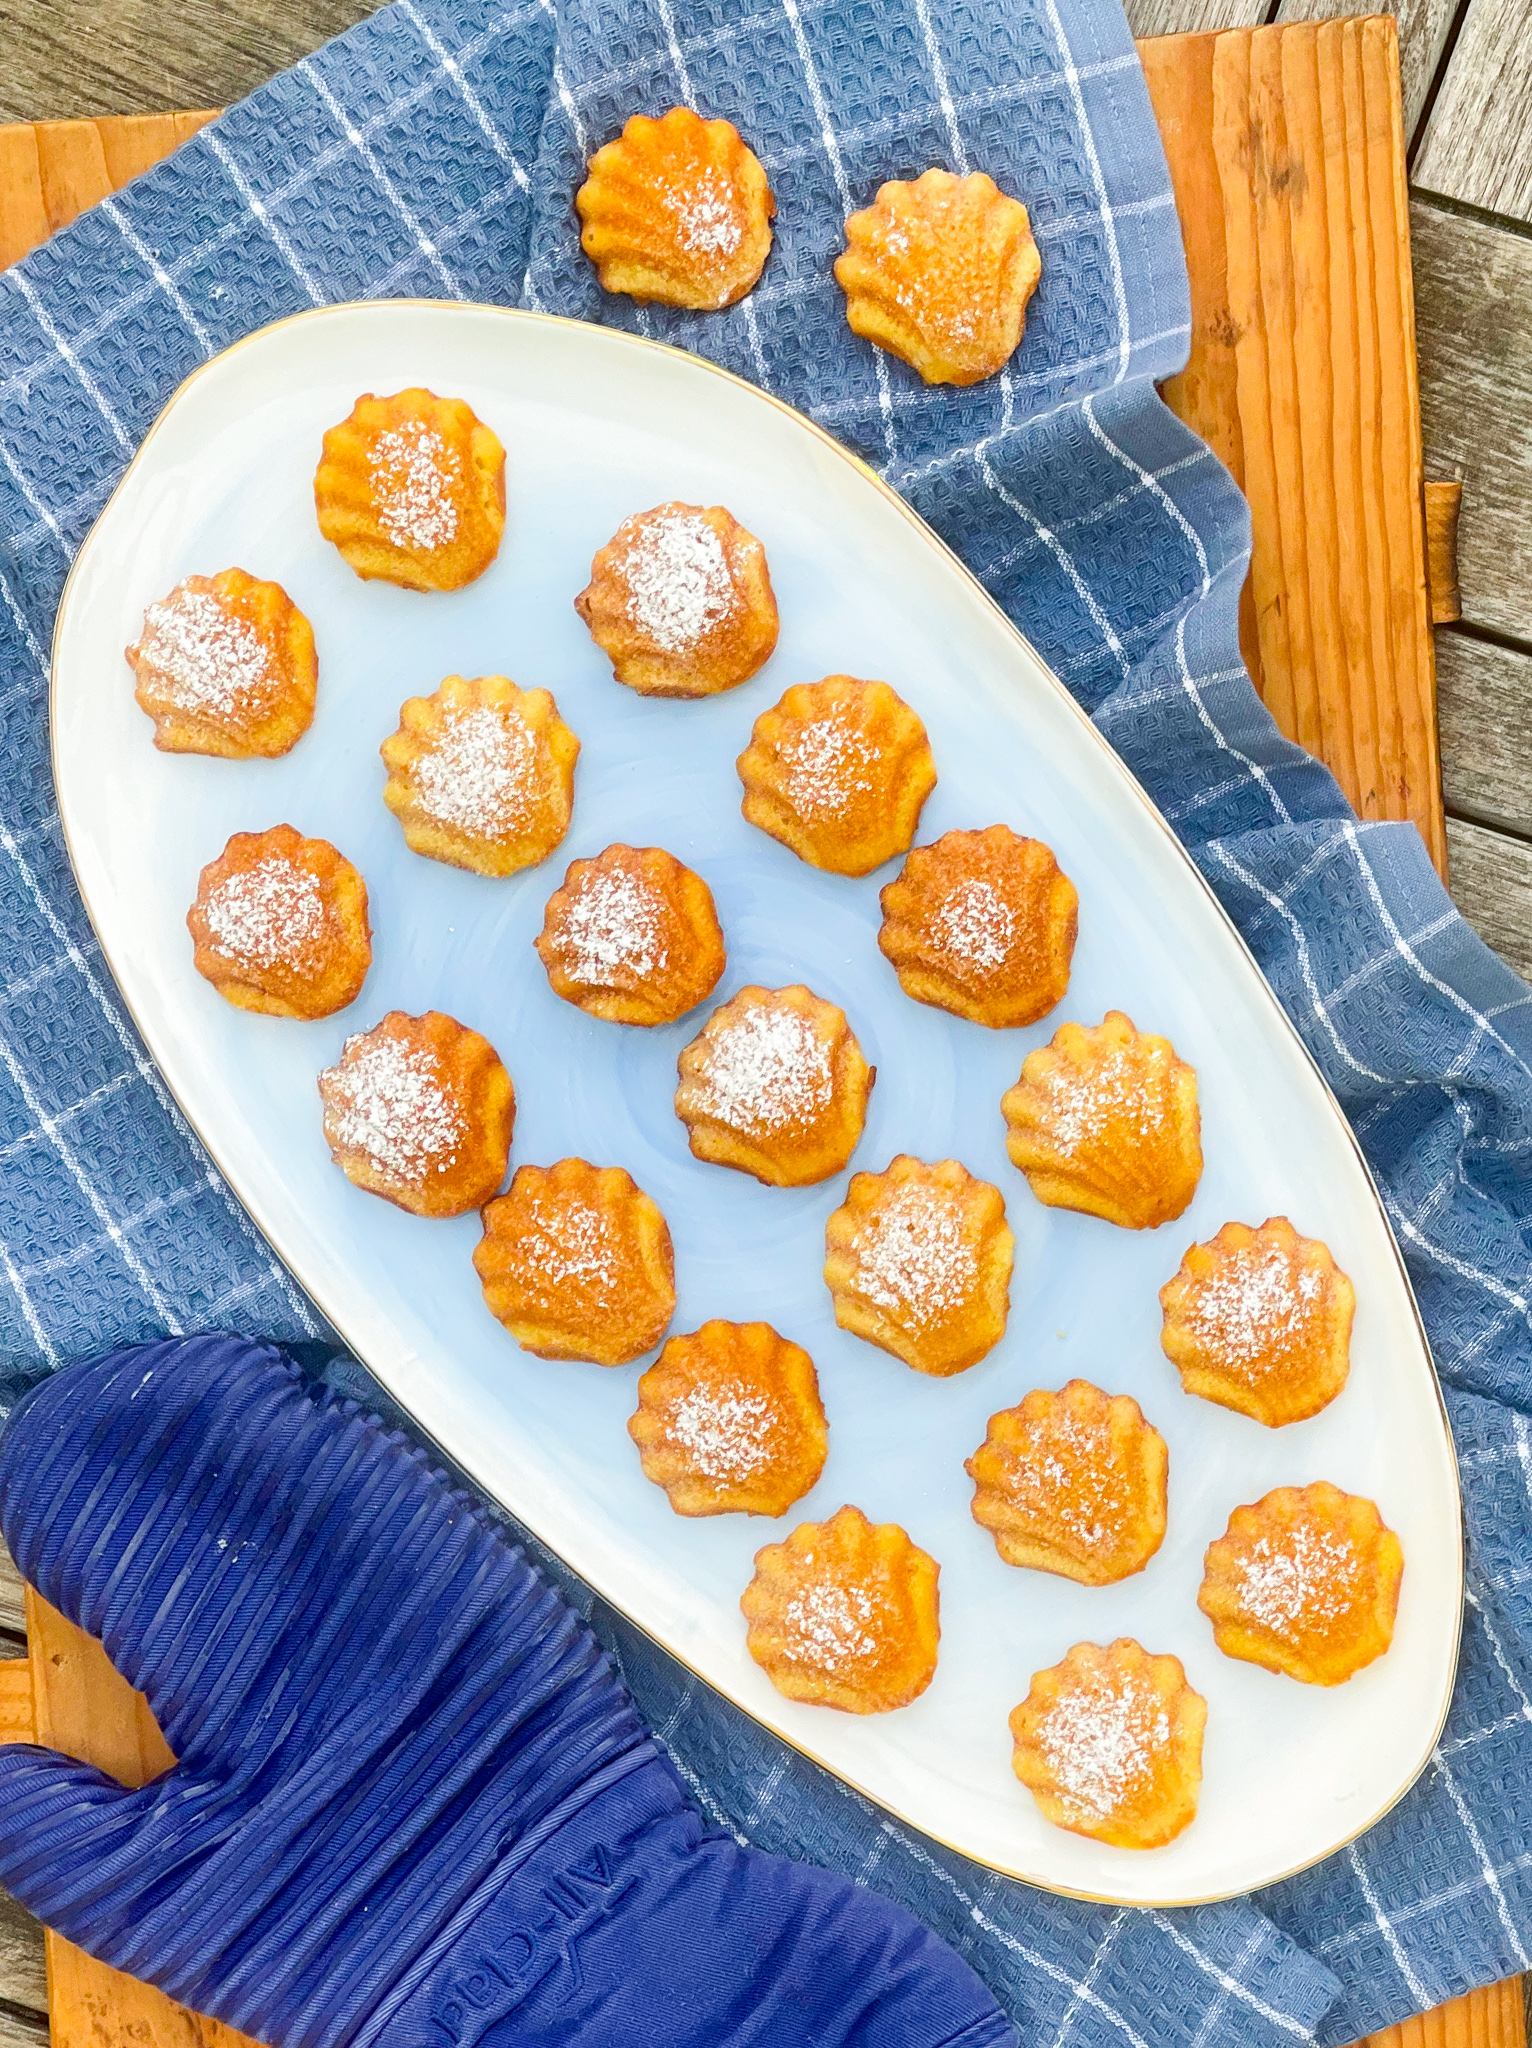
Now this is one recipe that I know you will enjoy making. Madeleines, also known as French butter cakes, are shell-shaped sponge cakes. When the cake was first made in the 18th century, the little bump was the most important feature.  The same is true today.  Though they are little butter cakes, most people refer to them as cookies. They are made with the simplest ingredients, but you have to be careful to ensure the right consistency. It may take a little extra time, but it is well worth it.

Whether you call them cakes or cookies, they should be light and airy, with a melt-in-your mouth exterior. You know the eggs are perfectly whipped when they drip like ribbons from your spoon or beaters. The vanilla extract adds even more delicious flavor, and the lemon zest, (don’t you dare leave it out!) gives these cookies a tang, that is so important to the cookie. You can then dust them with confectioners’ sugar or dip them in some melted chocolate for an even more luscious treat. Perfect for breakfast, a snack, or dessert, everyone will love them.

This recipe is courtesy of Sally’s Baking Addiction and will make 18 to 20 cookies to delight cookie and cake lovers alike.

Ingredients for Madeleines:

1/2 cup (1 stick) unsalted butter (plus another 2 Tbsp for the pan)
2 large eggs, at room temperature
1/2 cup granulated sugar 
2 teaspoons lemon zest
1 teaspoon pure vanilla extract
1 cup sifted all purpose flour, spooned and leveled
1/2 teaspoon baking powder
1/8 teaspoon salt
Optional: confectioners’ sugar for sprinkling on top, or melted chocolate for dipping.

Melt the butter and set aside to slightly cool as you prepare the rest of the batter. You can melt it in the microwave or melt it/brown it on the stovetop.

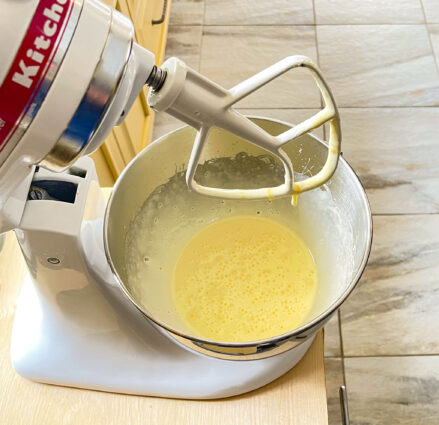
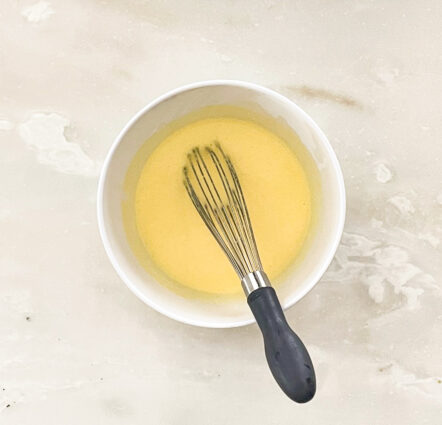
Using a handheld or stand mixer fitted with a whisk attachment (didn’t notice a difference using either one), beat the eggs and sugar together on high speed for at least 8 minutes.

The mixture will be thick, pale, and form ribbons when you lift the beater(s).

Beat in the lemon zest and vanilla extract until combined. (The remaining ingredients are mixed together by hand; you no longer need the mixer.)

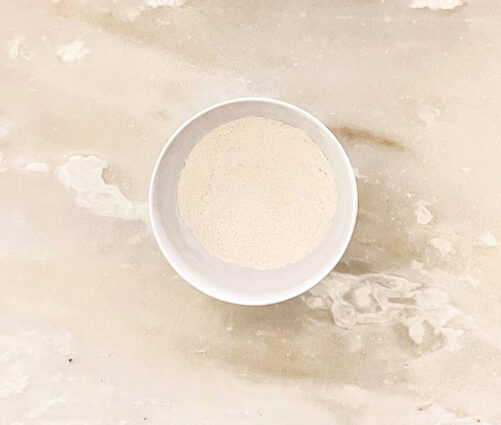
Whisk the flour, baking powder, and salt together in a small bowl.

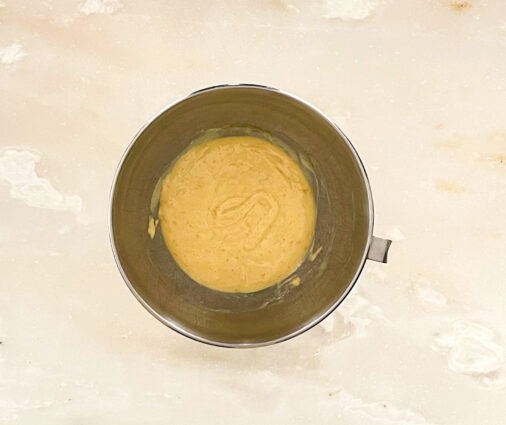
Using a spatula or wooden spoon, gently fold into egg mixture.

I suggest carefully folding in half of the flour mixture, then folding in the other half. (Instead of dumping it all in at once.) Make sure you’re handling this batter with care. It’s very delicate.


Stir 1/4 cup of the batter into the melted butter.

It will take a minute to fully incorporate.

Then stir it all into the rest of the batter.

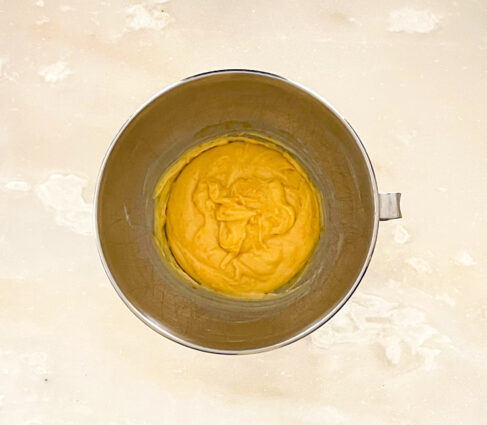
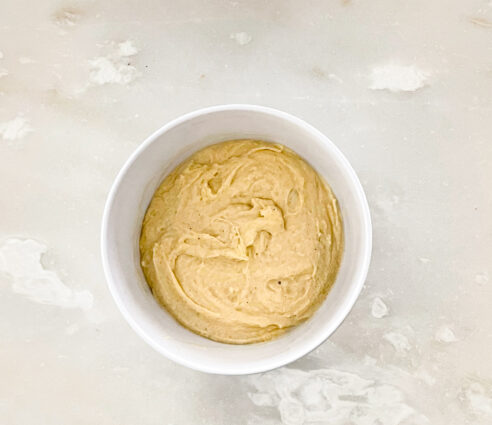
The batter will be thick, silky, and shiny. Cover the batter and chill in the refrigerator for 30-60 minutes.

Try not to chill any longer than this as the butter in the batter will begin to solidify.

During the last few minutes of chilling, preheat the oven to 350°F.

Melt the remaining 2 Tablespoons butter.

Using a pastry brush, lightly brush the pan with melted butter.

The author finds that greasing the pan is necessary even if you’re using a nonstick pan.

We want to avoid any chance of sticking.

The batter will be quite airy and spongy after resting. This is good! Do not try to deflate it. 

Spoon 1 generous tablespoon of batter into the center of each scalloped well.

No need to spread it to the edges. Just plop it in the center.

(Cover and refrigerate remaining batter if you do not have 2 madeleine pans to bake the batter all at once.)

Bake for 10-12 minutes.

The madeleines are done when the tops spring back after lightly pressed with your finger. Invert the pan onto the counter.

Transfer the warm madeleines to a wire rack to lightly cool.

Dust with confectioners’ sugar, if desired, before serving.

Madeleines are best enjoyed right after baking, so the author didn’t have any make-ahead tips.

They dry out very quickly; Sally finds baked and covered madeleines lose their texture even after 1 day!

For this reason, the author doesn’t recommend freezing them either. You’ll lose a lot of texture.

It’s that simple!
signature

[recaptcha]


We had a very mild winter last year. It wasn’t that cold, and we didn’t have much snow. I certainly didn’t mind, but I missed the snow days. For me, watching the snow fall, catching on the branches of the trees, and lighting up the landscape to a beautiful white, is a perfect day, especially when I have some freshly baked treats.

When I was younger, I remember wishing for snow days. Cancelling school meant going outside with my friends, building snowmen, and riding the sled down some steep hills near my home. They were happy days for me. I also remember having to shovel, which was definitely not fun. We had elderly neighbors on both sides of the house, so my parents insisted that I shovel our house and theirs too. My parents were very kind, and cared about others. They taught me a great lesson, which I have carried to this day and instilled in my own children. I hated having to be out there in the cold for so long, but I knew I was doing something good, and that inspired me to carry on.

As the years went by I went to college and lived on campus. The college was close to my home. My mother, being very old fashioned, did not believe girls should go far away to school. She wanted me to live at home and commute. I wanted to have more of an independent life. When I told her I wanted to move into the dorms, she was dead set against it. If I wanted to move in the dorms, I would have to get a job and pay for it myself. She thought this would deter me but it did not. I got a job, and moved into a small room in the dormitory. It was my first taste of being independent and I loved every minute of it.

But, being the youngest child (and the closest one to home as my parents got older), I felt responsible for them. My dad was much older than my mom and when it snowed, I would worry about him being out there shoveling the heavy snow for our house, and for the neighbors as well. So whenever I heard it was going to snow, I would sleep at home so I could be there to shovel for my dad. Those were the days when I truly dreaded the snow.

But now, I feel at peace when it snows. When my kids were growing up, after they were out sledding, I loved to make them hot chocolate, and a sweet treat to go with it. I loved seeing their little red faces light up with joy when they would come in to get their treats. Snow falling silently through the day and night gives me time to catch up with my thoughts and calm myself. Even during our most stressful moments, especially during this pandemic, the snow has the power to calm us down.

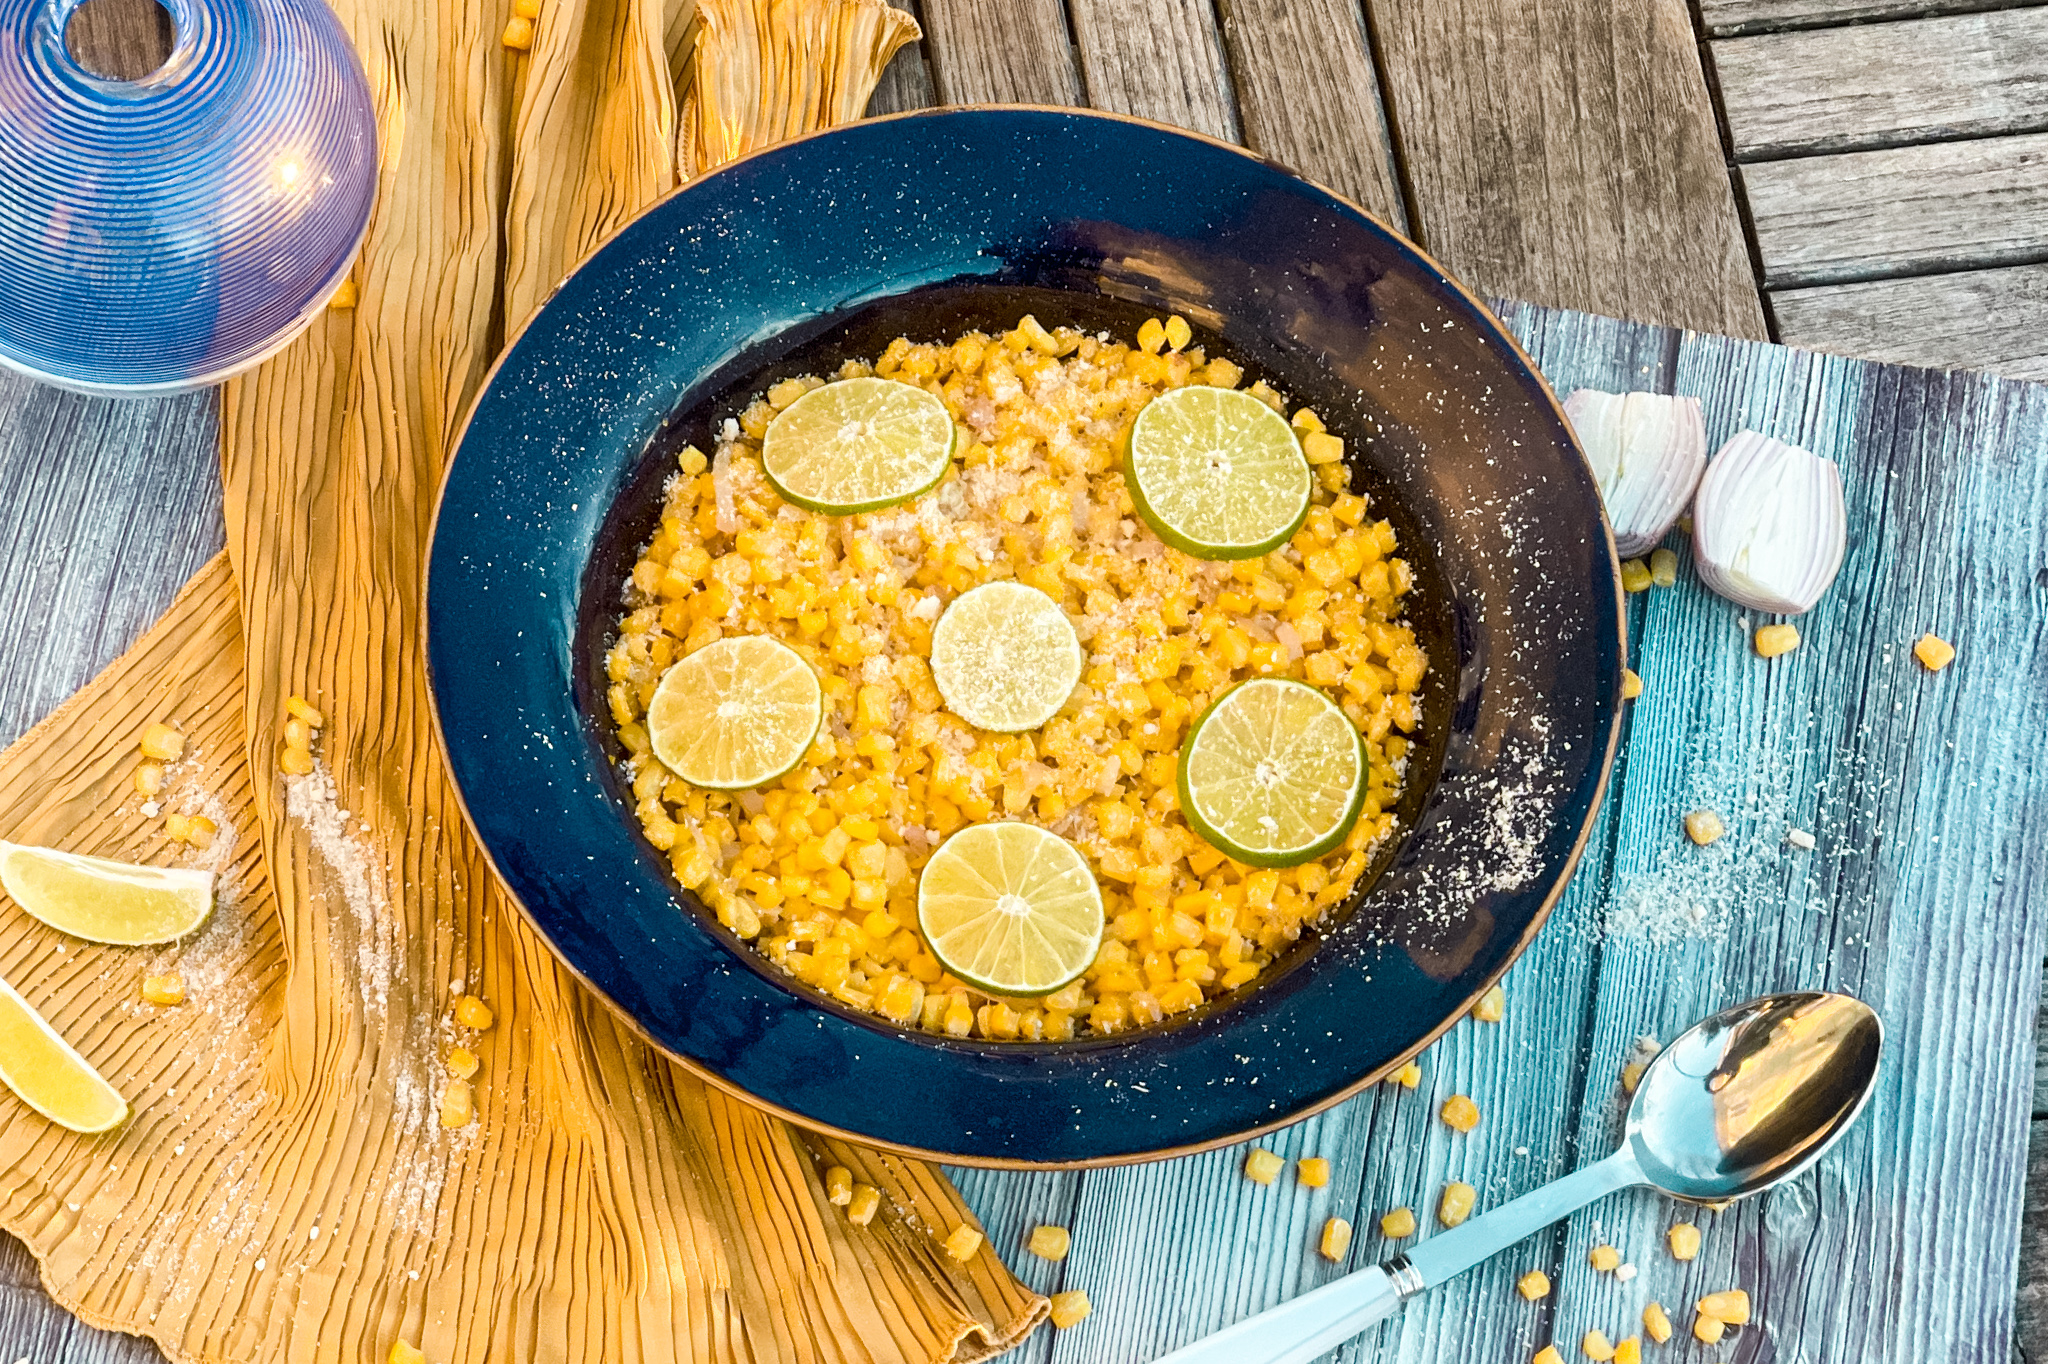
What to do when you are home on a snow day? There are tons of choices, but of course, I cook. Again, Ina Garten comes through for me. This is a side dish that she makes in the summer, when she gets fresh corn from the farmsteads near her home in the Hamptons. Now, I know this is not the season for corn, so I used frozen corn and believe me, it was still terrific. The sweet kernels are combined with savory shallots that adds even more deliciousness to this dish. The chili powder gives it a nice spicy kick. I also love the lime. The tangy flavor adds a whole new dimension and the creamy Parmesan makes this dish perfect for a cold, snowy day.

This recipe is courtesy of Ina Garten and will serve 6 to 8 people who will be thrilled to come in from the snow to this inviting dish.

Ingredients for Chipotle Parmesan Sweet Corn:

6 tablespoons (¾ stick) unsalted butter
1 cup shallots, halved lengthwise, peeled, and thinly sliced crosswise (3 shallots)
8 cups white or yellow corn kernels (8 to 12 ears)
¼ teaspoon chipotle chile powder
Kosher salt and freshly ground black pepper
2 tablespoons freshly squeezed lime juice
1 tablespoon freshly grated Italian Parmesan cheese

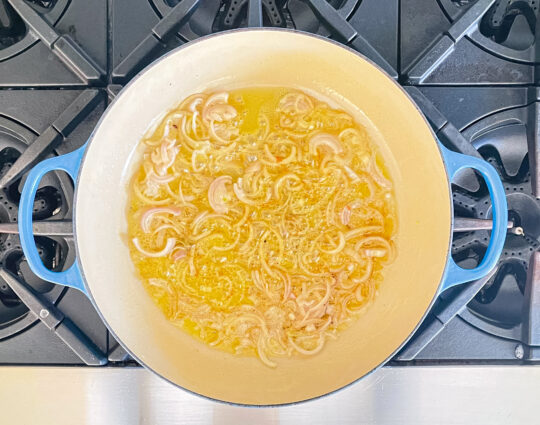
Heat the butter in a large (12-inch) sauté pan over medium heat, add the shallots, and cook for about 5 minutes, until tender and fragrant.

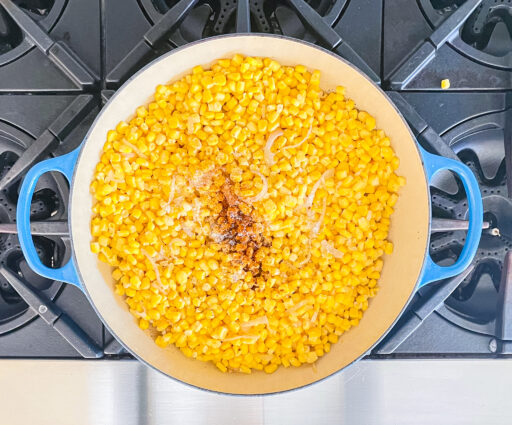
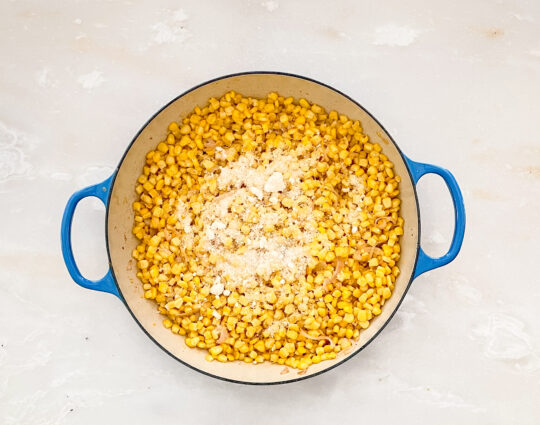
Add the corn, chipotle powder, 2 teaspoons salt, and 1 teaspoon pepper.

Raise the heat to medium high and cook for 10 to 12 minutes, stirring occasionally to allow the corn to brown lightly, until the corn is tender but still firm.

Off the heat, stir in the lime juice and Parmesan.

Taste for seasonings and transfer to a large shallow serving bowl.

Serve hot.

It’s that simple!
signature

[recaptcha]


Do you remember Art Linkletter’s show, “Kids say the funniest things?” It was on in the 40’s and 50’s and continued through to when I was a child (of course much later on). I used to love that show and remember laughing so hard at what the kids would say. At the time, while I would laugh out loud at the antics of other kids, I never realized that having kids of my own would bring this show right into my own living room, except this time, it would be real life.

My younger son was especially amusing.  He is a talker and when he was little, he said some of the funniest things I ever heard. He asked so many questions, and most of the time, I didn’t even know the answers. For example, when my mother died, he asked how my Mom would get to heaven. I hesitated, then he said “is she going to get there in an elevator?” When his older cousins were talking about drinking and getting a hangover, he asked me what an overhang was.  One night, when my extended family were over for dinner, we were talking about what my Mom looked like when she was mad. Right in front of her he said well, “she has the wrinkles all over her face that are there even when she is not mad.”  What am I even supposed to say to that?

I used to take him to the grocery store with me. One day there was a very old lady who was wearing a lot of makeup and dark red lipstick that was unevenly put on her lips, and extended over her lips. When we got to the end of the aisle, he leaned over and whispered to me, “Mommy, there is a witch in this isle.” Another time, my sister-in-law took him to the pharmacy with her. It was my birthday and Shelley asked him how old he thought I was. He replied, “Aunt Shelley, my Mom told me never ever to tell anyone her age, so I can’t tell you.”  I think I taught that kid right. 

There are so many more examples of his hilarious comments. My friends used to tell me to write them down, but I didn’t and oh, how I wish I did. Let that be a lesson to you parents or grandparents out there! Now to the recipe.

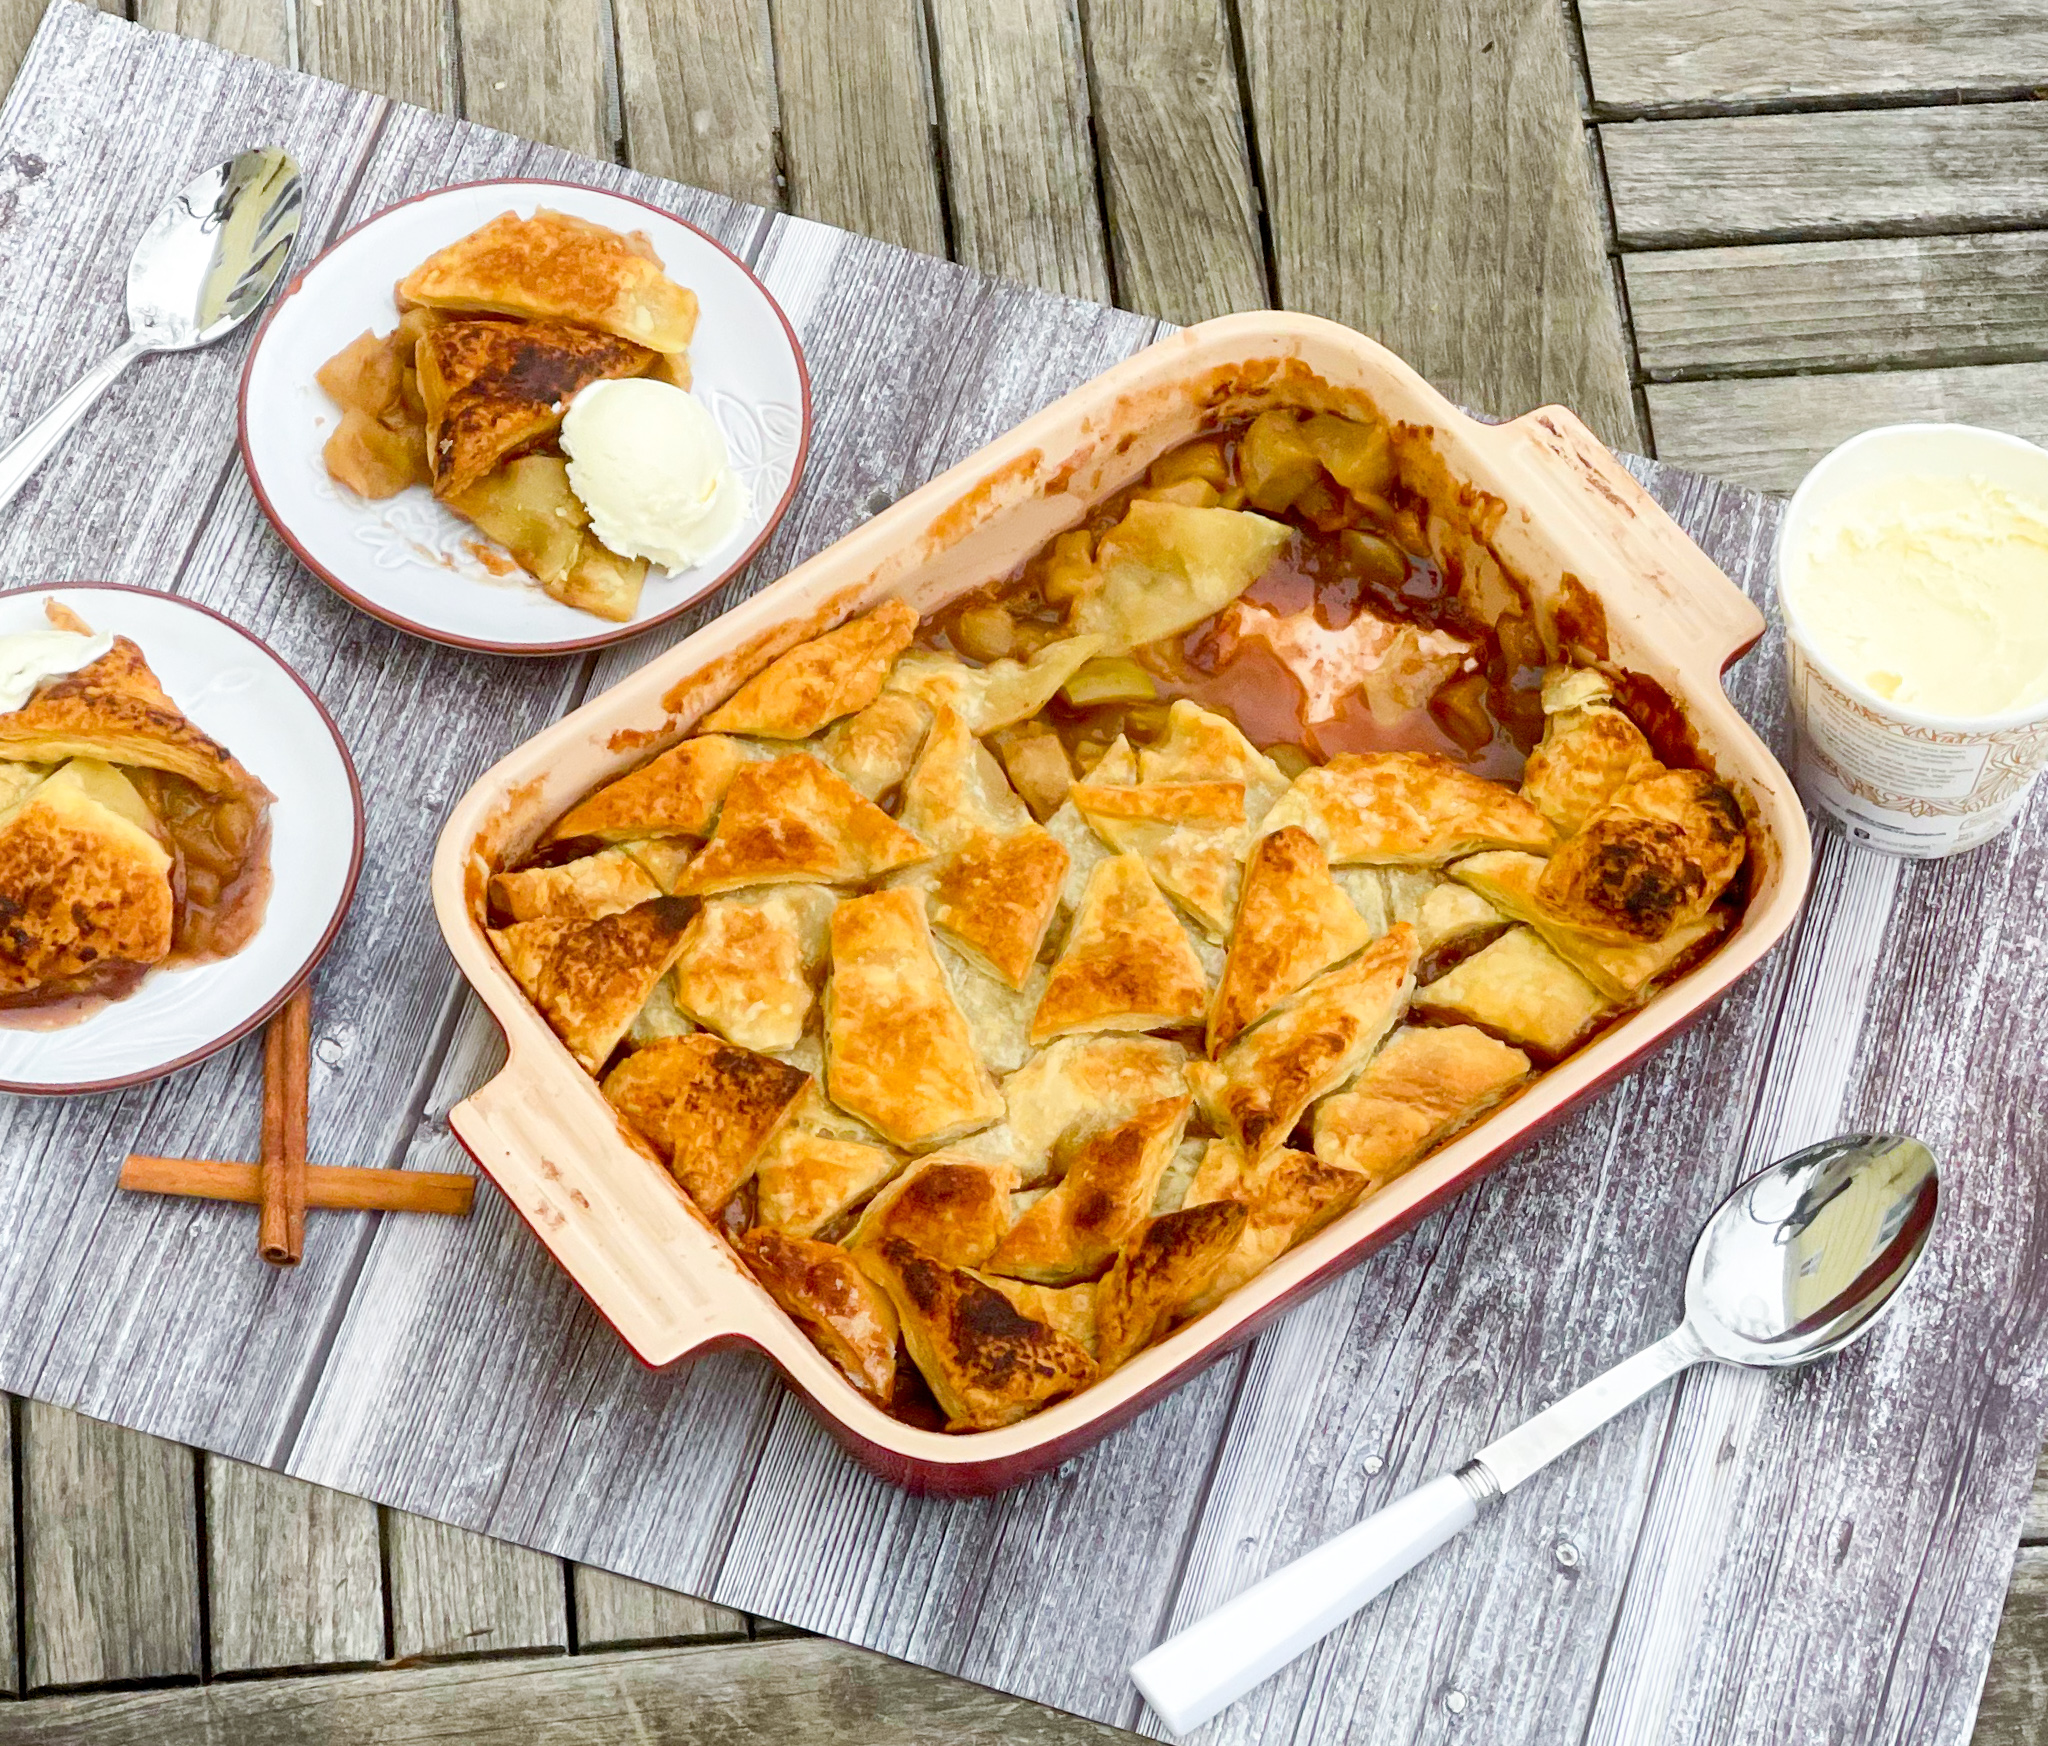
A pandowdy is a spiced apple pie baked in a pie dish. This apple dessert will bring a little comfort and warmth to any home. The smell of this sweet treat baking in your home is just delightful. The apples are dressed with savory goodness, like vanilla, cinnamon, and ginger.  The lemon juice and zest add just the right amount of tanginess. It is then topped with puffed pastry that browns beautifully when it is baked. This pandowdy is just delicious, and even better, it makes the whole house smell so festive. Do not forget the ice cream, it perfects this special treat.

This recipe is courtesy of Bon Appetit and makes 8 servings of this classic American dessert.

Ingredients for Apple Pandowdy:

6 tablespoons unsalted butter
4 pounds Pink Lady and/or Granny Smith apples
2/3 cup (packed) dark brown sugar
3tablespoons all-purpose flour, plus more for surface
1 tablespoon vanilla extract
2 teaspoons ground cinnamon
½ teaspoon kosher salt
1 lemon
1 ½-inch piece ginger
1 package frozen puff pastry, thawed by covering pastry sheet with plastic and leaving at room temperature 30 minutes
Granulated sugar (for sprinkling)
2 pints vanilla ice cream

Preheat oven to 425°.

Cook 6 tablespoons butter in a small saucepan over medium heat, swirling often, until bubbling and golden, about 5 minutes; set aside.

Prepare your apples: Using a vegetable peeler, remove peel from apples.

Stand them upright and slice down along core, working all the way around to remove big lobes of flesh.

Cut lobes lengthwise into 1″ pieces (irregular shapes are fine).

Discard peel and cores.

Transfer apples to a large bowl.

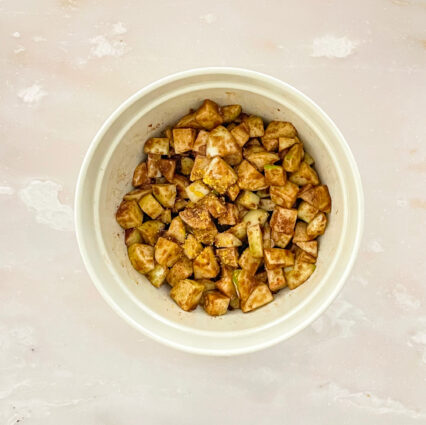
Add 2/3 cup dark brown sugar, 3 tablespoons flour, 1 tablespoon vanilla, 2 teaspoon cinnamon, and 1/2 teaspoon salt to bowl with apples.

Using a microplane or fine rasp grater, grate zest of 1/2 lemon over apples.

Cut lemon in half and squeeze juice from zested half over apples, catching any seeds.

Using peeler, remove peel from ginger, then grate over apples.

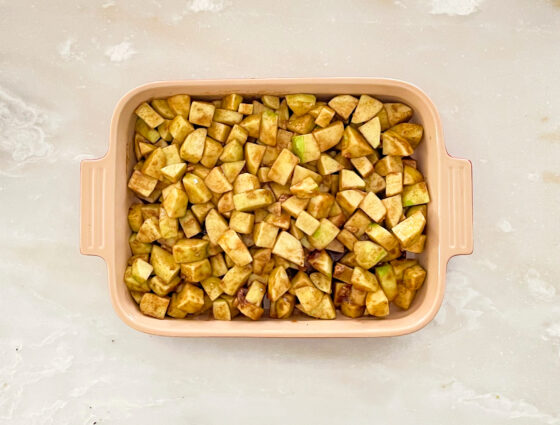
Toss apple mixture until combined, then transfer to a shallow 3-qt. baking dish.

Drizzle all but 2 Tbsp. brown butter over apples.

Dust cutting board with a light coating of flour and unfold puff pastry on floured surface.

Dust top with flour.

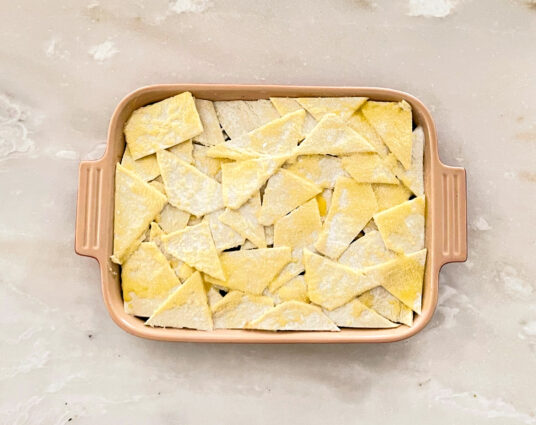
Cut puff pastry into irregular 1″ pieces (any shape is fine).

Arrange pieces of puff pastry over apples, overlapping but spreading to cover almost completely. Brush pastry with remaining brown butter.

Sprinkle with granulated sugar.

Bake pandowdy until pastry is puffed and golden around edges, 25–30 minutes.

Reduce oven temperature to 350° and continue to bake until juices are thick and bubbling and pastry is brown all over, 30–35 minutes longer.

Using a spoon, press pastry down into warm juices (but don’t submerge); let cool slightly.

Serve pandowdy warm with ice cream.

Do Ahead: Pandowdy can be made 1 day ahead. Let cool. Cover loosely with foil and store at room temperature. Reheat uncovered in a 200° oven 20 minutes before serving.

It’s that simple!
 

signature

[recaptcha]


Things have changed so much since I was a young adult. For one, there were much stricter rules back then– or at least, that’s how it was for me.  I was never allowed to grow my hair long, because my mother believed that only “hippies” had long hair. So, for much of my childhood and teenage years, I had a short, curly haircut that I absolutely hated. When I got to high school, she relaxed a bit, so of course I spent an exorbitant amount of time straightening my hair and blowing it out, as per the style of the day.

I had chores on the weekend (and most weekdays), and was not allowed to go out to football games with my friends until they were all done. There was an upside to this; I got very good at cleaning my room very quickly. Oh, there were times my mom made me re-clean to her satisfaction, but more often than not, I got away with just a cursory clean. 

Strange though it may sound, everyone dressed up to go out. If we went out to dinner, we would all wear our best clothes, especially my mom and dad. We wore formal attire for parties and holidays. People got all decked out to see a show or movie too.  I got new clothes for every holiday, cherishing the day I would finally get to wear them. Thank goodness that life has become more relaxed and informal these days.

As strict as my mom was, she also had a rebellious streak. For example, when I attended elementary school, girls were not allowed to wear pants (am I dating myself here or what?). In defiance, my mom bought me a tweed pair of pants, which I could not wait to wear. I wore them proudly. Once I got to school, they called my mother and told her to take me home to change, or I would not be allowed back. My mom did come to the school to argue, but in the end, the school won out, and I returned to school wearing the proper clothes. Imagine all that over a pair of pants!

Now, fashion is very relaxed and people dress as they please. I don’t mind wearing nice clothing, since it’s fun to dress up once in a while, but I really did hate having to do it so often. Now that we are staying home much more, leggings, t shirts, and comfortable sweatshirts are becoming the norm.

Change is good, and we are seeing it in all things, not only our wardrobe attire. If you are looking for a change in cooking, how about these doughnut-muffins that are not fried, but baked in the oven and served as a muffin?

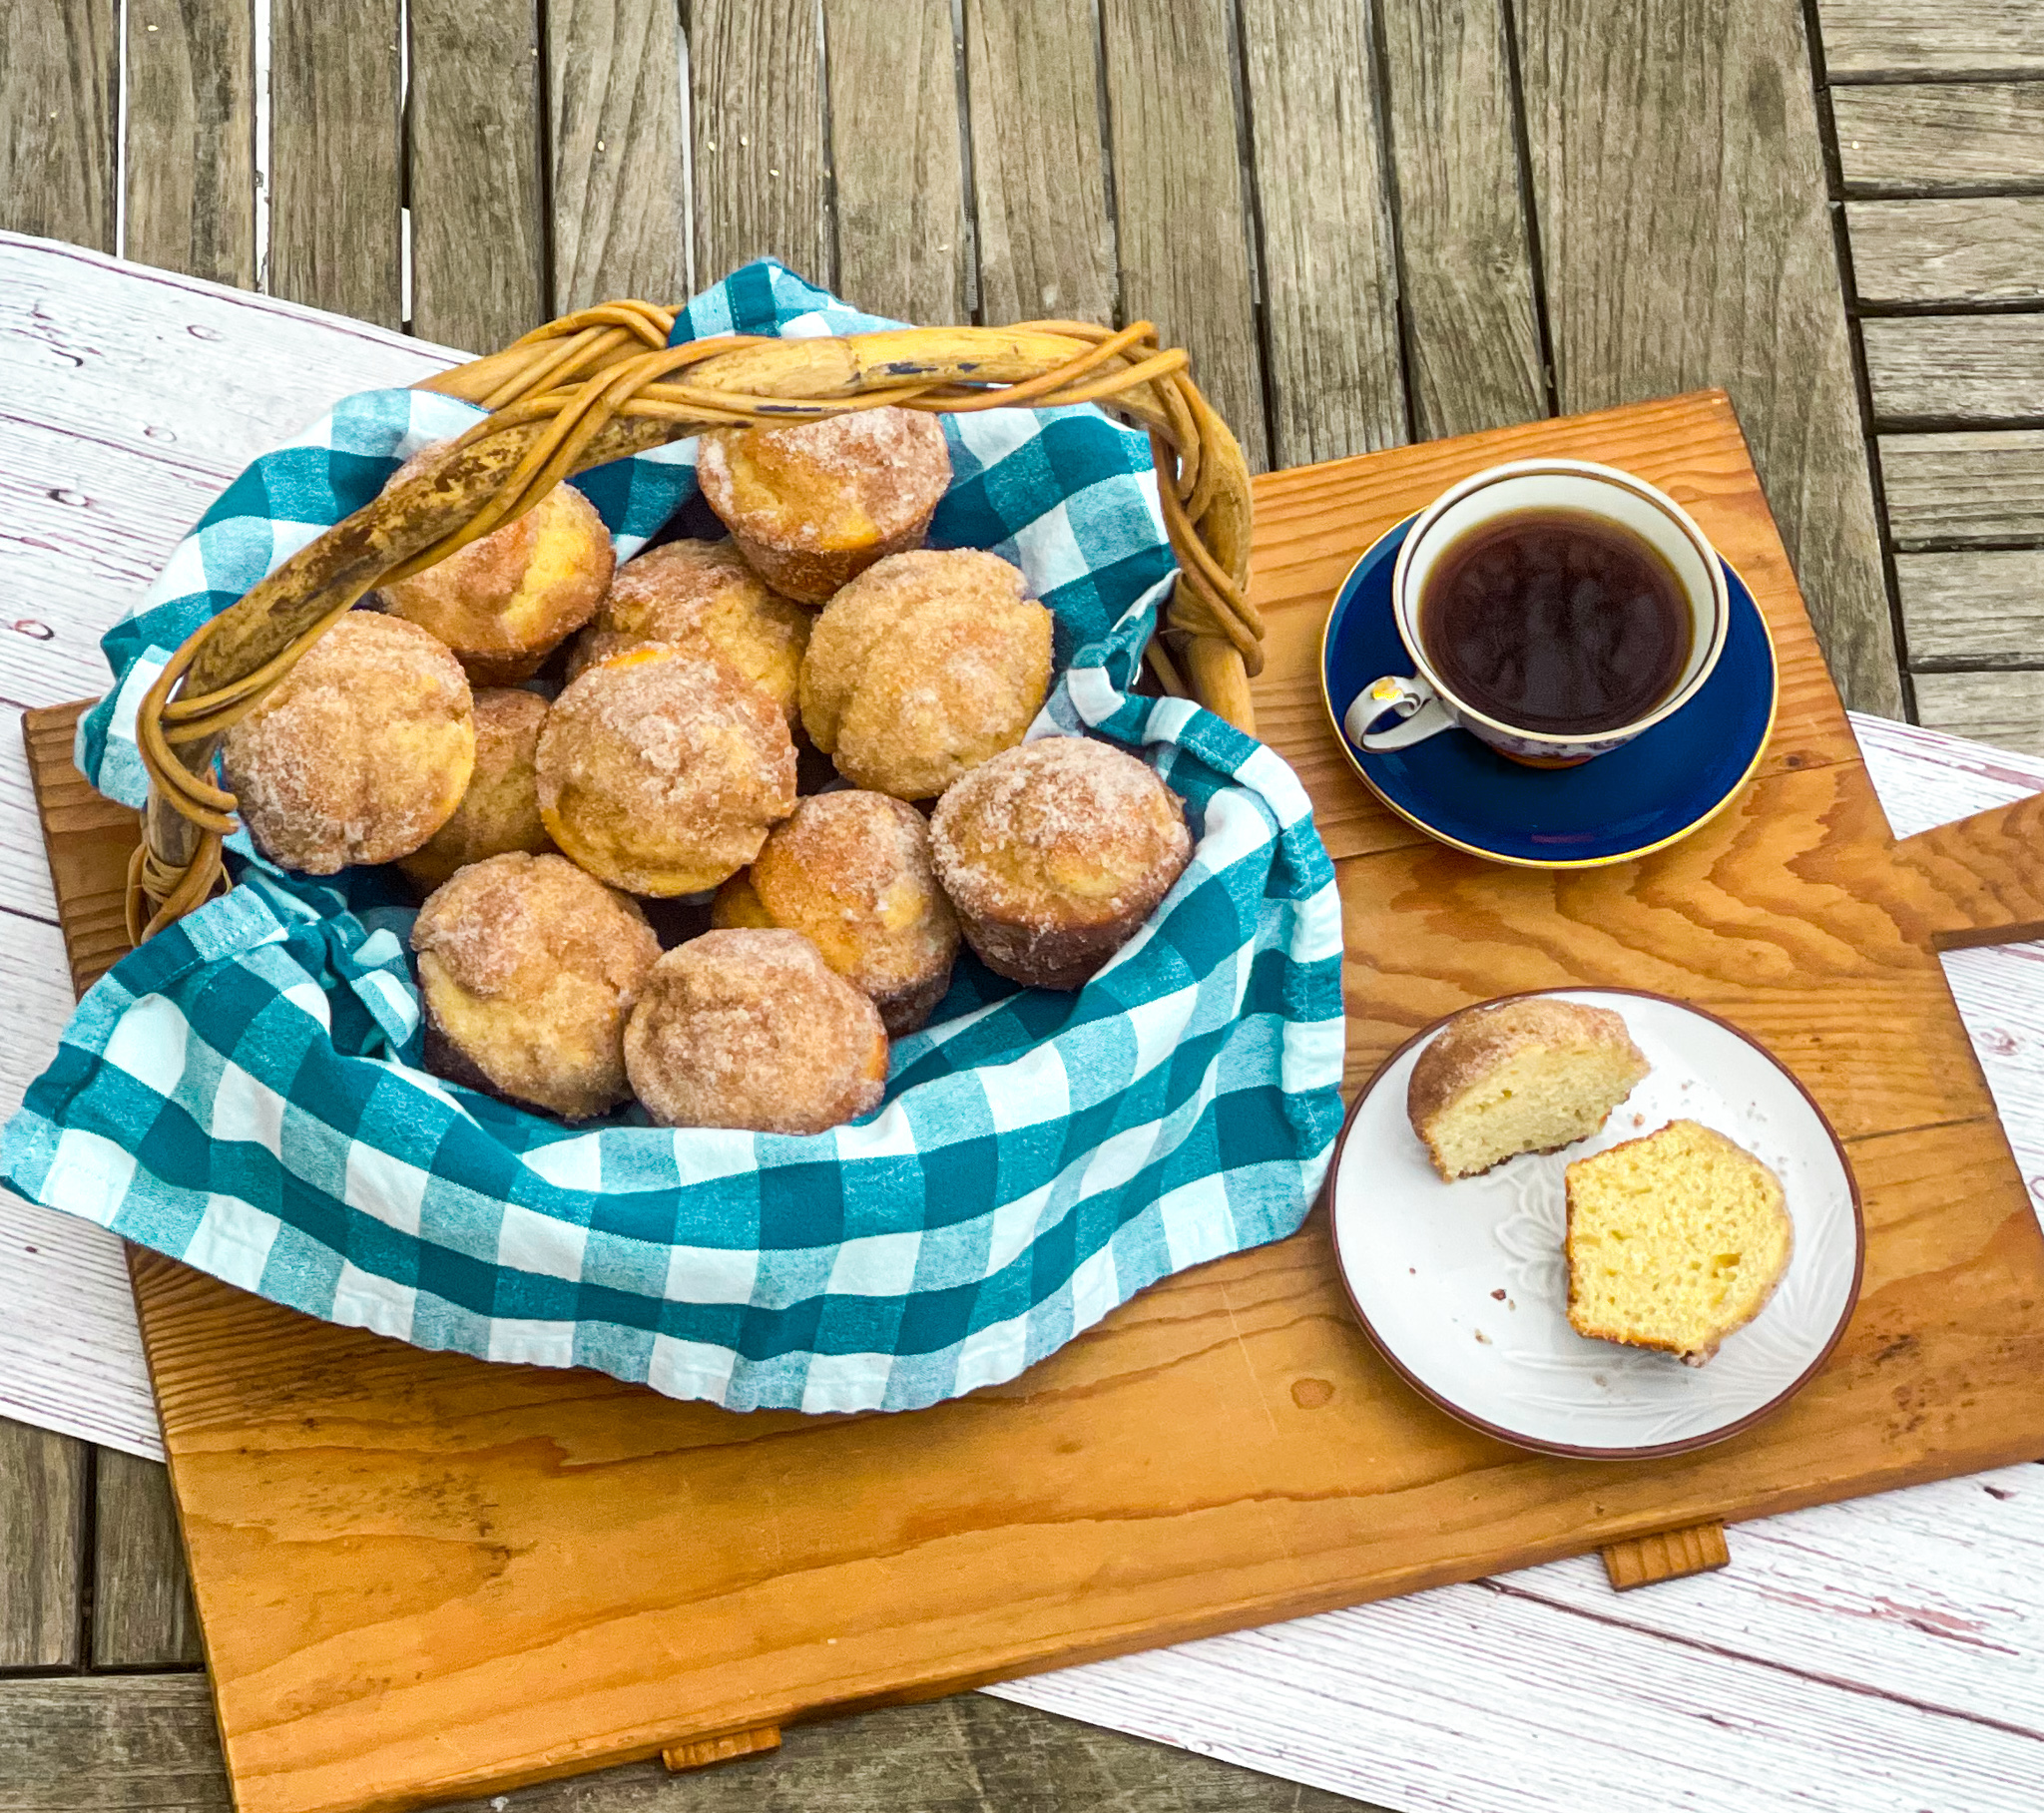
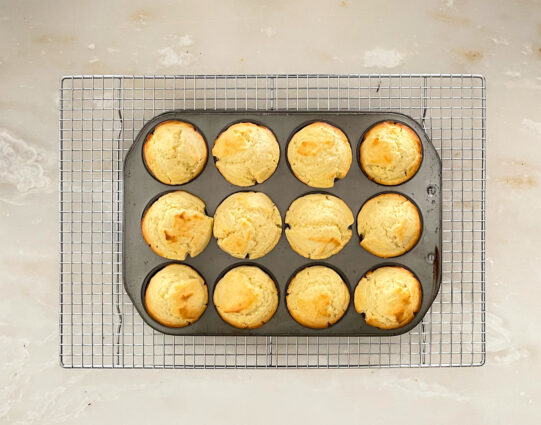
These Muffin Tin Doughnuts are amazing! As the author stated, “they set out to create a muffin that tasted like a doughnut in disguise with a tender crumb, a crisp exterior, and a buttery spiced coating.” And they did it! The buttermilk, butter and egg ensures a rich, yet delicate, cake-like doughnut. The nutmeg adds just the right amount of savory, giving it a little extra delicious flavor. The muffin is then baked at a high temperature to crisp it up and give the exterior a fried flavor. Each muffin is then brushed with butter and coated with a cinnamon sugar. How amazing does that sound? These are the perfect comfort food for breakfast, a snack, or dessert. Make these now: they are a “must try.”

This recipe is courtesy of Cook’s Country Kitchen and will make 12 doughnut muffins for people who will love this innovative twist on your classic muffin.

Ingredients for Muffin Tin Doughnuts:

2 3/4 cups (13 3/4 ounces) all-purpose flour
1 cup (7 ounces) sugar
1/4 cup cornstarch
1 tablespoon baking powder
1 teaspoon salt
1/2 teaspoon ground nutmeg
1 cup buttermilk
8 tablespoons unsalted butter, melted
2 large eggs plus 1 large yolk

For the Coating:

1 cup sugar
2 teaspoons ground cinnamon
8 tablespoons unsalted butter, melted

Adjust oven rack to middle position and heat oven to 400 degrees.

Spray 12-cup muffin tin with vegetable oil spray.

Whisk flour, sugar, cornstarch, baking powder, salt, and nutmeg together in bowl.

Whisk buttermilk, melted butter, and eggs and yolk together in separate bowl.

Add wet ingredients to dry ingredients and stir with rubber spatula until just combined.

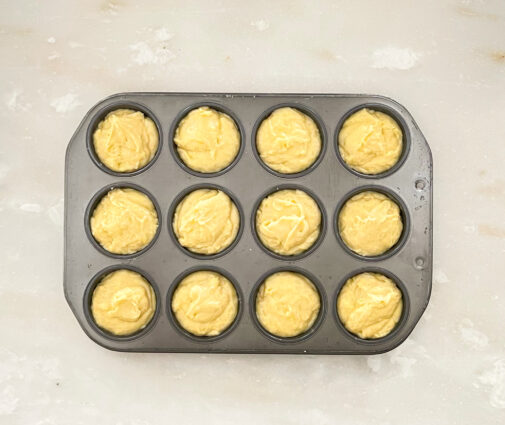
Scoop batter into prepared tin.

Bake until doughnuts are lightly browned and toothpick inserted in center comes out clean, 19 to 22 minutes.

Let doughnuts cool in tin for 5 minutes.

Whisk sugar and cinnamon together in bowl.

Remove doughnuts from tin.

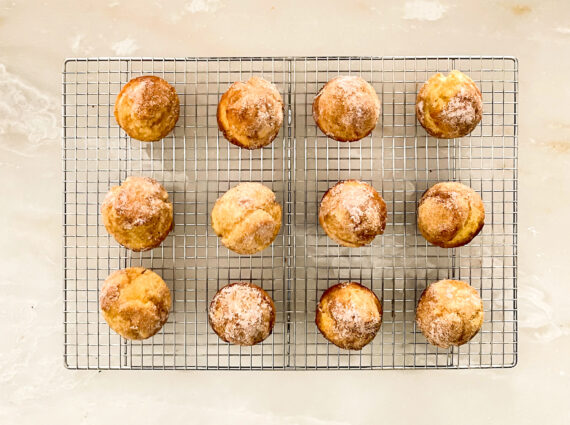
Working with 1 doughnut at a time, brush all over with melted butter, then roll in cinnamon sugar, pressing lightly to adhere.

Transfer to wire rack and let cool for 15 minutes.

Serve.

It’s that simple!
signature

[recaptcha]